Engine Removal
Special Tool Required
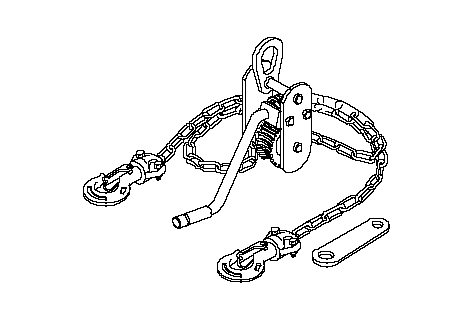
Engine tilt hanger set ( 07KAK-SJ40101)
NOTE:
- Use fender covers to avoid damaging painted surfaces.
- To avoid damage, unplug the wiring connectors carefully while holding the connector portion.
- Mark all wiring and hoses to avoid misconnection. Also, be sure that they do not contact other wiring or hoses, or interfere with other parts.
| 1. | Secure the hood in the wide open position (support rod in the lower hole).
|
| 2. | Make sure you have the anti-theft codes for the radio and navigation system, then write down the frequencies for the radio's preset buttons.
|
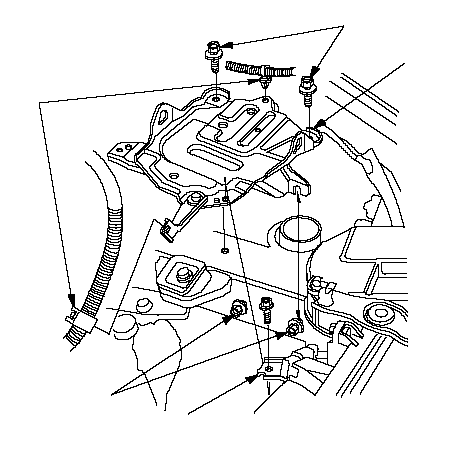
| 5. | Remove the harness clamps (A) and harness bracket (B).
 CEBDA CEBDA |
| 6. | Remove the two bolts (C), and loosen the two bolts (D) securing the battery base, then remove the battery base (E).
|
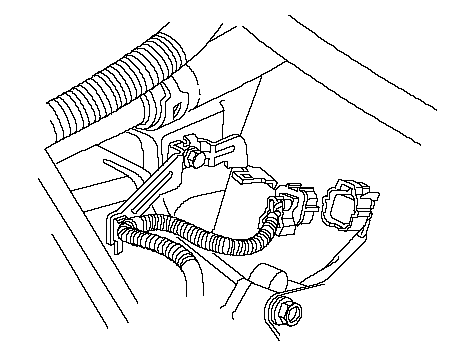
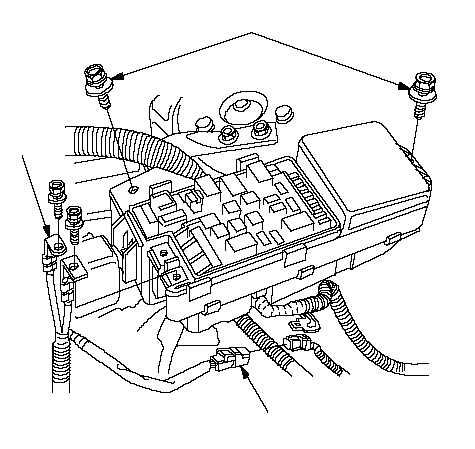
| 7. | Remove the battery cables (A) from the under-hood fuse/relay box, then disconnect the harness connector (B).
 CAB CAB |
| 8. | Remove the two bolts (C) securing the under-hood fuse/relay box.
|
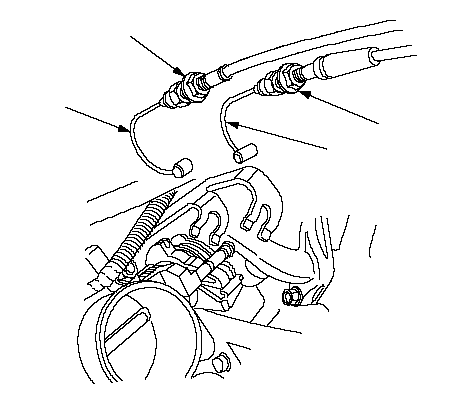
| 9. | Remove the throttle cable (A) and cruise control cable (B) by loosening the locknuts (C), then slipping the cable ends out of the accelerator linkage. Take care not to bend the cables when removing them. Always replace any kinked cable with a new one (K20A6 engine).
 CBCA CBCA |
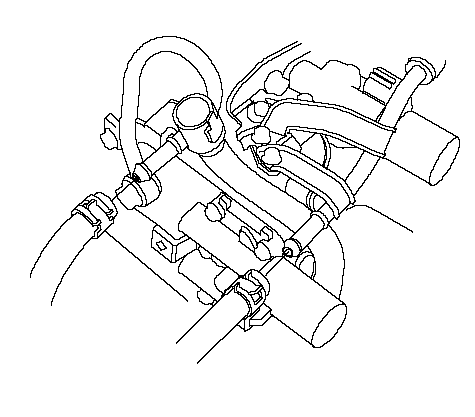
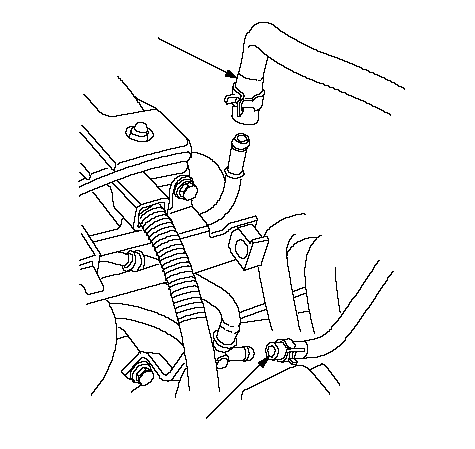
| 12. | Remove the evaporative emission (EVAP) canister hose (A) and brake booster vacuum hose (B).
 BA BA |
| 13. | Disconnect the engine control module (ECM)/powertrain control module (PCM) connectors (A) and main wire harness connectors (B).
LHD models: 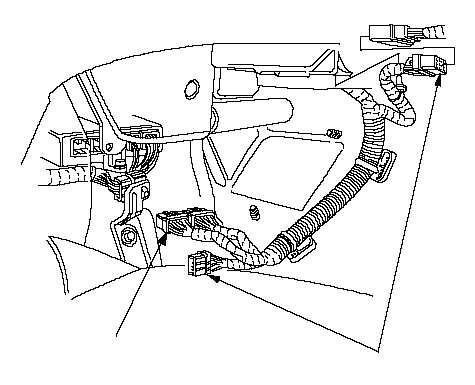 AB ABRHD models: 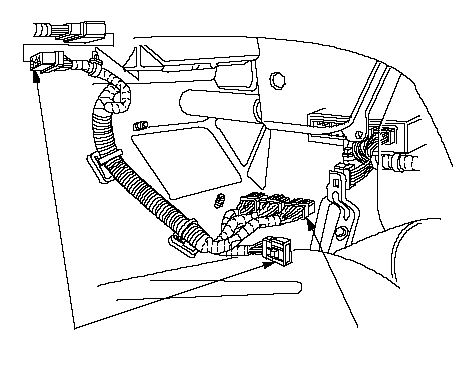 BA BA |
| 14. | Disconnect the accelerator pedal position (APP) sensor connector (A) (K24A3 engine).
LHD models: 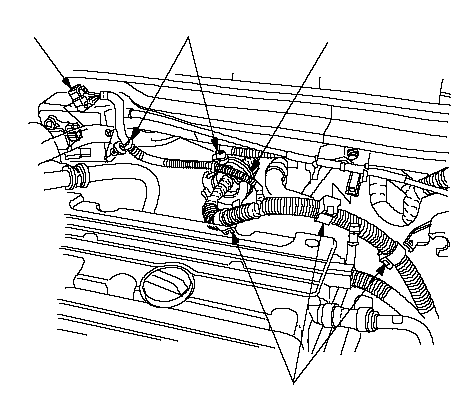 BCBA BCBARHD models: 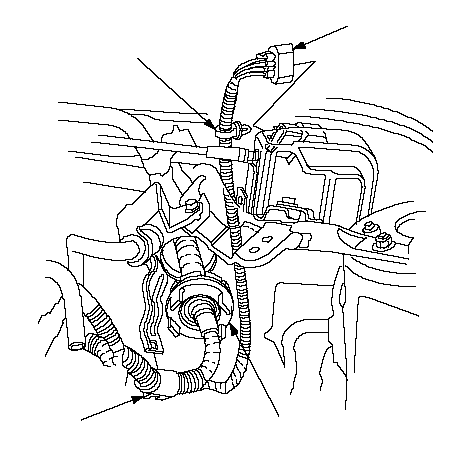 ABCB ABCB |
| 15. | Remove the harness clamps (B) and grommet (C), then pull the engine wire harness through the bulkhead.
|
| 16. | Remove the clutch slave cylinder (A), and clutch line bracket mounting bolt (B) (M/T).
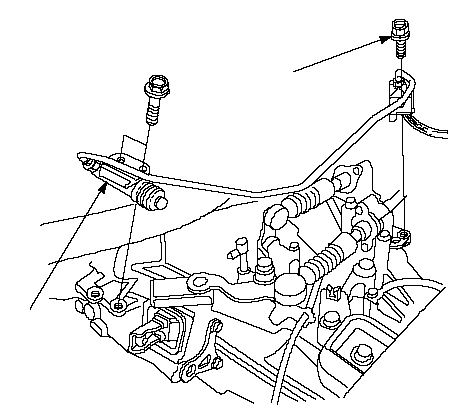 BA BA |
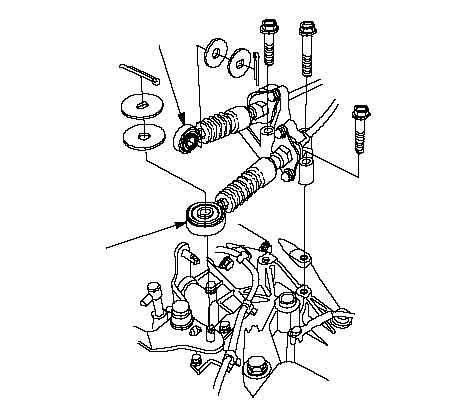
| 17. | Remove the shift cable (A) and select cable (B) (M/T).
 BA BA |
| 18. | Disconnect the air fuel ratio (A/F) sensor connector.
|
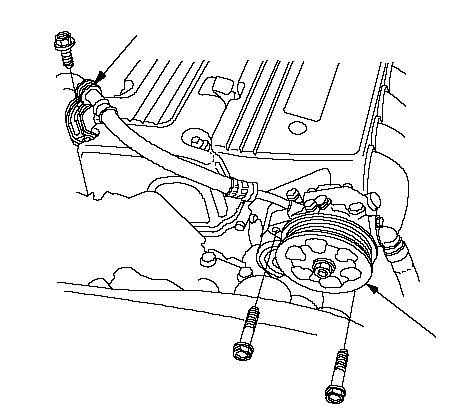
| 20. | Remove the power steering (P/S) pump (A), and the P/S hose clamp (B). Do not disconnect the P/S hoses from the pump.
 BA BA |
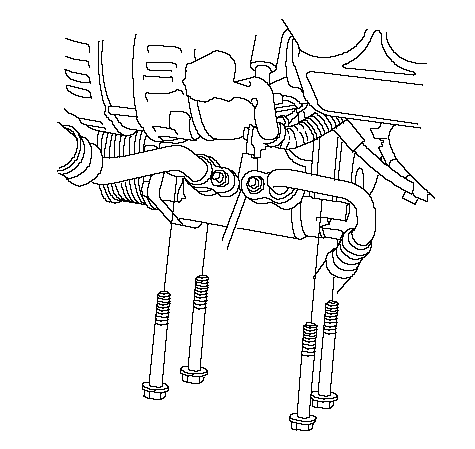
| 21. | Remove the A/C compressor without disconnecting the A/C hoses.
|
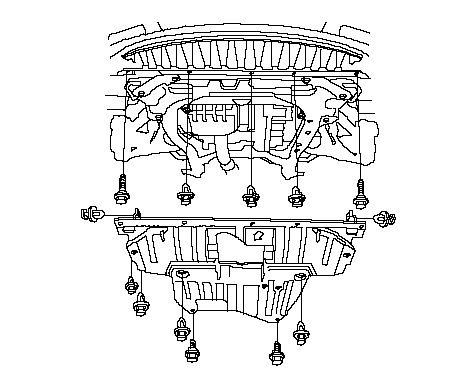
| 22. | Remove the splash shield.
|
| 23. | Remve the radiator cap.
|
| 24. | Raise the hoist to full height.
|
| 25. | Remove the front tires/wheels.
|
| 27. | Drain the transmission fluid:
|
| 32. | Remove the driveshafts. Coat all precision-finished surfaces with clean engine oil. Tie plastic bags over the driveshaft ends.
|
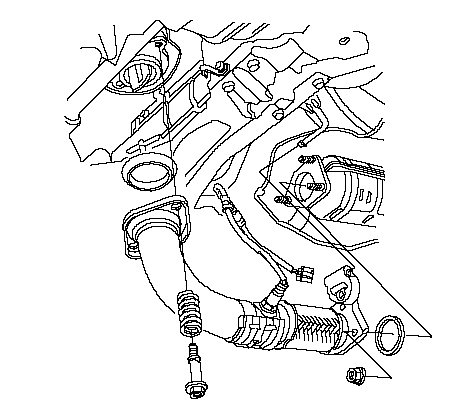
| 33. | Remove exhaust pipe A.
|
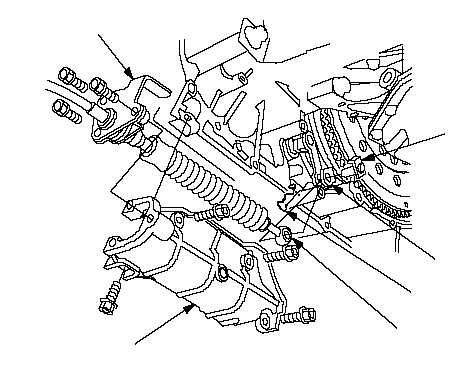
| 34. | Remove the two bolts securing the shift cable holder (A), then remove the shift cable cover (B) (A/T).
 EACFDB EACFDB |
| 35. | Remove the spring clip (C) and control pin (D), then separate the shift cable (E) from the control lever (F). Do not bend the cable excessively (A/T).
|
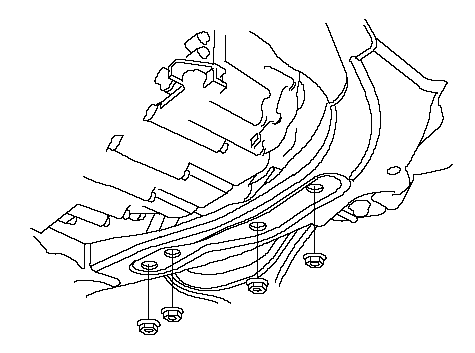
| 36. | Remove the nuts securing the transmission lower front mount and transmission lower rear mount.
|
| 38. | Remove the automatic transmission fluid (ATF) cooler hoses (A/T).
|
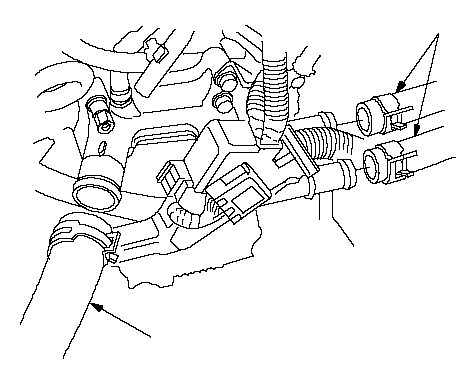
| 39. | Remove the upper radiator hose (A) and heater hoses (B).
 AB AB |
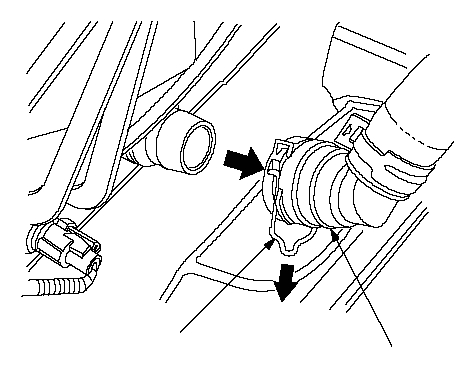
| 40. | Clean dirt off the quick connector (A), radiator, and lower radiator hose.
 AB AB |
| 41. | Pull out the lock (B) by hand, then wiggle the quick connector, and remove it from the thermostat cover. Do not use any tools to remove the quick connector.
|
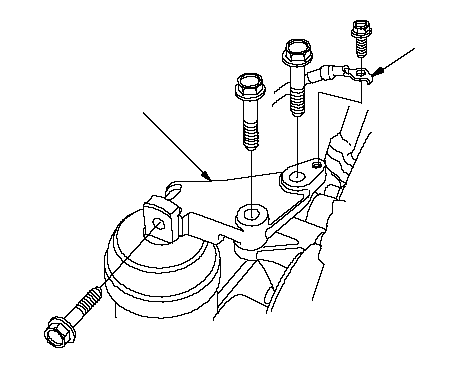
| 42. | Remove the ground cable (A), then remove the upper bracket (B).
 BA BA |
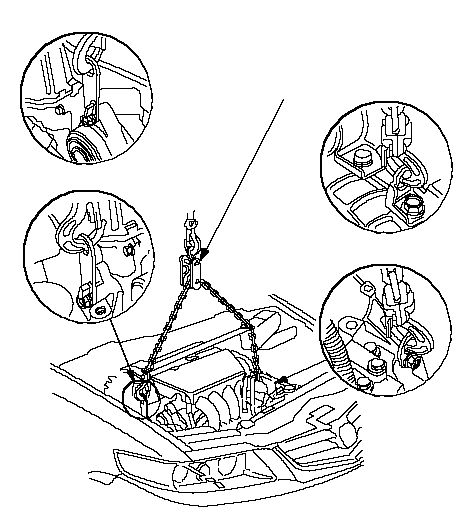
| 43. | Attach the engine tilt hanger set (Commercially available tool for EU models) to the engine as shown.
 AT:MT:AT:MT:07KAK-SJ40101 AT:MT:AT:MT:07KAK-SJ40101 |
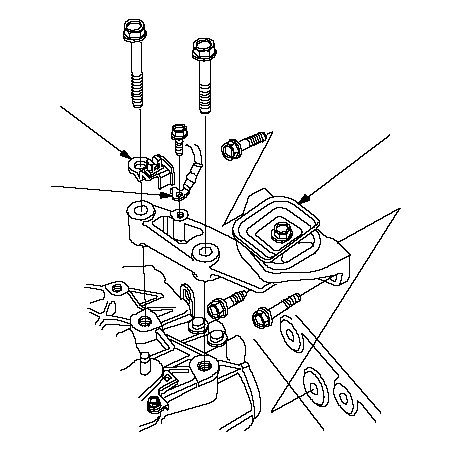
| 44. | Remove the ground cable (A), then remove the transmission upper mount/bracket assembly (B) and clutch line clamp bracket (C) (M/T).
 ABC ABC |
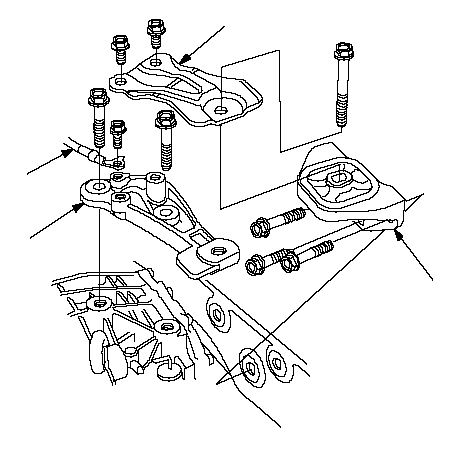
| 45. | Remove the ground cable (A), then remove the bracket plate (B), transmission upper bracket (C) and transmission upper mount (D) (A/T).
 ABCD ABCD |
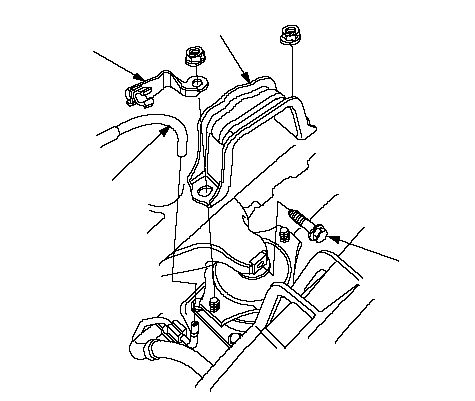
| 46. | Remove the vacuum hose (A) from the vacuum line. Remove the front mount stop (B) and vacuum hose clamp bracket (C), then remove the front mount bolt (D).
 CBDA CBDA |
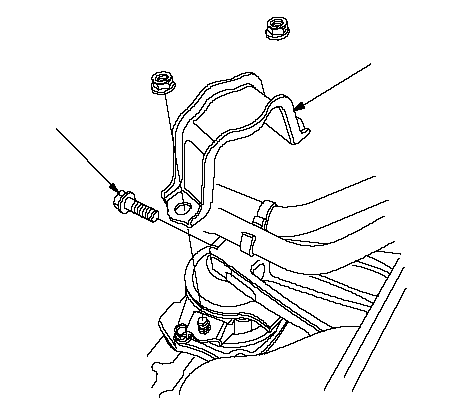
| 47. | Remove the rear mount stop (A), then remove the rear mount bolt (B).
 BA BA |
| 48. | Check that the engine/transmission is completely free of vacuum hoses, fuel and coolant hoses, and electrical wiring.
|
| 49. | Slowly raise the engine about 150 mm (6 in.). Check once again that all hoses and wire are disconnected from the engine/transmission.
|
| 50. | Raise the engine all the way, and remove it from the vehicle.
|