Front Lower Arm Removal/Installation
Front Lower Arm Removal/Installation
Special Tools Required
Ball joint remover, 28 mm ( 07MAC-SL00200)
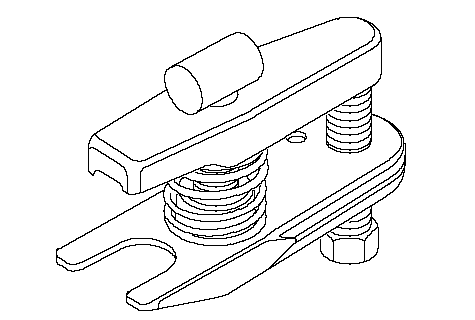
| 1. | Raise the front of the vehicle, and support it with safety stands in the proper locations. |
| 2. | Remove the front wheel. |
| 3. | Remove the damper fork (A) from the damper (B) and lower arm (C). NOTE: During installation, insert the damper fork into the damper lower end so the aligning tab (D) is aligned with the slot (E) in the damper fork. Replace the damper fork mounting nut (F) with a new one. 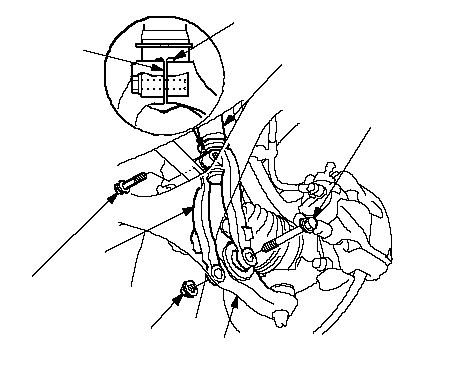 CBDA12 x 1.25 mm CBDA12 x 1.25 mm64 N·m (6.5 kgf·m, 47 lbf·ft)FE10 x 1.25 mm 43 N·m (4.4 kgf·m, 32 lbf·ft) |
| 4. | Remove the flange nut (A) while holding the joint pin(B) with a hex wrench (C), and disconnect the stabilizer link (D) from the lower arm (E).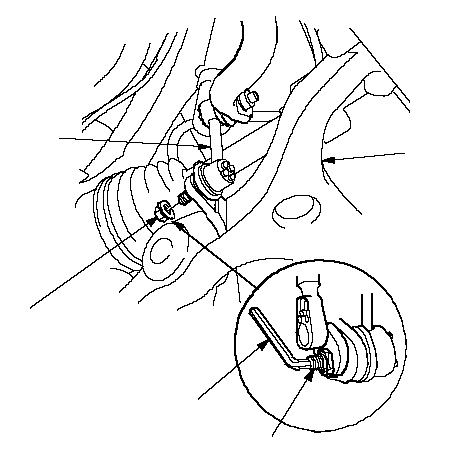 BCEDA BCEDA10 x 1.25 mm 29 N·m (3.0 kgf·m, 22 lbf·ft) |
| 5. | Remove the cotter pin (A) from the lower arm ball joint castle nut (B), and remove the nut. NOTE:
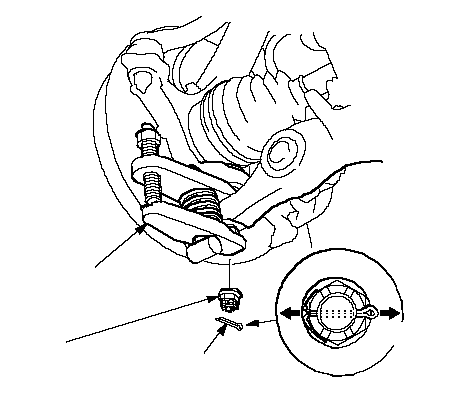 FORWARDB FORWARDB12 x 1.25 mm 78-88 N·m (8.0-9.0 kgf·m, 58-65 lbf·ft)A07MAC-SL00200 |
| 6. | Disconnect the lower arm from the knuckle using the special tool . |
| 7. | Remove the flange bolts, and remove the lower arm (A).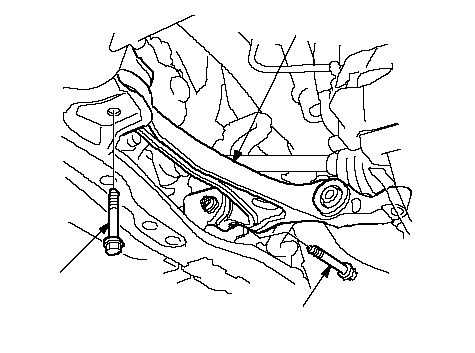 A14 x 1.5 mm A14 x 1.5 mm83 N·m (8.5 kgf·m, 61 lbf·ft)12 x 1.25 mm 64 N·m (6.5 kgf·m, 47 lbf·ft) |
| 8. | Install the lower arm in the reverse order of removal, and note these items:
|