Cylinder Head Removal (L12A/L13A)
Cylinder Head Removal
NOTE:- Use fender covers to avoid damaging painted surfaces.
- To avoid damage, unplug the wiring connectors carefully while holding the connector portion.
- To avoid damaging the cylinder head, wait until the engine coolant temperature drops below 38°C (100°F) before loosening the cylinder head bolts.
- Mark all wiring and hoses to avoid misconnection. Also, be sure that they do not contact other wiring or hoses, or interfere with other parts.
- Keep the cam chain away from magnetic fields.
| 1. | Drain the engine coolant. |
| 2. | Remove air cleaner housing. |
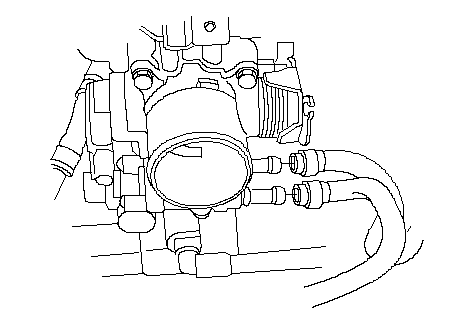
| 3. | Remove the water bypass hoses.
 |
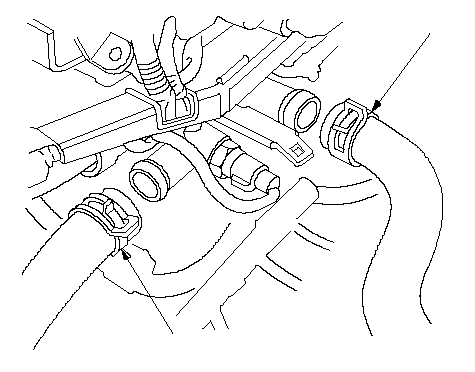
| 4. | Remove the upper radiator hose (A) and lower radiator hose (B).
 AB AB |
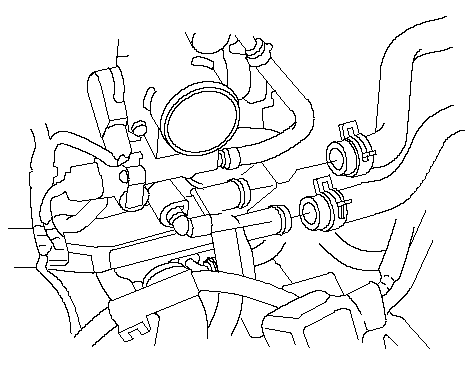
| 5. | Remove the heater hoses.
 |
| 6. | Remove the drive belt. |
| 7. | Remove the intake manifold. |
| 8. | Remove the exhaust manifold. |
| 9. | Remove the engine wire harness connectors and wire harness clamps from the cylinder head.
|
| 10. | Remove the fuel rail. |
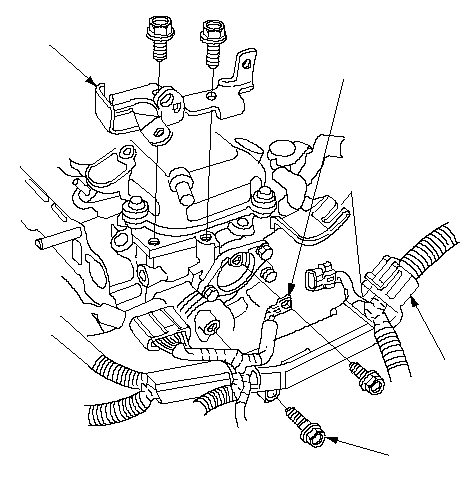
| 11. | Remove the air cleaner housing bracket (A), ground cable (B) and harness holder mounting bolt (C), then remove the harness holder (D) from the bracket.
 ABDC ABDC |
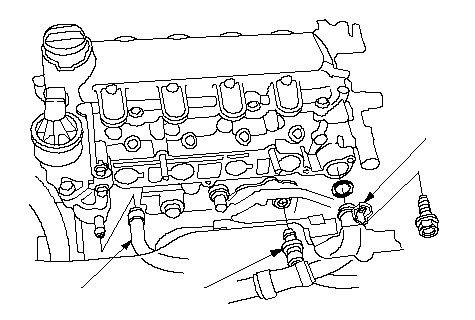
| 12. | Remove the connecting pipe (A), water bypass hose (B) and Positive Crankcase Ventilation (PCV) hose (C).
 BCA BCA |
| 13. | Remove the cylinder head cover. |
| 14. | Remove the alternator bracket mounting bolt and loosen the alternator mounting bolt. |
| 15. | Remove the idler pulley (with A/C compressor). |
| 16. | Turn the crankshaft pulley so its TDC mark lines up with the pointer. |
| 17. | Remove the water pump pulley. |
| 18. | Remove the crankshaft pulley. |
| 19. | Disconnect the Crankshaft Position (CKP) sensor connector, then remove the harness clamps. |
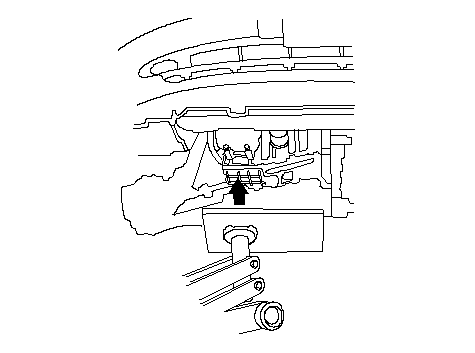
| 20. | Support the engine with a 300 x 300 x 25 mm (12 x 12 x 1 in.) piece of wood and jack under the oil pan. NOTE: Do not attach a jack on the center of the oil pan to avoid damage to the oil pan.
 |
| 21. | Remove the ground cable, then remove the side engine mount/bracket assembly. |
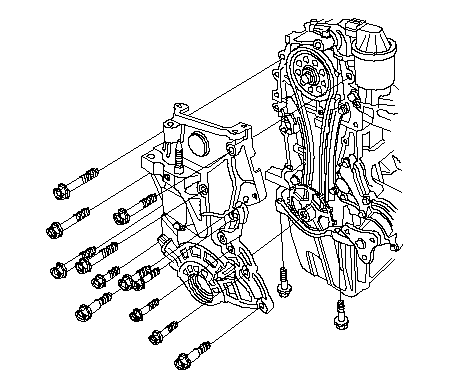
| 22. | Keep alternator away of the chain case. Remove the chain case.
 |
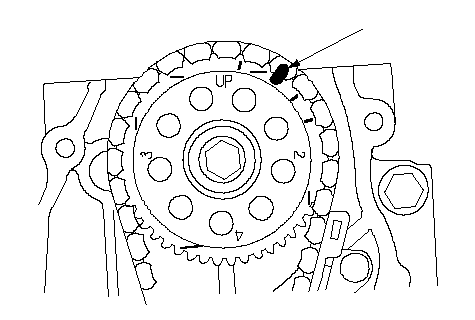
| 23. | Make a reference mark (A) across the camshaft sprocket and cam chain.
 A A |
| 24. | Loosely install the crankshaft pulley. |
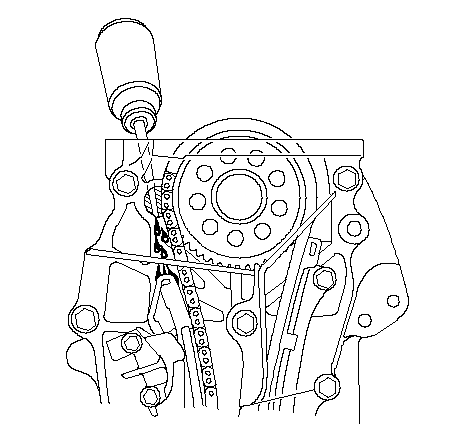
| 25. | Apply engine oil to the slider surface of the cam chain tensioner slider through the oil return hole in the cylinder head.
 |
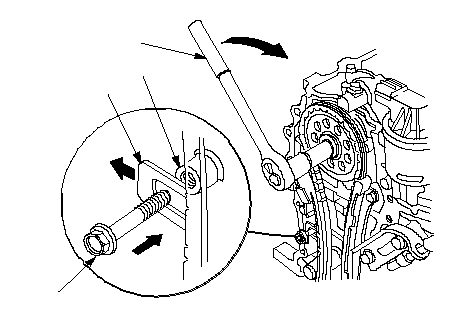
| 26. | Hold the crankshaft pulley and set the socket wrench (A) on the camshaft sprocket bolt.
 ACDB ACDB |
| 27. | Turn the camshaft clockwise to compress the cam chain tensioner, then install the 6 x 1.0 mm bolt (B) in the bolt hole (C) on the cylinder block through the cam chain tensioner (D). NOTE:
|
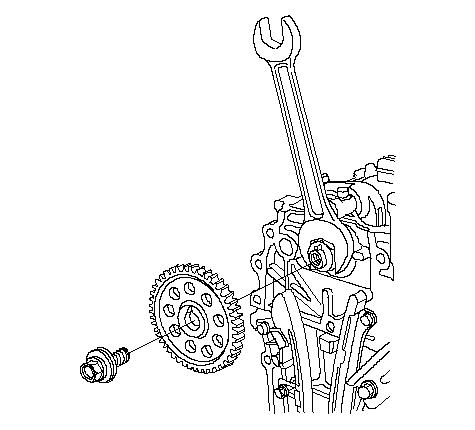
| 28. | Hold the camshaft with an open-end wrench, then remove the camshaft sprocket.
 |
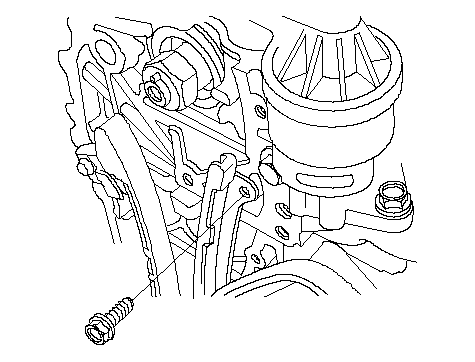
| 29. | Remove a bolt securing the cam chain guide.
 |
| 30. | Remove the cylinder head bolts. To prevent warpage, unscrew the bolts in sequence 1/3 turn at a time; repeat the sequence until all bolts are loosened. CYLINDER HEAD BOLTS LOOSENING SEQUENCE: 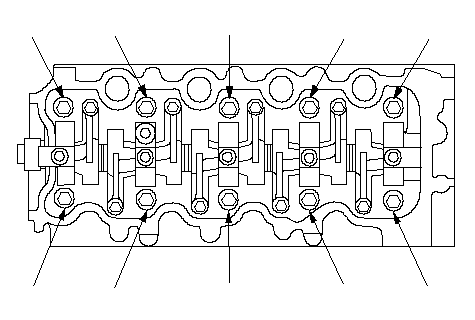 (1)(7)(9)(5)(3)(4)(6)(10)(8)(2) (1)(7)(9)(5)(3)(4)(6)(10)(8)(2) |
| 31. | Remove the cylinder head. |