Headliner Removal/Installation (4D)
Headliner Removal/Installation
SRS components are located in this are. Review the SRS component locations LHD, SRS components locations RHD and the precautions and procedures in the SRS section before performing repairs or service.NOTE:
- When prying with a flat-tip screwdriver, wrap it with protective tape to prevent damage.
- Take care not to bend and scratch the headliner.
- Be careful not to damage the dashboard and other interior trim.
| 1. | Remove these items:
|
| 2. | From both sides, using a flat-tip screwdriver, release the tabs (A), then remove the sunvisor cap (B) from the bracket (C). Turn the cap, and remove it.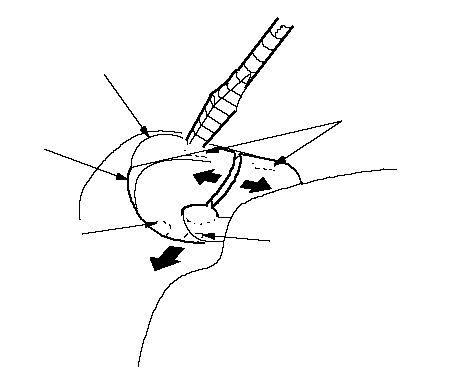 ABCAA ABCAA |
| 3. | From both sides, remove the sunvisor (A) and holder (B).
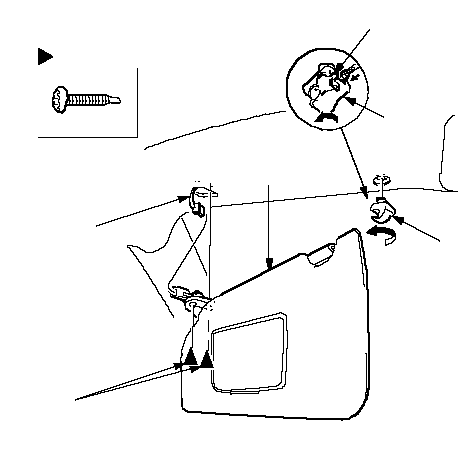 Fastener Locations: Screw, 4DBBA5 x 0.8 mm Fastener Locations: Screw, 4DBBA5 x 0.8 mm3.4 N·m (0.35 kgf·m, 2.5 lbf·ft)C |
| 4. | Lower the roof console (A).
Without U/S intrusion sensor: 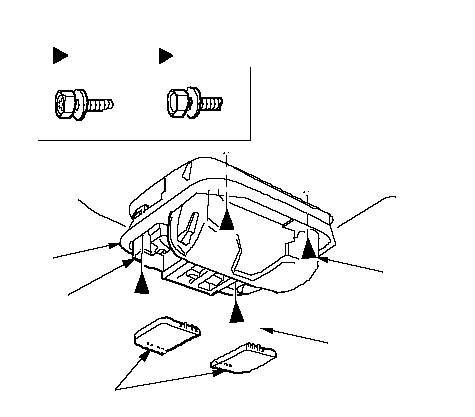 Fastener LocationsE: Bolt, 2G: Bolt, 25 x 0.8 mm Fastener LocationsE: Bolt, 2G: Bolt, 25 x 0.8 mm5 N·m (0.5 kgf·m, 4 lbf·ft)5 x 0.8 mm 3.4 N·m (0.35 kgf·m, 2.5 lbf·ft)AEBFGEG With U/S intrusion sensor: 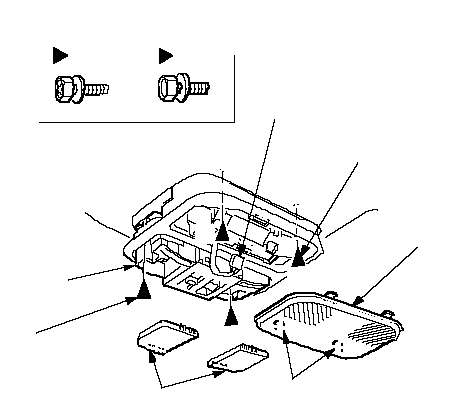 Fastener LocationsE: Bolt, 2G: Bolt, 25 x 0.8 mm Fastener LocationsE: Bolt, 2G: Bolt, 25 x 0.8 mm5 N·m (0.5 kgf·m, 4 lbf·ft)5 x 0.8 mm 3.4 N·m (0.35 kgf·m, 2.5 lbf·ft)FEBGGDHCE |
| 5. | Pass the individual map light (A) through the opening in the roof console (B), then remove the roof console.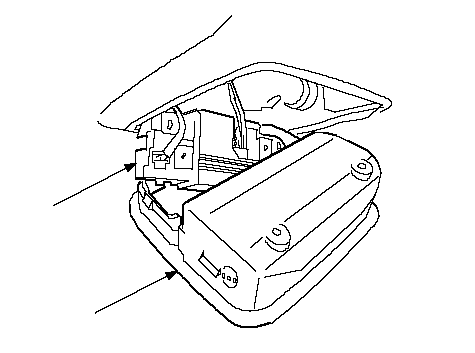 AB AB |
| 6. | Lower the grab handle, then pry out the lid (A). Remove the self-tapping ET screws, then remove the grab handle (B). Remove the remaining grab handles.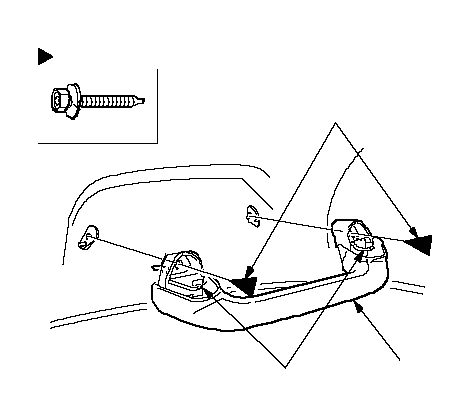 Fastener Locations: Screw, 8AB5 x 0.8 mm Fastener Locations: Screw, 8AB5 x 0.8 mm3.4 N·m (0.35 kgf·m, 2.5 lbf·ft) |
| 7. | With sunroof: Remove the headliner.
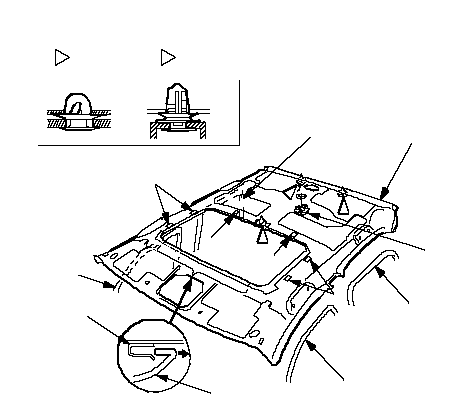 Fastener Locations: Clip, 2D: Clip, 2GECFCBFHBEGEADEG Fastener Locations: Clip, 2D: Clip, 2GECFCBFHBEGEADEG |
| 8. | Without sunroof: Remove the headliner.
LHD: 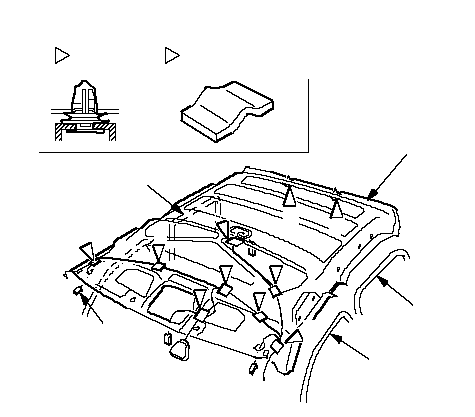 CDDEEEEAAFastener Locations: Clip, 2D: Cushion tape, 8EBEEEEB CDDEEEEAAFastener Locations: Clip, 2D: Cushion tape, 8EBEEEEBRHD: 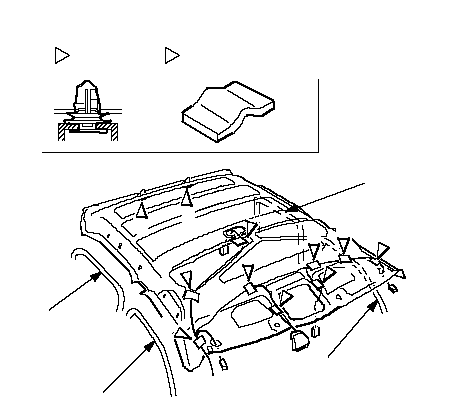 EAFastener Locations: Clip, 2D: Cushion tape, 9EBEEEEEEEEABDD EAFastener Locations: Clip, 2D: Cushion tape, 9EBEEEEEEEEABDD |
| 9. | If necessary, remove the bolts, then remove the front grab handle bracket (A) and rear grab handle bracket (B) from each side by releasing the hooks (C).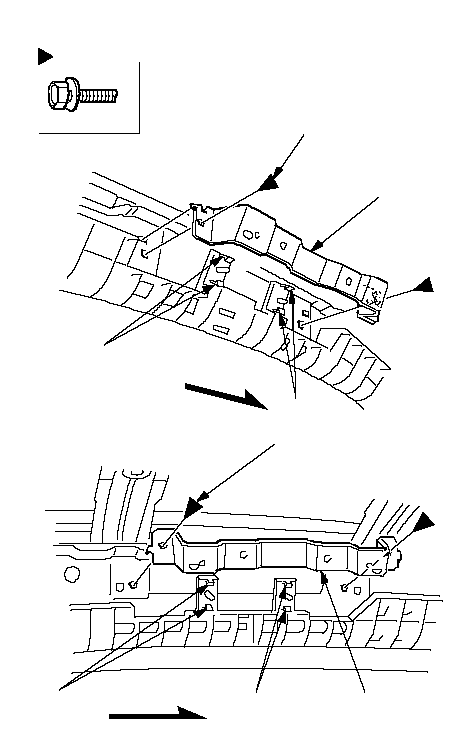 Fastener Locations: Bolt, 6CForwardCA5 x 0.8 mm Fastener Locations: Bolt, 6CForwardCA5 x 0.8 mm5 N·m (0.5 kgf·m, 4 lbf·ft)5 x 0.8 mm 5 N·m (0.5 kgf·m, 4 lbf·ft)ForwardCCB |
| 10. | If necessary, detach the hooks (A) and the clip (B), then remove the front roof side pad (C) and rear roof side pad (D).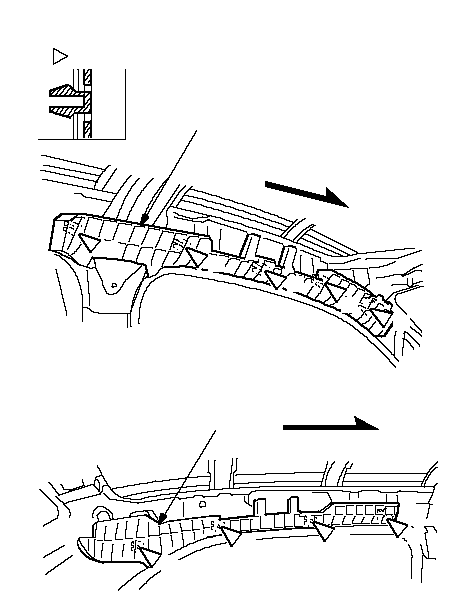 Fastener Locations: Hook, 9ForwardAForwardAAAABAAAAAC Fastener Locations: Hook, 9ForwardAForwardAAAABAAAAAC |
| 11. | With sunroof: If necessary, pull down the roof console bracket (A) to release the clip.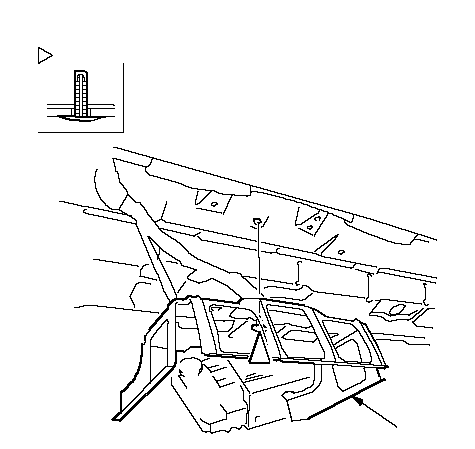 Fastener Location: Clip, 1A Fastener Location: Clip, 1A |
| 12. | Install the headliner in the reverse order of removal, and note these items:
|