SRS Precautions and Procedures
SRS Precautions and Procedures
General Precautions
Please read the following precautions carefully before performing the airbag system service. Observe the instructions described in this manual, or the airbags could accidentally deploy and cause damage or injuries.
- Except when performing electrical inspections, always turn the ignition switch OFF and disconnect the negative cable from the battery, and wait at least 3 minutes before beginning work.
NOTE: The memory is not erased even if the ignition switch is turned OFF or the battery cables are disconnected from the battery. - Use replacement parts which are manufactured to the same standards and quality as the original parts. Do not install used SRS parts. Use only new parts when making SRS repairs.
- Carefully inspect any SRS part before you install it.
Do not install any part that shows signs of being dropped or improperly handled, such as dents, cracks or deformation.
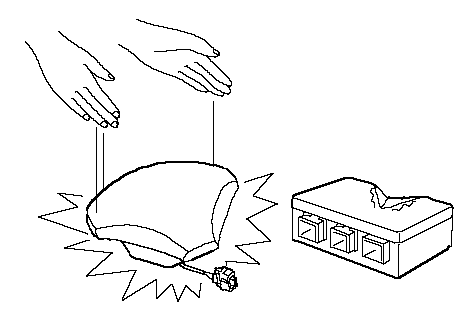
- Before removing any of the SRS parts (including the disconnection of the connectors), always disconnect the SRS connector.
- Use only a digital multimeter to check the system. If it is not a Honda multimeter, make sure its output is 10 mA (0.01A) or less when switched to the lowest value in the ohmmeter range. A tester with a higher output could cause accidental deployment and possible injury.
- Do not put objects on the front passenger's airbag.
- The original radio has a coded theft protection circuit. Be sure to get the customer's radio code and write down the frequencies for the radio's preset stations before disconnecting the battery cable.
- Before returning the vehicle to the customer, enter the radio code, then enter the customer's radio station presets, the power window control unit reset procedure, and set the clock. Do the engine control module (ECM) idle learn procedure.
- After disconnecting the battery negative cable, do the power window control unit resetting procedure.
Steering-related Precautions
Cable Reel Alignment
- Misalignment of the cable reel could cause an open in the wiring, making the SRS system and the horns inoperative. Center the cable reel whenever the following is performed.
- Installation of the steering wheel
- Installation of the cable reel
- Installation of the steering column
- Other steering-related adjustment or installation
- Installation of the steering wheel
- Do not disassemble the cable reel.
- Do not apply grease to the cable reel.
- If the cable reel shows any signs of damage, replace it with a new one. For example, it does not rotate smoothly.
Airbag Handling and Storage
Do not disassemble an airbag. It has no serviceable parts. Once an airbag has been deployed, it cannot be repaired or reused.
For temporary storage of the airbag during service, please observe the following precautions.
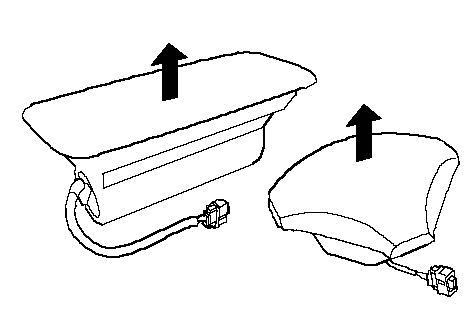
- Store the removed airbag with the pad surface up. Never put anything on the removed airbag.
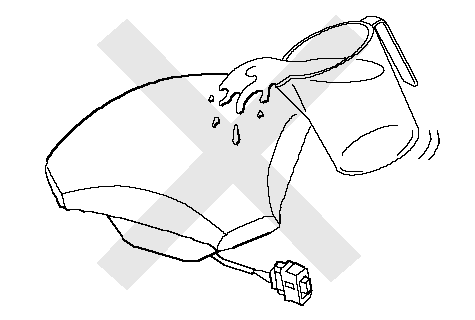
- To prevent damage to the airbag, keep free from any oil, grease, detergent, or water.
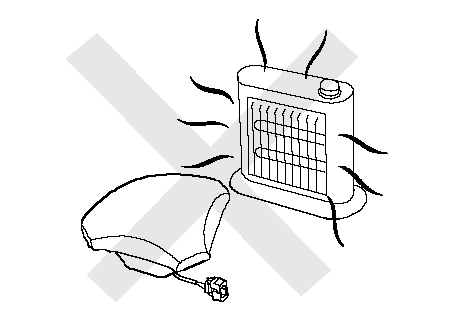
- Store the removed airbag on a secure, flat surface away from any high heat source (exceeding 200°F/ 93°C).
- Never perform electrical inspections to the airbags, such as measuring resistance.
- Do not position yourself in front of the airbag assembly during removal, inspection, or replacement.
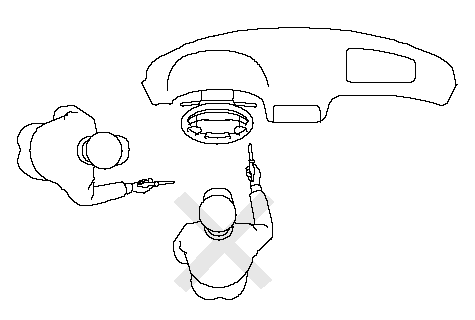
- Refer to the scrapping procedures for disposal of the damaged airbag.
- The side curtain airbag inflator assembly is a long, jointed part containing an inflator (A), a flexible bag (B), an adapter pipe (C), and a center bracket (D).
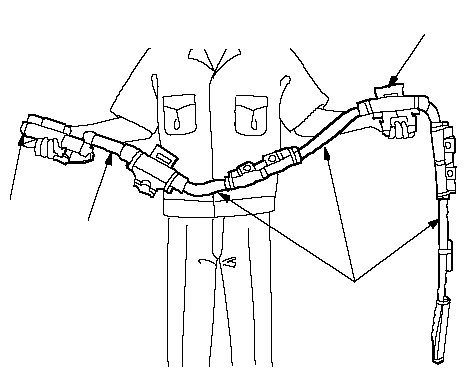 DBCA
DBCA- When removing or installing the side curtain airbag inflator assembly, never handle the flexible bag (B) or the adapter pipe (C).
SRS Unit, Front Impact Sensors and Side Impact Sensors
- Be careful not to bump or impact the SRS unit, front impact sensors or the side impact sensors whenever the ignition switch is ON (II), or for at least 3 minutes after the ignition switch is turned OFF.
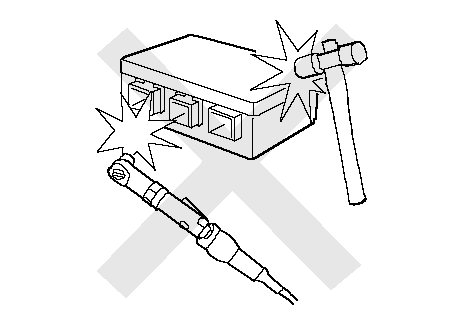
- During installation or replacement, be careful not to bump (by impact wrench, hammer, etc.) the area around the SRS unit, front impact sensors, and the side impact sensor. The airbags could accidentally deploy and cause damage or injury.
- After a collision in which the airbags or seat belt tensioners were deployed, replace the SRS unit, front sensors, and other related components. After a collision in which a side airbag was deployed, replace the side impact sensor on the deployed side and the SRS unit. After a collision in which the airbags or the side airbags did not deploy, inspect for any damage or any deformation on the SRS unit, front impact sensors, and the side impact sensors. If there is any damage, replace the SRS unit and/or the sensors.
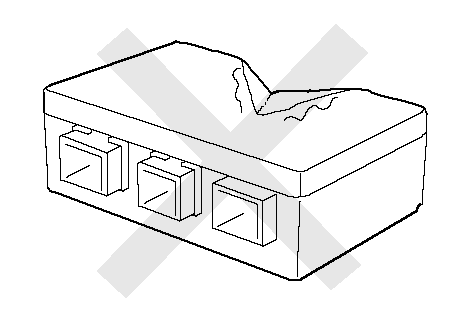
- Do not disassemble the SRS unit, front impact sensors, or the side impact sensors.
- Turn the ignition switch OFF, disconnect the battery negative cable and wait at least 3 minutes before beginning installation or replacement of the SRS unit, or disconnecting the connectors from the SRS unit.
- Be sure the SRS unit, front impact sensors, and side impact sensors are installed securely with the mounting bolts torqued to 9.8 N·m (1.0 kgf·m, 7.2 lbf·ft)
- Do not spill water or oil on the SRS unit or the side impact sensors, and keep them away from dust.
- Store the SRS unit, front impact sensors and the side impact sensors in a cool (less than 104°F/40°C) and dry (less than 80 % relative humidity, no moisture) area.
Wiring Precautions
Some of the SRS wiring can be identified by special yellow outer covering, and the SRS connectors can be indentified by their yellow color.
Observe the instructions described in this section.
- Never attempt to modify, splice, or repair SRS wiring.
If there is an open or damage in SRS wiring, replace the harness.
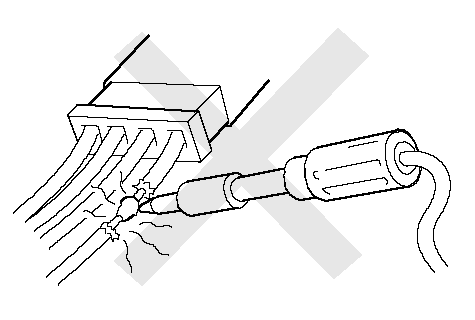
- Be sure to install the harness wires so they do not get pinched or interfere with other parts.
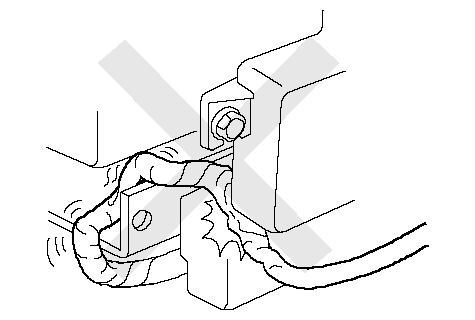
- Make sure all SRS ground locations are clean, and grounds are securely fastened for optimum metal-to-metal contact. Poor grounding can cause intermittent problems that are difficult to diagnose.
Precautions for Electrical Inspections
- When using electrical test equipment, insert the probe of the tester into the wire side of the connector. Do not insert the probe of the tester into the terminal side of the connector, and do not tamper with the connector.
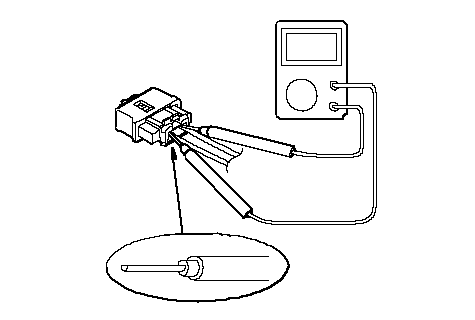
- Use a U-shaped probe. Do not insert the probe forcibly.
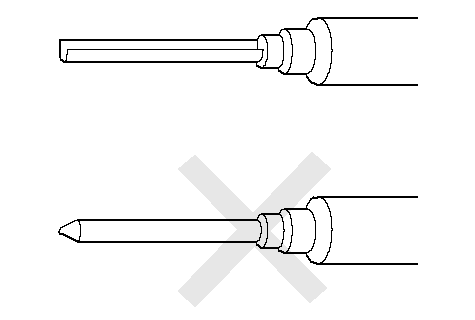
- Use specified service connectors in troubleshooting.
Using improper tools could cause an error in inspection due to poor metal-to-metal contact.
Spring-loaded Lock Connector
Some SRS system connectors have a spring-loaded lock.
Front Airbag Connectors:
Disconnecting
To release the lock, pull the spring-loaded sleeve (A) toward the stop (B) while holding the opposite half of the connector. Then pull the connector halves apart. Be sure to pull on the sleeve and not on the connector.
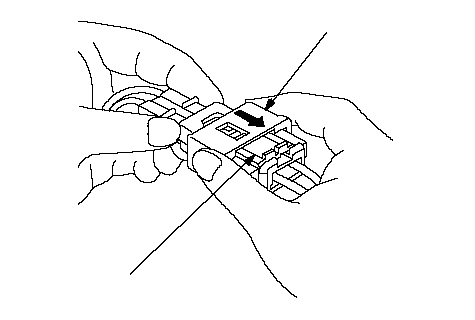 AB
AB| 1. | To reconnect, hold the pawl-side connector half, and press on the back of the sleeve-side connector half in the direction shown. As the two connector halves are pressed together, the sleeve (A) is pushed back by the pawl (C). Do not touch the sleeve.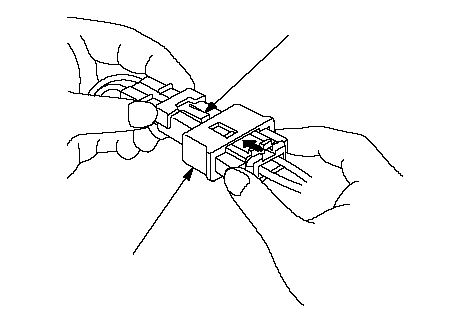 CA CA |
| 2. | When the connector halves are completely connected, the pawl is released, and the spring-loaded sleeve locks the connector.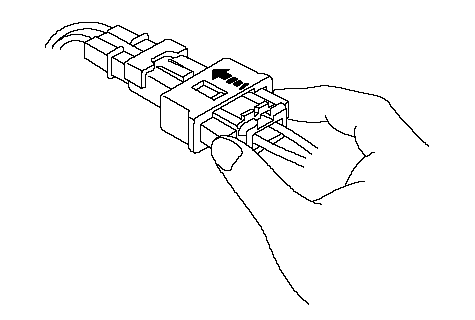 |
Side Airbag and Side Curtain Airbag Connector:
Disconnecting
To release the lock, pull the spring-loaded sleeve (A) and the slider (B) while holding the opposite half of the connector. Then pull the connector halves apart. Be sure to pull on the sleeve and not on the connector half.
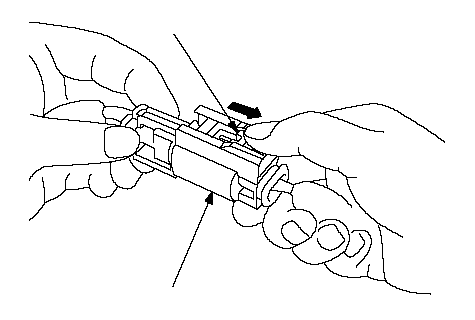 BA
BAHold both connector halves, and press them firmly together until the projection (C) of the sleeve-side connector clicks.
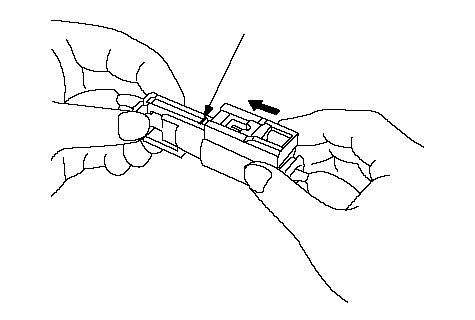 C
CReopening the SRS Unit circuit for diagnosis
NOTE
- To prevent damage of the connector cavity, insert the special tool straight into the cavity from the terminal side.
- Before installing the special tool, wash it with electrical contact cleaner, then air blow it dry.
- Do not use the special tool if it is damaged.
- Make sure to remove the special tool before re-connecting.
When the SRS unit connector(s) A, B, or C are disconnected, a short circuit is created in the connector by own its function to prevent airbag deployment. The circuit needs to be open sometimes when diagnosis is performed on the circuit.
Insert the special tool(s) (No. 070AZ-SAA0100) in the specified cavities when it is necessary to keep the circuit open for diagnosis.
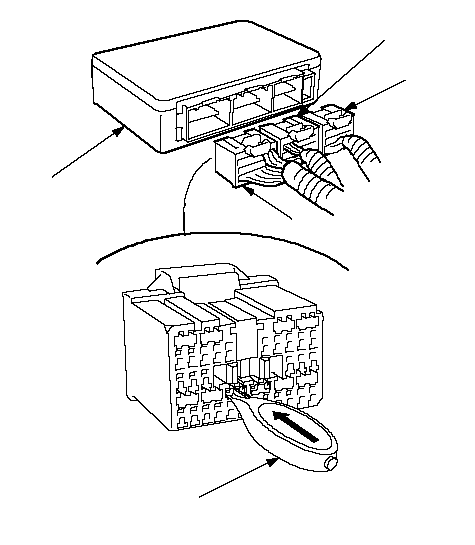 BCSRS UNITTerminal side of
 connectorSRS Short Canceller
(070AZ-SAA0100)A
Backprobing Spring-loaded Lock Connectors
When checking voltage or resistance on this type of connector the first time, you must remove the retainer to insert the tester probe from the wire side.
NOTE: It is not necessary to reinstall the removed retainer; the terminals will stay locked in the connector housing.
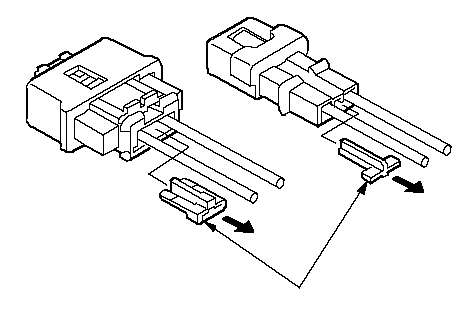 A
ATo remove the retainer (A), insert a flat-tip screwdriver (B) between the connector body and the retainer, then carefully pry out the retainer. Take care not to break the connector.
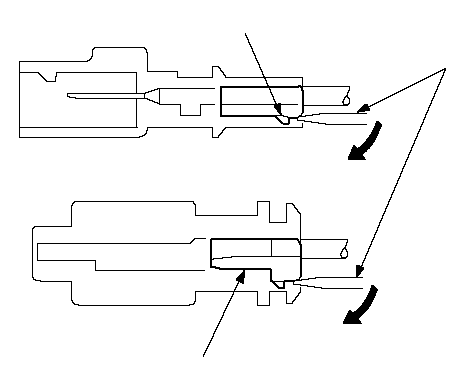 ABA
ABASeats with Side Airbags
Seats with side airbags have a ‘‘SIDE AIRBAG'' label on the seat-back. Because the component parts (seat-back cover, cushion, etc.) of seats with and without airbags are different, make sure you install only the correct replacement parts.
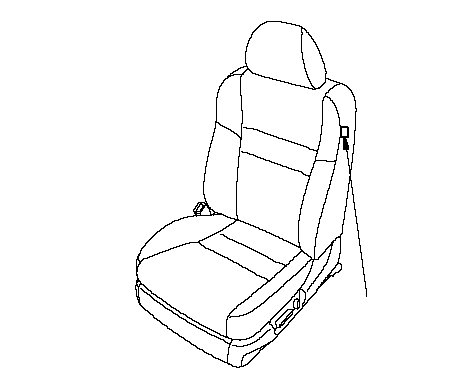 SIDE AIRBAG
LABEL
- When cleaning, do not saturate the seat with liquid, and do not spray steam on the seat.
- Do not repair a torn or frayed seat-back cover. Replace the seat-back cover.
- After a collision in which the side airbag was deployed, replace the side airbag with new parts. If the seat-back cushion is split, it must be replaced. If the seat-back frame is deformed, it must be replaced.
- Never put aftermarket accessories on the seat (covers, pads, seat heaters, lights, etc.).
Disconnecting System Connectors
Turn the ignition switch OFF and disconnect the negative cable from the battery, and wait at least 3 minutes before beginning the following procedures.
- Before disconnecting SRS unit connector B (3) from SRS unit, disconnect both seat belt tensioner 4P connectors (4, 5).
- Before disconnecting the cable reel 4P connector (1), disconnect the driver's airbag 2P connector (2).
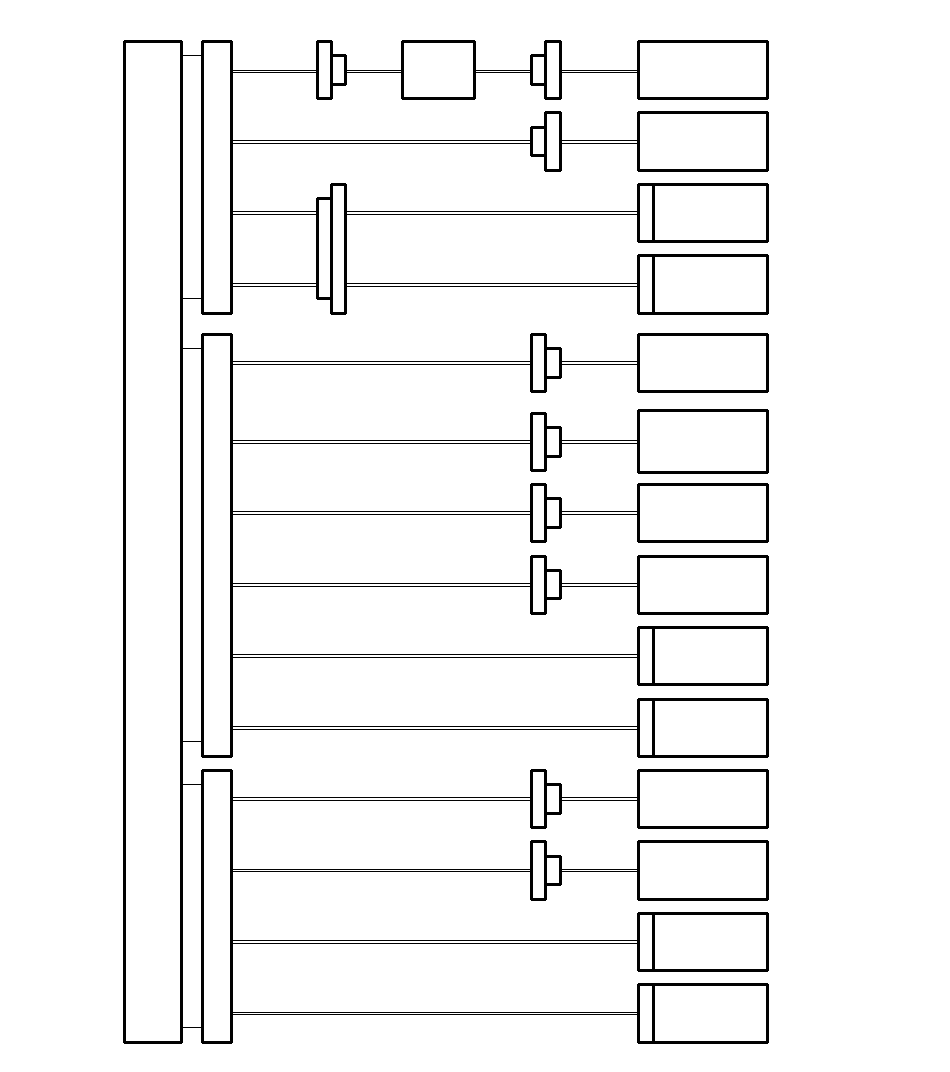 12SENSOR (2ND)SIDE IMPACTRIGHTLEFTSIDE IMPACTSENSOR (2ND)RIGHTSIDE IMPACTSENSOR (1ST)RIGHTSIDE CURTAINAIRBAGSIDE CURTAINAIRBAG SUBHARNESSAIRBAGSIDE CURTAINLEFT45RIGHT SIDESEAT BELTTENSIONERWIRE HARNESSHARNESSUNITSRSLEFTSIDE AIRBAGSENSOR (1ST)SIDE IMPACTLEFTRIGHTSIDE AIRBAGRIGHT FRONTIMPACTSENSORENGINE COMPARTMENTSENSORIMPACTLEFT FRONTLEFT SIDESEAT BELTTENSIONERWIRE HARNESSFLOOR3DASHBOARD WIREFRONTPASSENGER'SAIRBAGREELCABLEAIRBAGDRIVER'S
| 1. | Disconnect the battery negative cable, and wait at least 3 minutes. |
Driver's Airbag
| 2. | Remove the access panel (A) from the steering wheel, then disconnect the driver's airbag 2P connector (B) from the cable reel.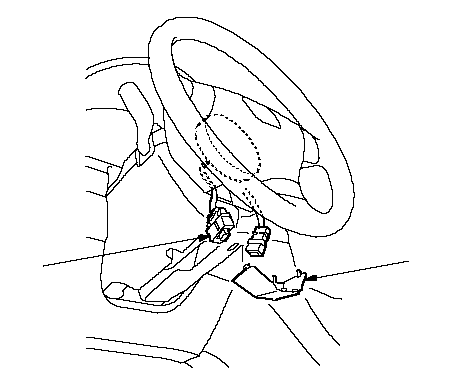 AB AB |
Front Passenger's Airbag
| 3. | Remove the grove box, then disconnect the front passenger's airbag 2P connector (A) from the dashboard wire harness.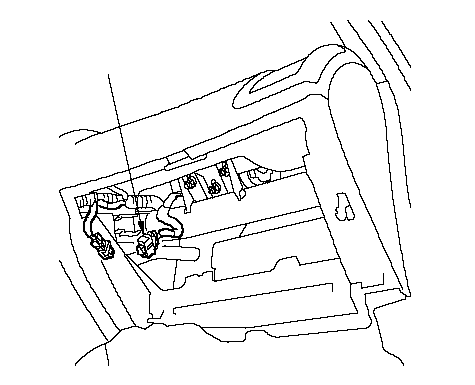 A A |
Side Airbag
| 4. | Disconnect the side airbag 2P connector (A) from the floor wire harness.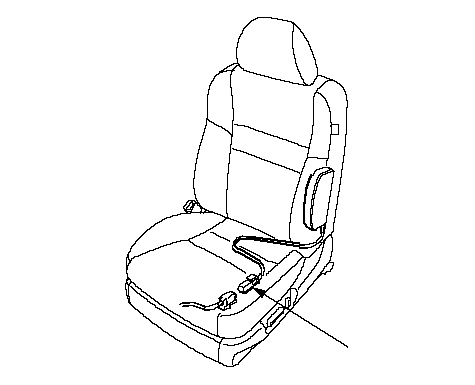 A A |
Side Curtain Airbag
| 5. | Disconnect the side curtain airbag 2P connector (A) from the side curtain airbag subharness.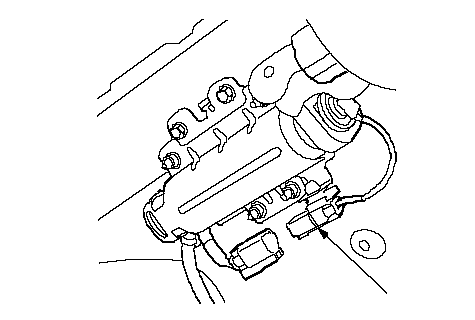 A A |
Seat Belt Tensioner
| 6. | Disconnect the seat belt tensioner 4P connector (A) from the floor wire harness.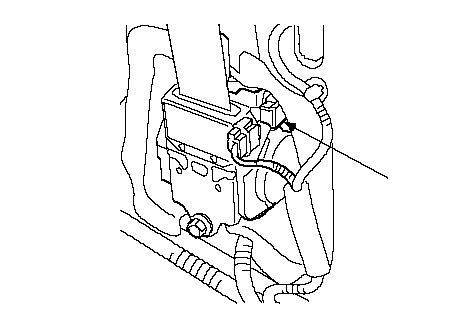 A A |
SRS Unit
| 7. | Disconnect SRS unit connector A, SRS unit connector B, and/or SRS unit connector C from the SRS unit.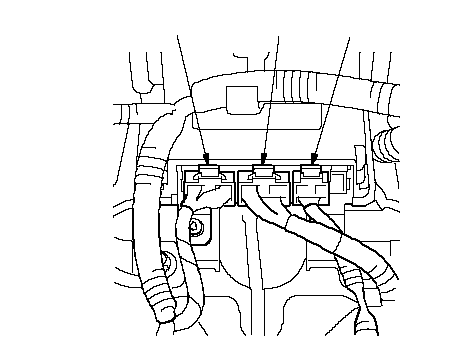 ABC ABC |