Rear Damper/Spring Replacement (4D)
Rear Damper/Spring Replacement
Exploded View
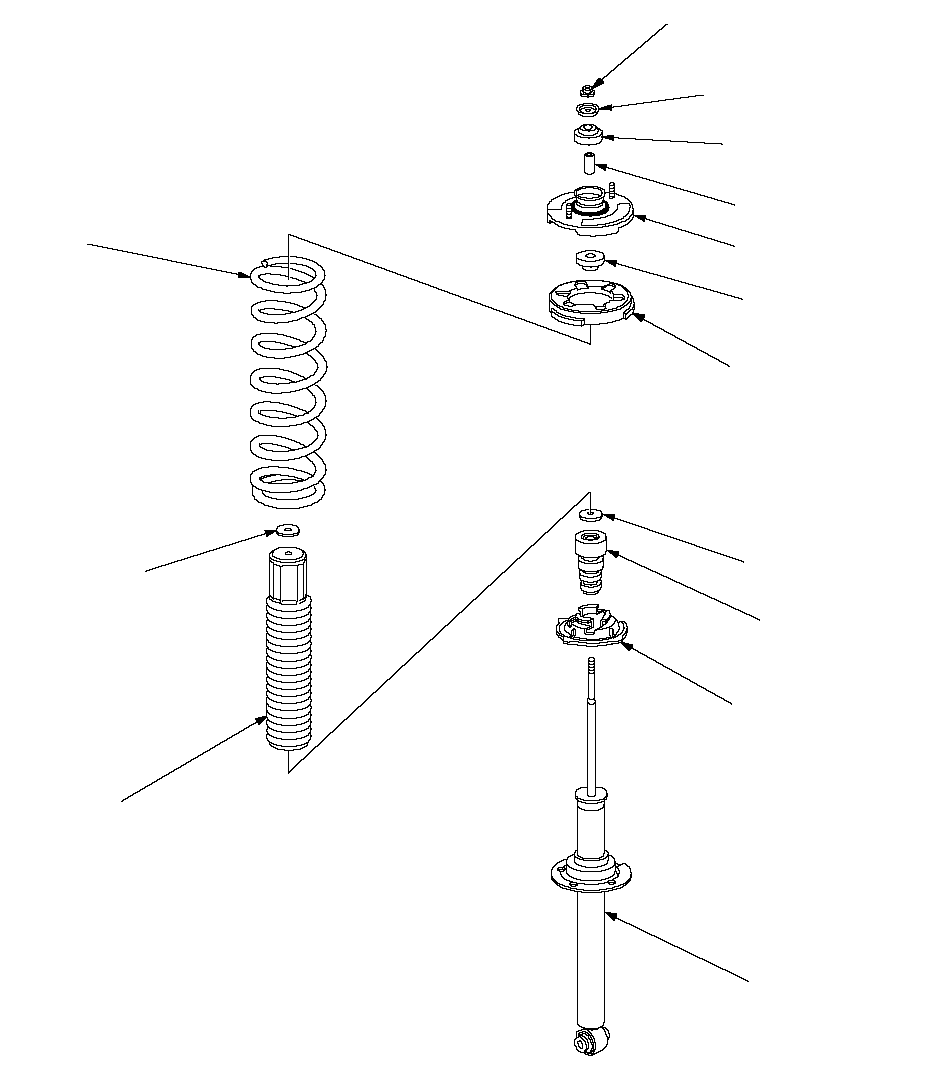 SELF-LOCKING NUT
10 x 1.25 mm
29 N·m (3.0 kgf·m, 22 lbf·ft)
Replace.RUBBER BUSHING
Check for weakness
and damage.DAMPER MOUNTING BASE
Check for deformation.SPRING MOUNTING
CUSHION
Check for deterioration
and damage.DUST COVER LOWER MOUNTING
Check for deterioration
and damage.DUST COVER PLATEBUMP STOP PLATEBUMP STOP
Check for weakness
and damage.DUST COVER
Check for bending and damage.DAMPER UNIT
Check for oil leaks, gas leaks,
and smooth operation.DAMPER SPRING
Check for free length.WASHER
Check for deformation.RUBBER BUSHING
Check for weakness
and damage.COLLAR
Special Tools Required
Strut Spring Compressor, ( Branick MST-580A
or model 7200, or equivalent, commercially available.)
Removal
| 1. | Raise the rear of the vehicle, and support it with safety stands in the proper locations. Remove the rear wheel. |
| 2. | Remove the rear shelf cover. |
| 3. | Remove the seat side bolster. |
| 4. | Remove the two flange nuts (A).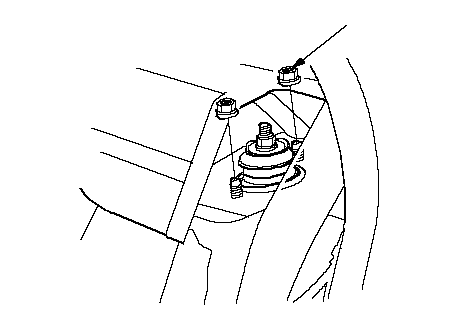 A A10 x 1.25 mm |
| 5. | Remove the flange bolt (A) from the knuckle.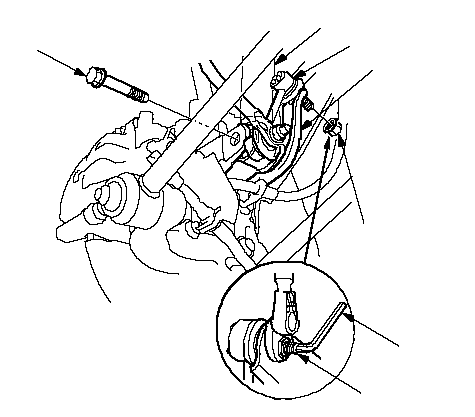 A A12 x 1.25 mmB 12 x 1.25 mmGEFDC |
| 6. | Remove the flange nut (B) while holding the joint pin (C) with a hex wrench (D), and disconnect the stabilizer link (E) from the stabilizer link bracket (F). |
| 7. | Lower the rear suspension, and remove the damper (G) from the vehicle. Damper spring are different, left and right. Mark the springs L and R before you continue. |
Disassembly/Inspection
| 1. | Compress the damper spring with a commercially available strut spring compressor (A) according to the manufacturer's instructions, then remove the self-locking nut (B) while holding the damper shaft with a hex wrench (C). Do not compress the spring more than necessary to remove the self-locking nut.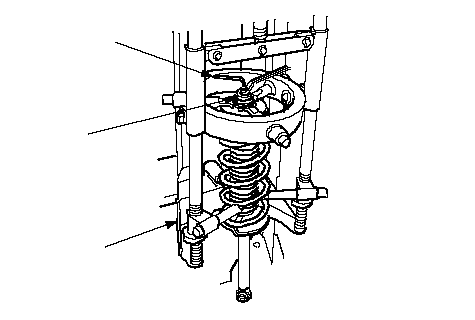 CBA CBA |
| 2. | Release the pressure from the strut spring compressor, then disassemble the damper as shown in the Exploded View. |
| 3. | Reassemble all parts, except the spring. |
| 4. | Compress the damper assembly by hand, and check for smooth operation through a full stroke, both compression and extension. The damper should extend smoothly and constantly when compression is released. If it does not, the gas is leaking and the damper should be replaced.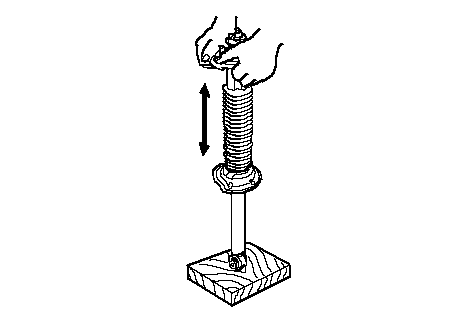 |
| 5. | Check for oil leaks, abnormal noises, and binding during these tests. |
Reassembly
| 1. | Install all parts except the self-locking nut and washer onto the damper unit by referring to the Exploded View. Align the bottom of the spring (A) and the stepped part of the lower spring seat (B), and align the damper mounting base (C) as shown.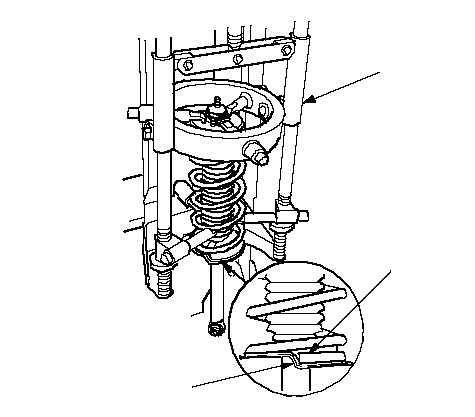 ABD ABD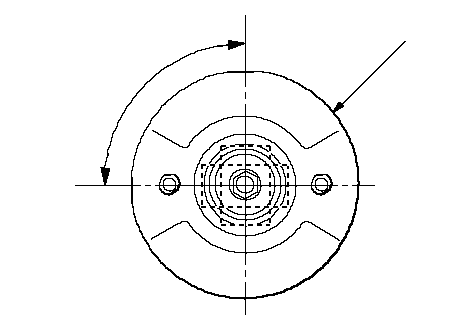 90°C 90°C |
| 2. | Install the damper assembly on a commercially available strut spring compressor (D). |
| 3. | Compress the damper spring with the spring compressor. |
| 4. | Install the washer (A), and loosely install a new self-locking nut (B).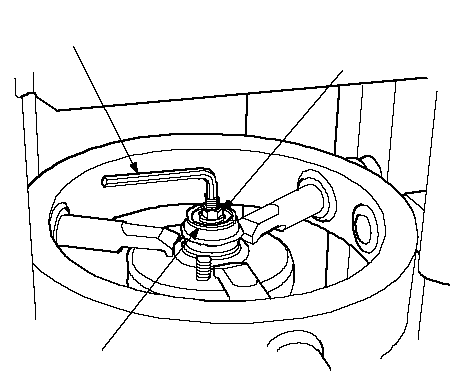 CB CB10 x 1.25 mm 29 N·m (3.0 kgf·m, 22 lbf·ft)A |
| 5. | Hold the damper shaft with a hex wrench (C), and tighten the self-locking nut to the specified torque. |
Installation
| 1. | Lower the rear suspension, position the damper (A),in the body.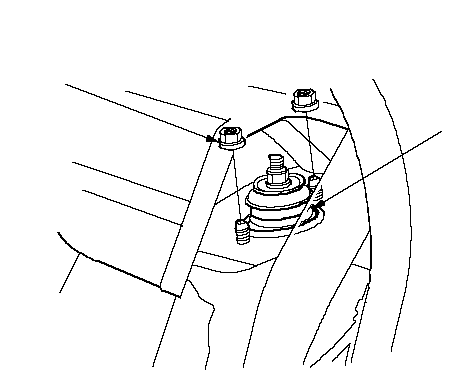 B B10 x 1.25 mm 38 N·m (3.9 kgf·m, 28 lbf·ft)A |
| 2. | Loosely install the flange nuts (B) onto the top of the damper. |
| 3. | Loosely install the flange bolt (A) on the bottom of the damper. Connect the stabilizer link (B) on the bracket (C), and loosely install the flange nut (D).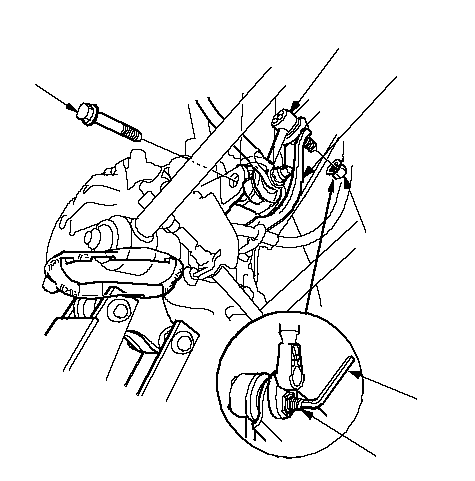 A A12 x 1.25 mm 108 N·m (11.0 kgf·m, 79.6 lbf·ft)BCD 10 x 1.25 mm 39 N·m (4.0 kgf·m, 29 lbf·ft)FE |
| 4. | Raise the rear suspension with a floor jack load the vehicle weight, and tighten the flange bolt to the specified torque. |
| 5. | Tighten the flange nut while holding the joint pin (E) with a hex wrench (F). |
| 6. | Tighten the two flange nuts on top of the damper to the specified torque. |
| 7. | Install the seat side bolster. |
| 8. | Install the rear shelf cover. |
| 9. | Clean the mating surface of the brake disc and the inside of the wheel, then install the rear wheel. |
| 10. | Check the rear wheel alignment, and adjust it if necessary. |