Clutch Master Cylinder Removal
NOTE: Do not spill brake fluid on the vehicle; it may damage the paint; if brake fluid does contact the paint, wash it off immediately with water.
| 1. | Remove the brake fluid from the clutch master cylinder reservoir with a syringe.
|
| 2. | Write down the frequencies for the radio's preset buttons. Disconnect the negative (-) cable first, then the positive (+) cable from the battery.
Remove the battery.
|
| 5. | Pry out the lock pin (A), and pull the pedal pin (B) out of the yoke. Remove the master cylinder mounting nuts (C).
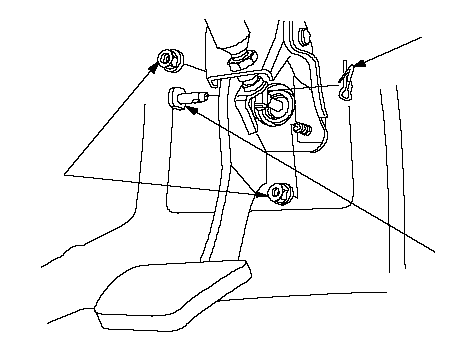 ABC ABC |
| 6. | Remove the reservoir mounting bolt (A).
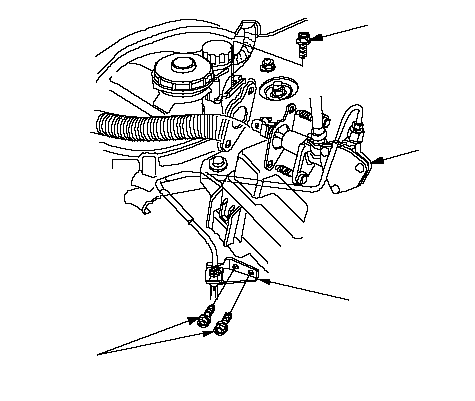 6 x 1.0 mm 6 x 1.0 mm
9.8 N·m (1.0 kgf·m, 7.2 lbf·ft)A
6 x 1.0 mm
9.8 N·m
(1.0 kgf·m,
7.2 lbf·ft)CB |
| 7. | Remove the clutch pipe bracket (B).
|
| 8. | Remove the clutch master cylinder (C).
|
| 9. | Disconnect the reservoir hose (A), then remove the retaining clip (B) and remove clutch pipe (C) from the clutch master cylinder (D). Plug the end of the reservoir hose and clutch pipe with a shop towel to prevent brake fluid from coming out.
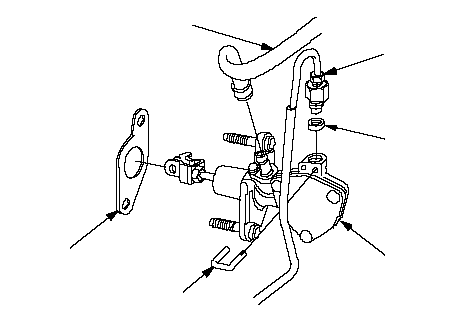 CAFBDE CAFBDE |
| 10. | Remove the O-ring (E) and clutch master cylinder seal (F) from the clutch master cylinder.
|
| 11. | Install the clutch master cylinder in the reverse order of removal, and note these item.
|
| 12. | Make sure the hose clamps (A) are positioned on the master cylinder (B) and reservoir (C) as shown.
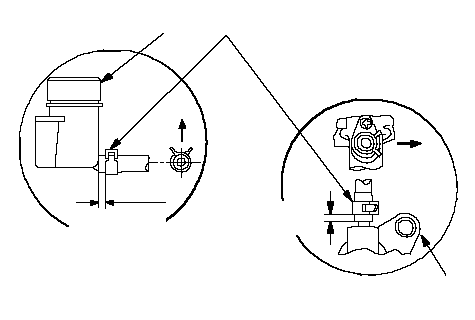 CAUP1-3 mm CAUP1-3 mm
(0.04-0.12 in.)1-3 mm
(0.04-0.12 in.)LEFT
SIDEB |
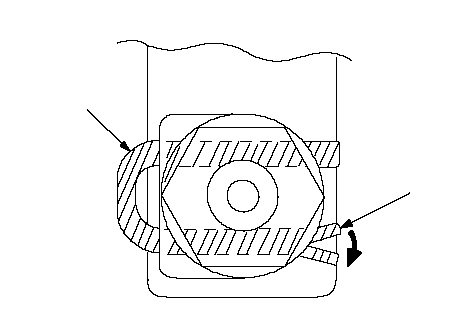
| 13. | To prevent the retaining clip (A) from coming off, pry to open the tip of the retaining clip (B) with a screwdriver.
 BA BA |