RADIO ANTENNA > INSTALLATION |
| 1. INSTALL ANTENNA ASSEMBLY |
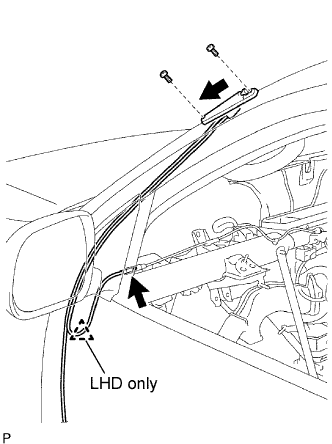 |
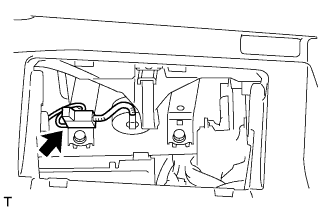
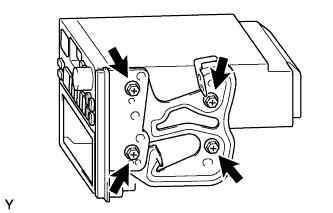
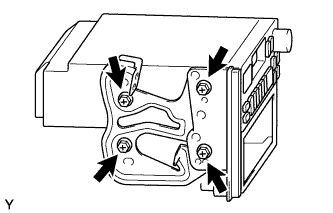
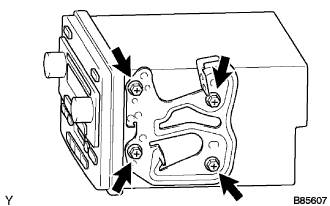
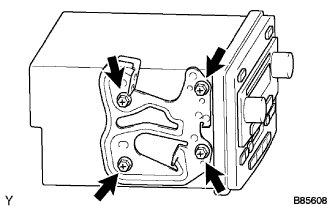
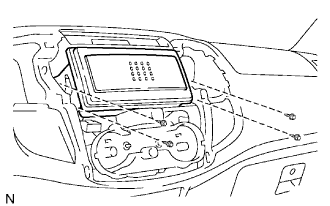
Install the antenna as shown in the illustration.
RHD
Install the 2 screws.
LHD
Attach the clamp and install the screws.
Connect the connector.
| 2. INSTALL INSTRUMENT PANEL SUB-ASSEMBLY UPPER |
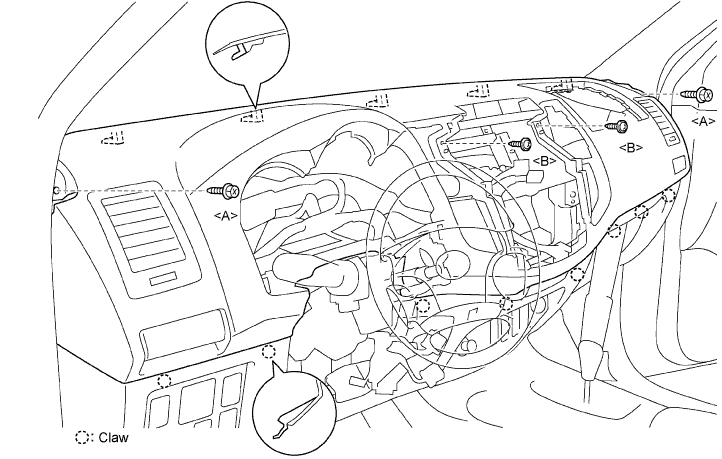
Securely attach the instrument panel claws to the vehicle body.
Install the instrument panel with the 2 bolts <A> and 2 screws <B>.
| 3. INSTALL FRONT PILLAR GARNISH LH |
Install the front pillar garnish LH (Click here or Click here or Click here).
| 4. INSTALL FRONT PILLAR GARNISH RH |
Install the front pillar garnish RH (Click here or Click here or Click here).
| 5. INSTALL FRONT PASSENGER AIRBAG ASSEMBLY (w/ Airbag System) |
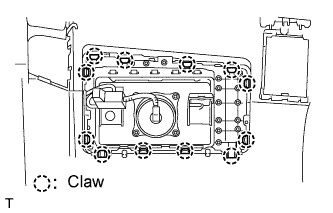 |
Attach the 12 claws to install the airbag.
Attach the clamp to the bracket.
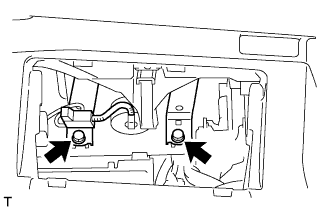 |
Tighten the 2 bolts.
 |
Connect the connector to the airbag.
| 6. INSTALL INSTRUMENT PANEL DOOR (w/o Airbag System) |
 |
Attach the 8 claws to install the door.
Install the door with the 2 screws <D>.
| 7. INSTALL GLOVE COMPARTMENT DOOR ASSEMBLY |
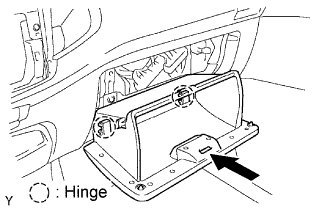 |
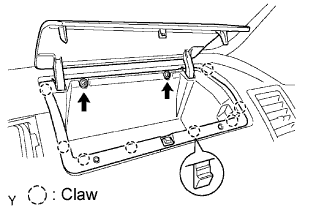
Attach the 2 hinges to install the door.
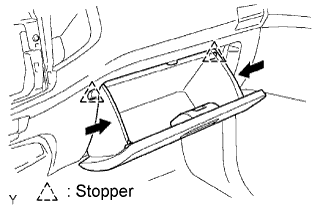 |
Push in the sides of the glove compartment door, as indicated by the arrows in the illustration. Then close the door to engage it to the 2 stoppers.
| 8. INSTALL RADIO RECEIVER ASSEMBLY WITH BRACKET |
 |
w/ Stereo opening cover:
Install the No. 1 radio bracket.
Install the 4 screws and radio bracket to the radio receiver.
 |
w/Stereo opening cover:
Install the No. 2 radio bracket.
Install the 4 screws and radio bracket to the radio receiver.
 |
w/o Stereo opening cover:
Install the No. 1 radio bracket.
Install the 4 screws and radio bracket to the radio receiver.
 |
w/o Stereo opening cover:
Install No. 2 radio bracket.
Install the 4 screws and radio bracket to the radio receiver.
Connect all connectors and install the radio receiver.
Install the radio receiver with the 4 screws.
| 9. INSTALL RADIO TUNER OPENING COVER WITH BRACKET |
 |
Install the opening cover with the 4 screws <F>.
| 10. INSTALL AIR CONDITIONING CONTROL ASSEMBLY |
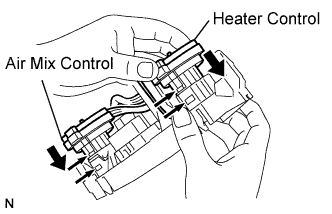 |
Attach the 2 claws to connect the air mix damper control cable.
Attach the 2 claws to connect the heater control cable.
 |
Connect the connector.
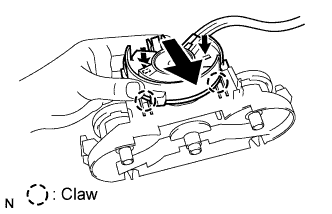
Attach the 2 claws to connect the air inlet damper control cable.
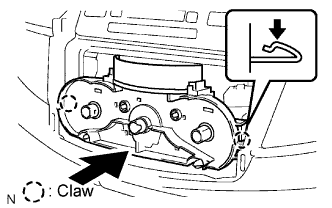 |
Attach the 2 claws to connect the A/C control.
| 11. INSTALL INSTRUMENT CLUSTER FINISH PANEL ASSEMBLY CENTER |
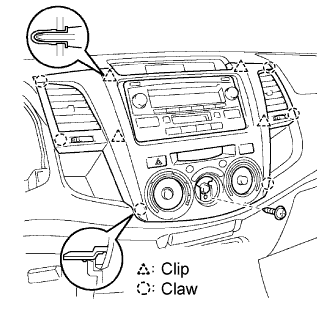 |
Connect all connectors.
Attach the 6 claws and 4 clips to install the panel.
Install the panel with the screw <C>.
| 12. INSTALL FRE/REC CONTROL KNOB |
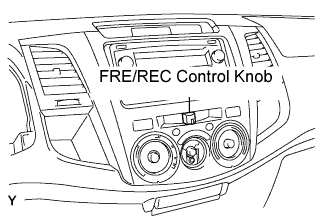 |
Install the control knob.
| 13. INSTALL HEATER CONTROL KNOB |
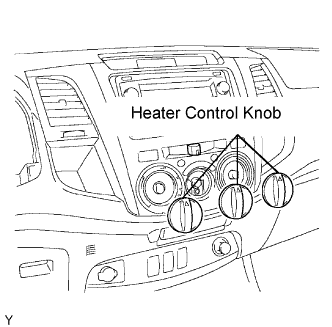 |
Install the 3 control knobs.
| 14. INSTALL COMBINATION METER ASSEMBLY |
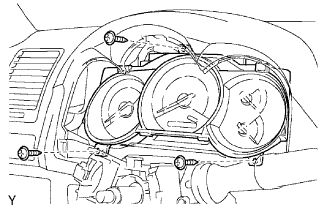 |
Connect all connectors.
Install the combination meter with the 3 screws <B>.
| 15. INSTALL INSTRUMENT CLUSTER FINISH PANEL |
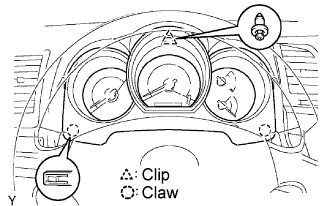 |
Attach the 2 claws to install the panel.
Install the clip.
| 16. INSTALL STEERING COLUMN COVER UPPER |
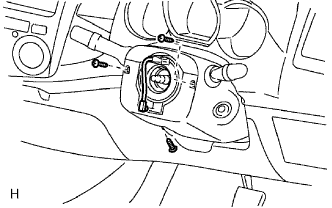 |
Install the cover lower with the 3 screws.
| 17. INSTALL STEERING COLUMN COVER LOWER |
|
Install the cover lower with the 3 screws.
| 18. REMOVE STEERING WHEEL ASSEMBLY |
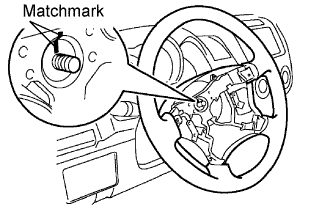 |
Align the matchmarks on the steering wheel and main shaft.
Install the steering set nut.
| 19. PLACE FRONT WHEELS FACING STRAIGHT AHEAD |
| 20. INSPECT STEERING WHEEL CENTER POINT |
| 21. INSTALL STEERING PAD ASSEMBLY |
Check for cuts, cracks or discoloration on the steering pad outer surface and in the grooved portion.
Check that the horn sounds.
| 22. CONNECT CABLE TO NEGATIVE BATTERY TERMINAL |
| 23. INSPECT STEERING PAD ASSEMBLY |
Check for cuts, cracks or discoloration on the steering pad outer surface and in the grooved portion.
Check that the horn sounds.
| 24. PERFORM INITIALIZATION |
Perform initialization (Click here).
| 25. CHECK SRS WARNING LIGHT |
Check the SRS warning light (see page ).
