FRONT NO. 1 SPEAKER > REMOVAL |
| 1. DISCONNECT CABLE FROM NEGATIVE BATTERY TERMINAL |
| 2. REMOVE FRONT DOOR WINDOW REGULATOR HANDLE ASSEMBLY (w/o Power Window) |
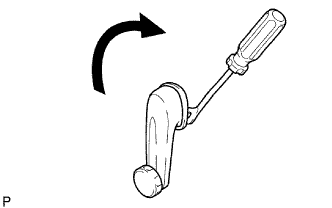 |
Insert a clip remover between the plate and trim.
Turn the handle clockwise to remove the handle.
| 3. REMOVE FRONT DOOR LOWER FRAME BRACKET GARNISH LH |
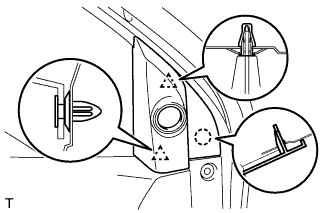 |
Using a screwdriver, detach the 2 clips and remove the garnish.
| 4. REMOVE DOOR PULL HANDLE |
 |
Remove the screw and pull handle.
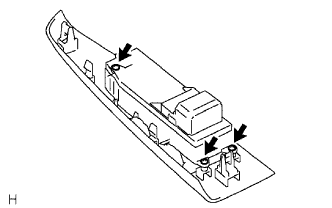
| 5. REMOVE FRONT ARMREST BASE PANEL UPPER LH (w/ Power Window) |
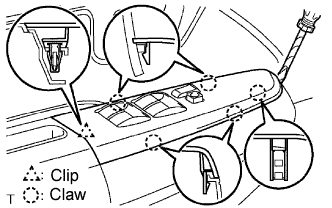 |
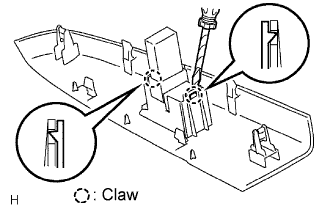
Using a screwdriver, detach the clip and 5 claws, and remove the panel together with the window regulator master switch.
Disconnect the switch connector.
 |
Driver side:
Remove the 3 screws and window regulator master switch from the base panel.
 |
Passenger side:
Using a screwdriver, detach the 2 claws and remove the window regulator switch from the base panel.
| 6. REMOVE FRONT DOOR TRIM BOARD SUB-ASSEMBLY LH |
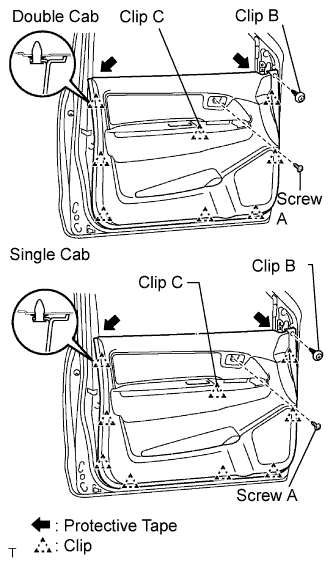 |
Remove the screw labeled A and clip labeled B.
Remove the trim.
Double cab:
Using a screwdriver, detach the 8 remaining clips and remove the trim.
Single cab:
Using a screwdriver, detach the 9 remaining clips and remove the trim.
Using a screwdriver, detach the 7 claws and remove the weatherstrip inner.
| 7. REMOVE FRONT NO. 1 SPEAKER ASSEMBLY |
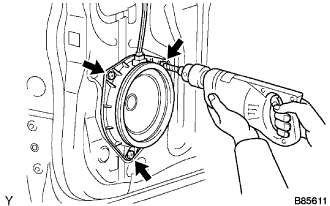 |
Disconnect the connector.
Using a drill bit with a diameter of less than 4 mm (0.16 in.), drill out the 3 rivet heads and remove the speaker.
Continue drilling and push out the remaining rivet fragments.
Using a vacuum cleaner, remove the rivet fragments and shavings from the inside of the door.
