HEADLIGHT ASSEMBLY > REMOVAL |
| 1. DISCONNECT CABLE FROM NEGATIVE BATTERY TERMINAL |
| 2. REMOVE RADIATOR GRILLE |
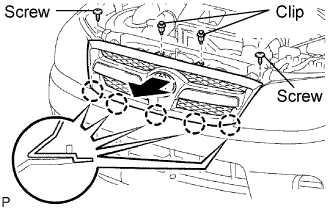 |
Using a clip remover, remove the 2 clips.
Remove the 2 screws.
Pull the radiator grille in the direction indicated by the arrow in the illustration to detach the 5 claws and remove the radiator grille.
| 3. REMOVE FRONT FENDER LINER LH |
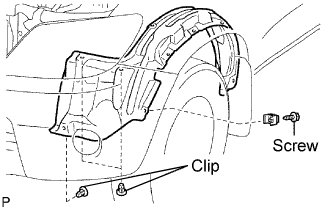 |
Remove the screw.
Using a clip remover, remove the 3 clips.
Partially remove the fender liner.
| 4. REMOVE ENGINE SIDE COVER SUB-ASSEMBLY LH (for 4WD) |
 |
Using a clip remover, remove the 2 clips.
Remove the 3 bolts and engine side cover.
| 5. REMOVE ENGINE SIDE COVER SUB-ASSEMBLY RH (for 4WD) |
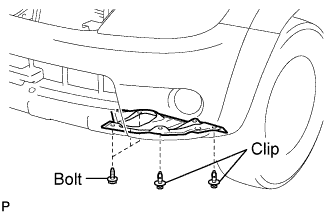
| 6. REMOVE FRONT BUMPER COVER |
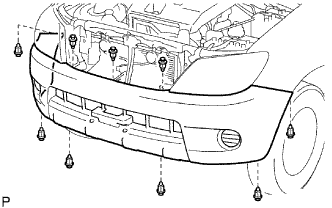 |
Using a clip remover, remove the 9 clips.
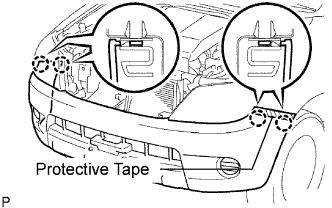 |
Put protective tape under the front fender.
Detach the 4 claws and remove the bumper cover.
| 7. REMOVE HEADLIGHT ASSEMBLY |
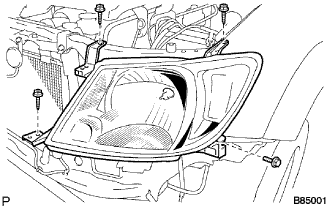 |
Remove the 3 screws and bolt.
Disconnect the connectors and remove the headlight.
| 8. REMOVE HEADLIGHT SOCKET COVER |
| 9. REMOVE NO. 1 HEADLIGHT BULB |
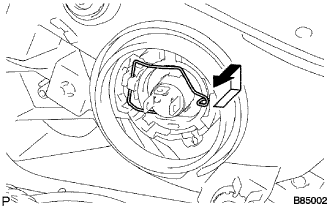 |
Release the lock of the set spring and remove the bulb.
| 10. REMOVE FRONT TURN SIGNAL LIGHT BULB |
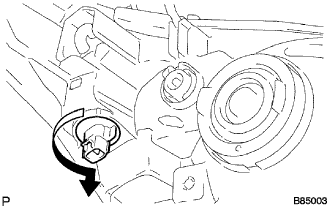 |
Turn the bulb/socket unit in the direction indicated by the arrow and pull to remove it.
Remove the bulb from the socket.
| 11. REMOVE CLEARANCE LIGHT BULB |
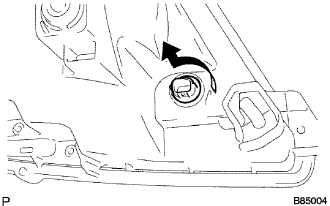 |
Turn the bulb in the direction indicated by the arrow and pull to remove it.
