FUEL LID LOCK CONTROL > REMOVAL |
| 1. DISCONNECT CABLE FROM NEGATIVE BATTERY TERMINAL |
| 2. REMOVE FRONT SEAT ASSEMBLY (for RHD) |
| 3. REMOVE REAR SEAT ASSEMBLY (for Double Cab) |
| 4. REMOVE REAR SEAT CUSHION ASSEMBLY LH (for Extra Cab) |
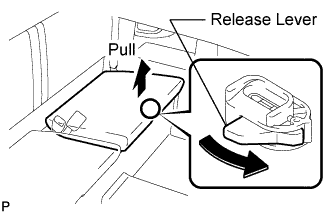 |
Pull the seat cushion lock hook's release lever in the direction of the arrow, and then disconnect the hook on the front of the seat cushion.
 |
Detach the seat cushion's 2 rear hooks from the vehicle body.
Remove the seat cushion.
| 5. REMOVE REAR SEAT CUSHION ASSEMBLY RH (for Extra Cab) |
| 6. REMOVE BACK PANEL GARNISH LOWER (for Extra Cab) |
 |
Using a screwdriver, detach the 6 claws.
Using a clip remover, detach the 5 clips and remove the garnish.
| 7. REMOVE CONSOLE BOX ASSEMBLY (for RHD) |
 |
Remove the 4 screws <F> and 2 bolts <E>.
Using a clip remover, remove the 2 clips and console box.
| 8. REMOVE FRONT DOOR SCUFF PLATE LH |
| 9. REMOVE FRONT DOOR SCUFF PLATE RH (for RHD) |
| 10. REMOVE COWL SIDE TRIM BOARD LH (for LHD) |
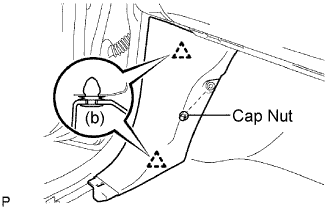 |
Remove the cap nut.
Using a clip remover, detach the 2 clips and remove the trim board.
| 11. REMOVE COWL SIDE TRIM BOARD RH (for RHD) |
| 12. REMOVE REAR DOOR SCUFF PLATE LH (for Double Cab) |
 |
Using a screwdriver, detach the 7 claws.
Using a clip remover, detach the 2 clips and remove the scuff plate.
| 13. REMOVE FRONT SEAT OUTER BELT ASSEMBLY LH |
 |
Single cab:
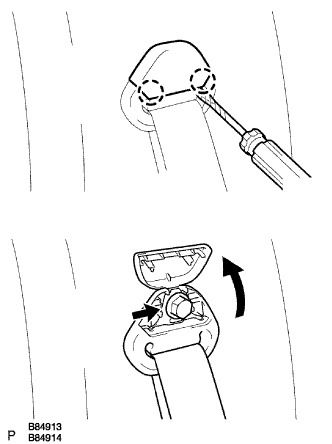
Remove the outer belt shoulder anchor.
Using a screwdriver, detach the 2 claws and open the seat belt anchor cover.
Remove the bolt and shoulder anchor.
 |
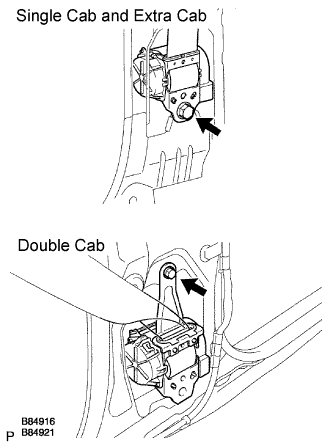
Double cab:
Remove the outer belt shoulder anchor.
Using a screwdriver, disengage the 4 claws and remove the seat belt anchor cover cap.
Remove the bolt and shoulder anchor.
 |
w/o Pretensioner:
Remove the bolt and seat belt.
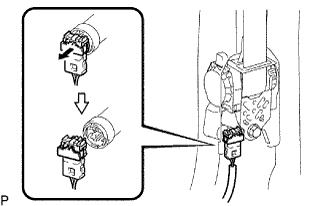 |
w/ Pretensioner:
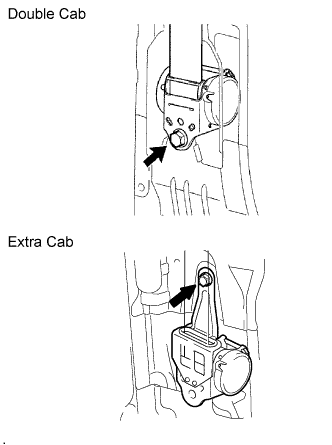
Disconnect the pretensioner connector as shown in the illustration.
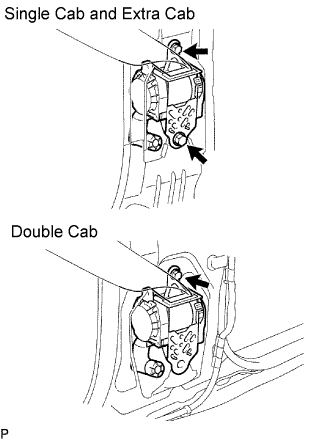 |
Remove the bolt and seat belt.
| 14. REMOVE REAR NO. 1 SEAT BELT ASSEMBLY OUTER LH (for Extra Cab) |
 |
Remove the bolt and floor anchor.
 |
Using a screwdriver, detach the 2 claws and open the seat belt anchor cover.
Remove the bolt.
 |
Remove the bolt and seat belt.
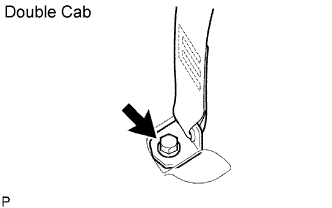
| 15. REMOVE CENTER PILLAR GARNISH LOWER LH (for Double Cab) |
 |
Using a screwdriver, detach the 2 claws.
Using a clip remover, detach the 2 clips and remove the garnish.
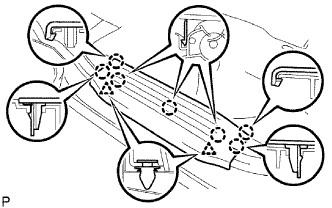
| 16. REMOVE QUARTER TRIM PANEL LOWER LH |
| 17. REMOVE QUARTER INSIDE TRIM BOARD LH (for Extra Cab) |
 |
Using a clip remover, detach the 7 clips.
Using a screwdriver, detach the 6 claws and remove the trim board.
Detach the claws and remove the trim pocket from the trim board.
| 18. REMOVE FLOOR CARPET ASSEMBLY FRONT (for RHD) |
Partially remove the floor carpet.
| 19. REMOVE REAR NO. 1 WHEEL OPENING EXTENSION LH (w/ Rear wheel opening extension) |
Remove the 7 screws.
Detach the 11 clips and remove the extension.
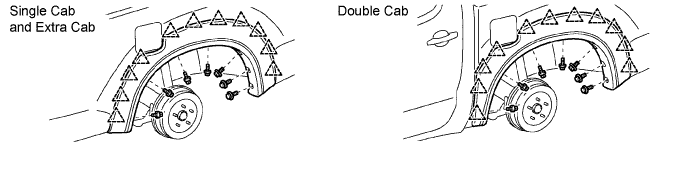
| 20. REMOVE REAR WHEEL HOUSE LINER LH |
Partially remove the liner.
| 21. REMOVE FUEL LID LOCK CONTROL CABLE SUB-ASSEMBLY |
Remove the open lever.
Remove the grommet from the vehicle body.
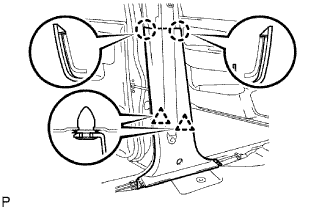
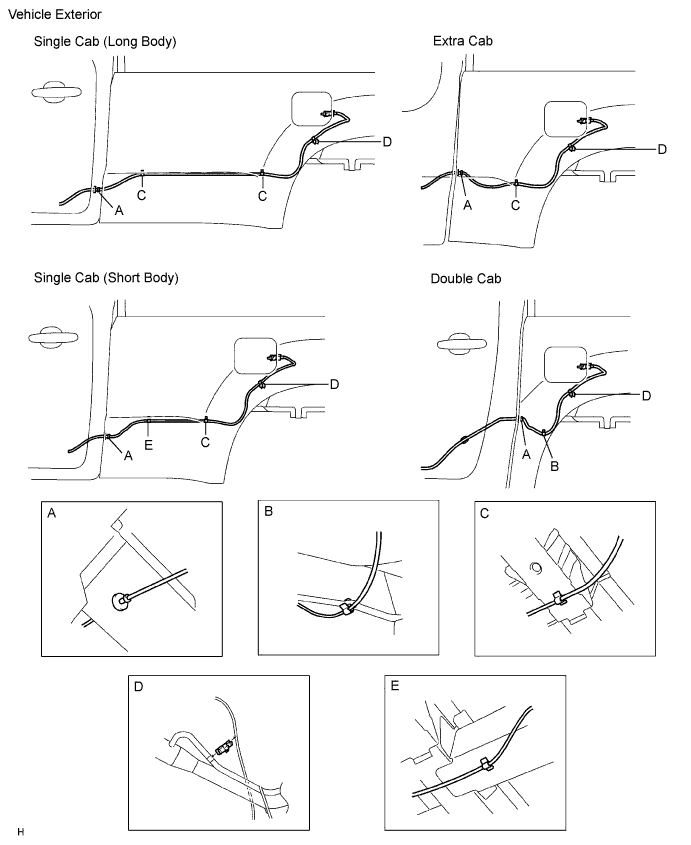
Remove the cable from the clamps as shown in the illustration.
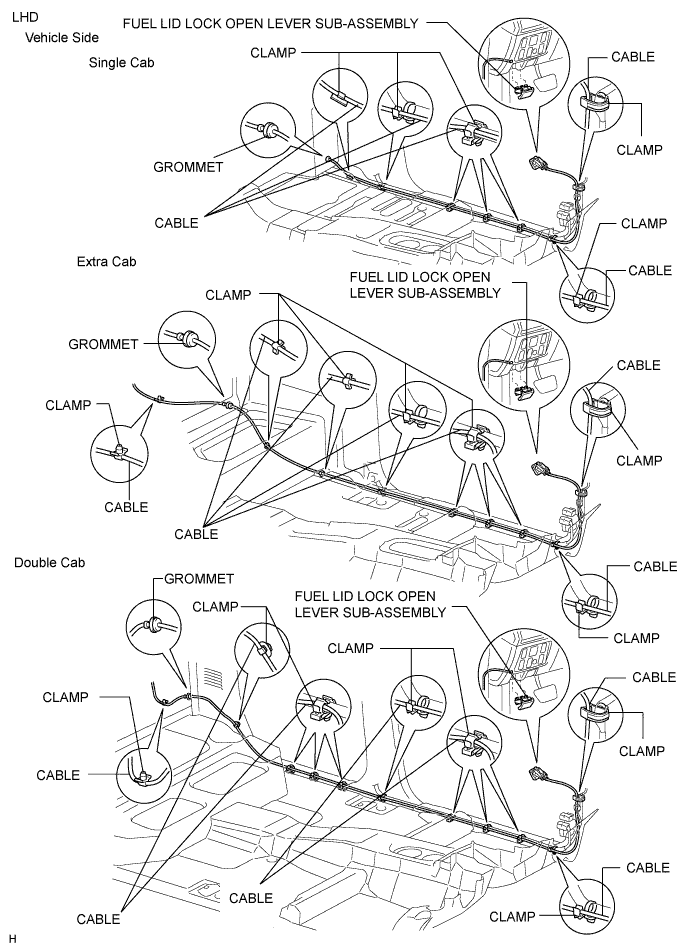
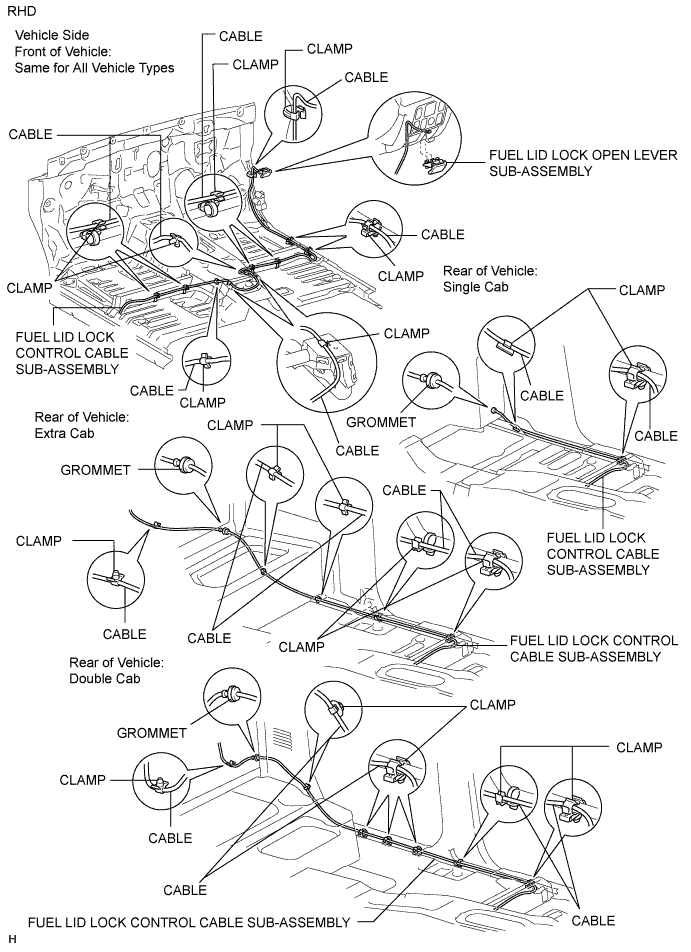
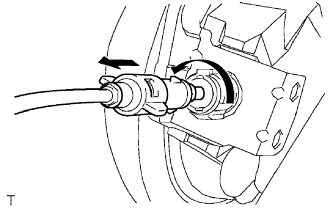 |
Turn the lock retainer counterclockwise and remove the cable from the retainer.
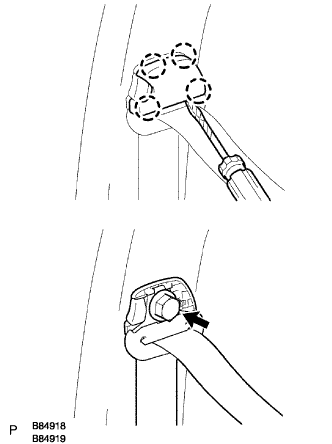
| 22. REMOVE FUEL FILLER OPENING LID LOCK RETAINER |
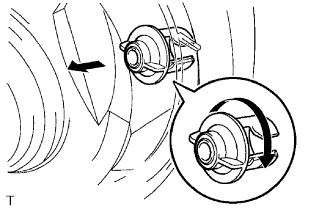 |
Turn the lock retainer clockwise and remove the lock retainer as shown in the illustration.
