ROOF HEADLINING (for Single Cab) > INSTALLATION |
| 1. INSTALL NO. 2 SIDE RAIL SPACER REAR LH |
| 2. INSTALL NO. 2 SIDE RAIL SPACER REAR RH |
| 3. INSTALL SIDE RAIL SPACER REAR LH (for LHD) |
| 4. INSTALL SIDE RAIL SPACER REAR RH (for RHD) |
| 5. INSTALL SIDE RAIL SPACER FRONT LH |
| 6. INSTALL SIDE RAIL SPACER FRONT RH |
| 7. INSTALL ROOF NO. 2 SILENCER PAD |
| 8. INSTALL ROOF HEADLINING ASSEMBLY |
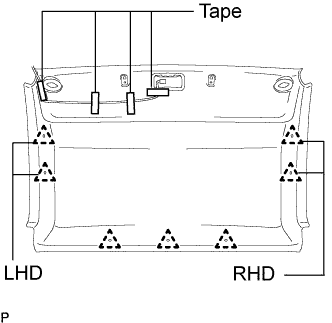 |
Align the wire harness to the markings, and then install the wire harness with tape.
Install the roof headlining with the 5 clips.
| 9. INSTALL ASSIST GRIP |
Install the assist grip with the 2 screws.
Close the 2 covers.
| 10. INSTALL VISOR HOLDER LH |
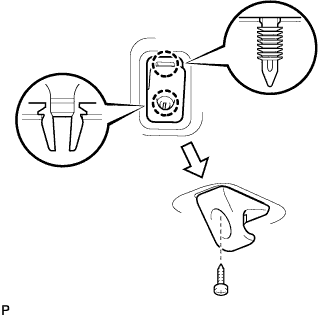 |
Attach the 2 claws to install the holder.
Install the screw.
| 11. INSTALL VISOR HOLDER RH |
| 12. INSTALL VISOR ASSEMBLY LH |
Install the visor with the screw.
| 13. INSTALL VISOR ASSEMBLY RH |
Install the visor with the screw.
| 14. INSTALL ROOM LIGHT ASSEMBLY |
| 15. INSTALL BACK PANEL TRIM (w/ Back Panel Trim) |
Install the back panel trim with the 3 clips.
| 16. INSTALL QUARTER INSIDE TRIM BOARD LH |
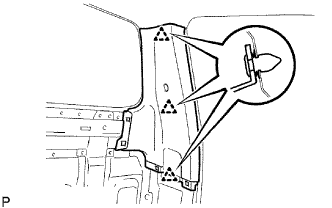 |
Attach the 3 clips to install the trim board.
| 17. INSTALL QUARTER INSIDE TRIM BOARD RH |
| 18. INSTALL QUARTER TRIM PANEL LOWER LH |
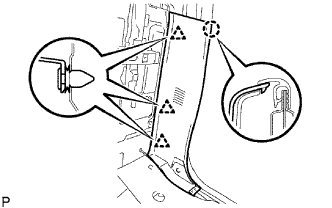 |
Attach the 3 clips and claw to install the trim panel.
| 19. INSTALL QUARTER TRIM PANEL LOWER RH |
| 20. INSTALL FRONT SEAT OUTER BELT ASSEMBLY LH |
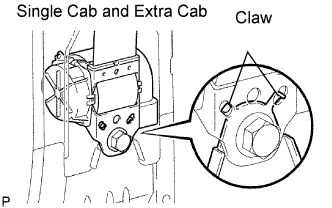 |
w/o Pretensioner single cab and extra cab:
Align the claws with the seat belt positioning holes and install the ELR of the seat belt with the bolt as shown in the illustration.
 |
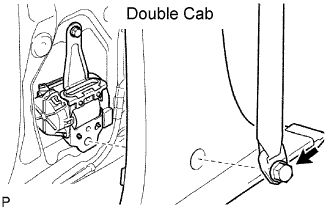
w/o Pretensioner Double cab:
Align the claws with the seat belt positioning holes and install the ELR of the seat belt with the bolt as shown in the illustration.
 |
w/ Pretensioner:
Install the bolt and seat belt.
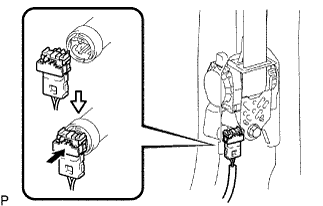 |
w/ Pretensioner:
Connect the pretensioner connector as shown in the illustration.
 |
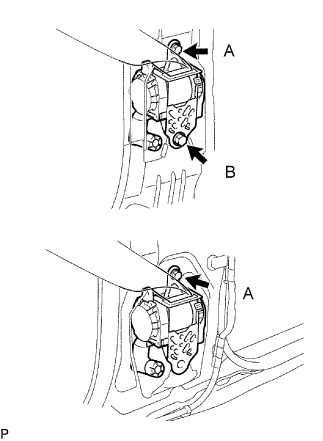
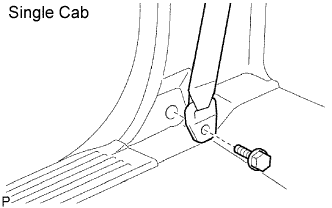
Single cab:
Install the anchor with the bolt.
Close the cover.
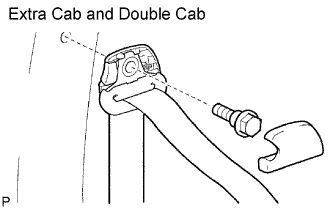 |
Extra cab and double cab:
Install the anchor with the bolt.
Install the cap.
 |
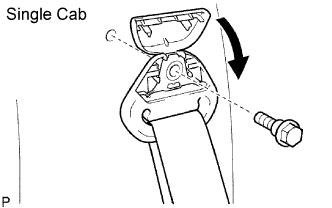
Single cab:
Install the quarter trim panel lower. Then install the seat belt floor anchor with the bolt.
 |
Extra cab:
Install the quarter inside trim board. Then install the seat belt floor anchor with the bolt.
 |
Double cab:
Install the anchor of the seat belt with the built-in bolt after installing the center pillar garnish lower.
| 21. INSTALL FRONT SEAT OUTER BELT ASSEMBLY RH |
|
w/o Pretensioner single cab and extra cab:
Align the claws with the seat belt positioning holes and install the ELR of the seat belt with the bolt as shown in the illustration.
|
w/o Pretensioner Double cab:
Align the claws with the seat belt positioning holes and install the ELR of the seat belt with the bolt as shown in the illustration.
|
w/ Pretensioner:
Install the bolt and seat belt.
|
w/ Pretensioner:
Connect the pretensioner connector as shown in the illustration.
|
Single cab:
Install the anchor with the bolt.
Close the cover.
|
Extra cab and double cab:
Install the anchor with the bolt.
Install the cap.
|
Single cab:
Install the quarter trim panel lower. Then install the seat belt floor anchor with the bolt.
|
Extra cab:
Install the quarter inside trim board. Then install the seat belt floor anchor with the bolt.
|
Double cab:
Install the anchor of the seat belt with the built-in bolt after installing the center pillar garnish lower.
| 22. INSTALL BACK PANEL GARNISH UPPER |
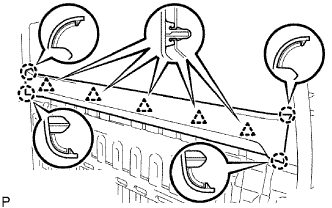 |
Attach the 5 clips and 4 claws to install the garnish.
| 23. INSTALL FRONT PILLAR GARNISH LH |
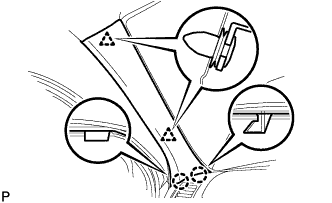 |
Attach the 2 clips and 2 claws to install the garnish.
w/ Assist grip:
Install the assist grip with the 2 screws.
w/ Assist grip:
Attach the 4 claws to install the 2 assist plugs.
| 24. INSTALL FRONT PILLAR GARNISH RH |
| 25. INSTALL COWL SIDE TRIM BOARD LH |
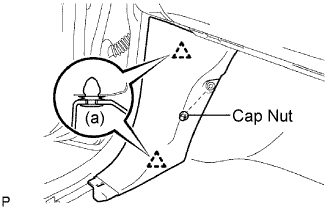 |
Attach the 2 clips to install the trim board.
Install the cap nut.
| 26. INSTALL COWL SIDE TRIM BOARD RH |
| 27. INSTALL FRONT DOOR OPENING TRIM LH |
| 28. INSTALL FRONT DOOR OPENING TRIM RH |
| 29. INSTALL FRONT DOOR SCUFF PLATE LH |
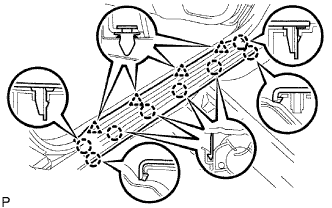 |
Attach the 4 clips and 8 claws to install the scuff plate.
| 30. INSTALL FRONT DOOR SCUFF PLATE RH |
| 31. CONNECT CABLE TO NEGATIVE BATTERY TERMINAL |
| 32. PERFORM INITIALIZATION |
Perform initialization (Click here).
