ROOF DRIP SIDE FINISH MOULDING > INSTALLATION |
| Item | Temperature |
| Clip | 40 to 60°C (104 to 140°F) |
| Vehicle Body | 20 to 30°C (68 to 86°F) |
| 1. INSTALL NO. 1 ROOF DRIP SIDE FINISH MOULDING CLIP |
Remove the tape that remains on the surfaces of the moulding and vehicle body, and then clean the surfaces with white gasoline.
Heat the clip installation surfaces of the vehicle body and the installation part of the clip.
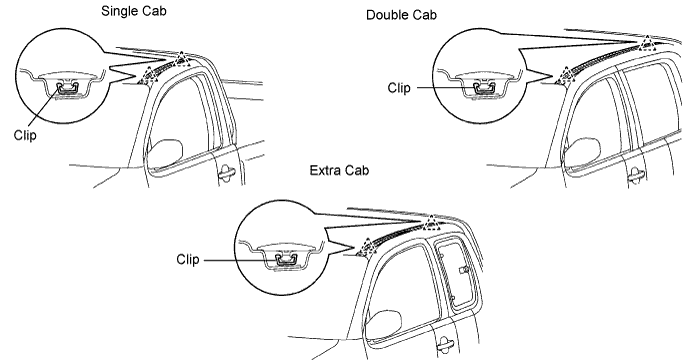
Install new clips to the positions shown in the illustration. Press-fit the clips by hand.

| 2. INSTALL ROOF DRIP SIDE FINISH MOULDING LH |
Put protective tape around the edges of the moulding.
Adjust the position of the moulding so that the front and rear ends attach to the vehicle's 2 clips, and install the moulding.