VACUUM SWITCHING VALVE > INSTALLATION |
| 1. INSTALL VACUUM SWITCHING VALVE (for EGR Cut) |
 |
Install the valve with the bolt.
| 2. INSTALL VACUUM SWITCHING VALVE BRACKET |
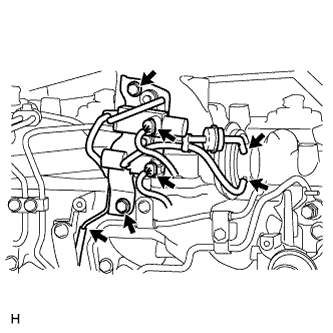 |
Install the bracket with the 2 bolts.
Connect the vacuum hoses to the 3 locations.
Connect the 2 connectors.
| 3. INSTALL CHARGE AIR COOLER ASSEMBLY |
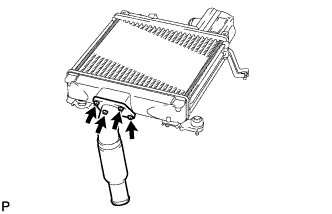 |
Install a new gasket and the intake air connector with the 4 bolts.
 |
Using a 22 mm deep socket wrench, install a new gasket and the IAT sensor.
 |
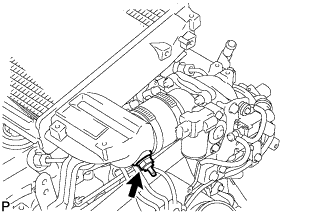
Install the CAC with the 4 bolts.
Tighten the 4 hose clamps of the No. 1 and No. 2 air hose.
Connect the diesel turbo IAT sensor connector.
| 4. INSTALL NO. 1 ENGINE COVER SUB-ASSEMBLY |
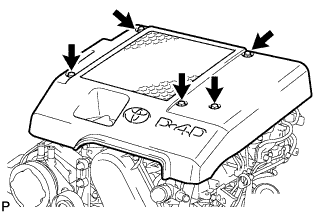 |
Install the cover with the 3 bolts and 2 nuts.
| 5. CONNECT CABLE FROM NEGATIVE BATTERY TERMINAL |
| 6. PERFORM INITIALIZATION |
Perform initialization (Click here).
