DIRECT CLUTCH > DISASSEMBLY |
| 1. INSPECT PACK CLEARANCE OF DIRECT CLUTCH |
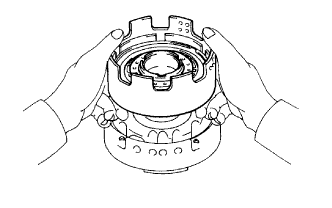 |
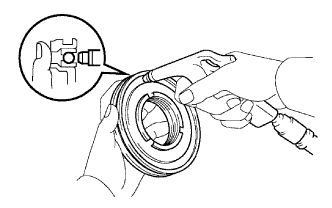
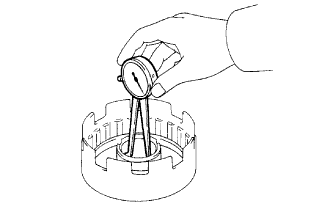
Place the direct clutch assembly onto the O/D support assembly.
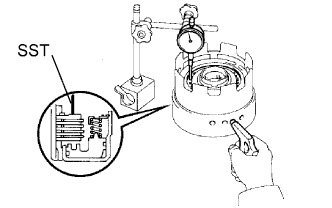 |
Using SST and a dial indicator, measure the direct clutch pack clearance while applying and releasing compressed air (186 to 206 kPa (1.9 to 2.1 kgf/cm2, 27 to 30 psi)).
| No. | Thickness | No. | Thickness |
| 53 | 3.3 mm (0.130 in.) | 57 | 3.7 mm (0.146 in.) |
| 54 | 3.4 mm (0.134 in.) | 58 | 3.8 mm (0.150 in.) |
| 55 | 3.5 mm (0.138 in.) | 60 | 4.0 mm (0.157 in.) |
| 56 | 3.6 mm (0.142 in.) | 62 | 4.2 mm (0.165 in.) |
| 2. REMOVE DIRECT CLUTCH FLANGE |
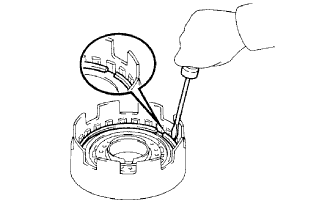 |
Using a screwdriver, remove the snap ring from the direct clutch drum.
Remove the flange, 5 plates and 5 discs.
| 3. INSPECT DIRECT CLUTCH FLANGE |
 |
Replace all discs if one of the following problems is present: 1) a disc, plate or flange is worn or burnt, 2) the lining of a disc is peeled off or discolored, or 3) grooves or printed numbers have even a little bit of damage.
| 4. REMOVE DIRECT CLUTCH RETURN SPRING |
| 5. INSPECT DIRECT CLUTCH RETURN SPRING |
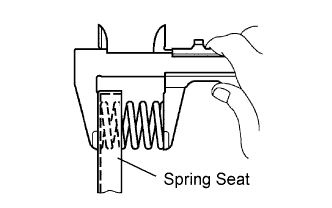 |
Using a vernier caliper, measure the free length of the spring together with the spring seat.
| 6. REMOVE DIRECT CLUTCH PISTON |
 |
Place the direct clutch drum onto the overdrive support.
Hold the direct clutch piston, and apply compressed air (196 kPa (2.0/kgf cm2, 28.5 psi)) to the overdrive support to remove the direct clutch piston.
Remove the direct clutch piston.
 |
Using a small screwdriver, remove the 2 O-rings from the piston.
| 7. INSPECT DIRECT CLUTCH PISTON |
 |
Check that the check ball is free by shaking the piston.
Check that the valve does not have leaks by applying low-pressure compressed air.
| 8. INSPECT DIRECT CLUTCH DRUM |
 |
Using a dial indicator, measure the inside diameter of the clutch drum bush.
