FRONT DOOR > INSTALLATION |
| 1. INSTALL FRONT DOOR WEATHERSTRIP LH |
 |
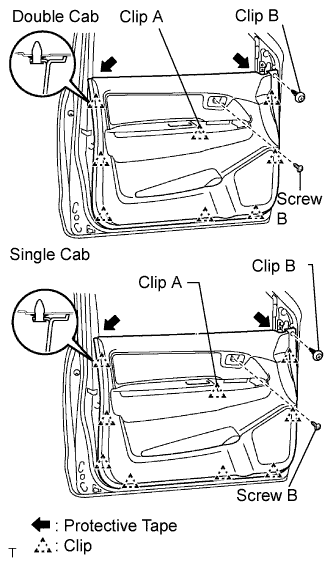
Install the clip indicated by the arrow in the illustration.
Double cab:
Attach the 33 clips and install the weatherstrip.
Single cab:
Attach the 34 clips and install the weatherstrip.
| 2. INSTALL FRONT DOOR CHECK ASSEMBLY LH |
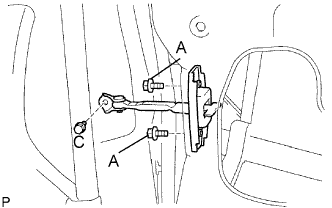 |
Install the door check to the door panel with the 2 bolts.
Apply adhesive to the bolt.
Install the door check to the body panel with the bolt.
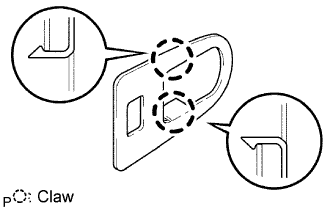
| 3. INSTALL FRONT DOOR OUTSIDE HANDLE PAD REAR |
 |
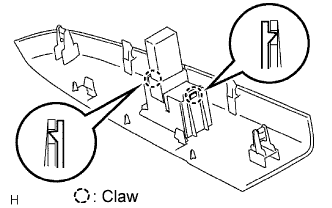
Attach the 2 claws to install the pad.
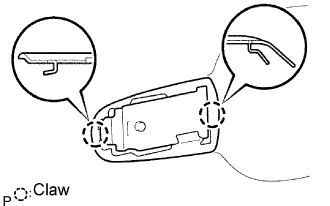
| 4. INSTALL FRONT DOOR OUTSIDE HANDLE PAD FRONT |
 |
Attach the 2 claws to install the pad.
| 5. INSTALL FRONT DOOR OUTSIDE HANDLE FRAME SUB-ASSEMBLY LH |
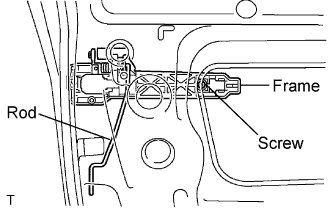 |
Install the front door lock open rod.
Using a T30 "torx" socket, install the frame with the screw.
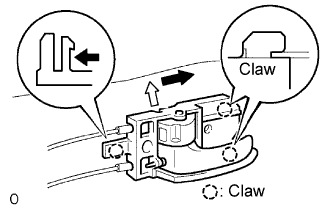
| 6. INSTALL FRONT DOOR HANDLE ASSEMBLY OUTSIDE LH |
 |
Install the outside handle pad front and rear.
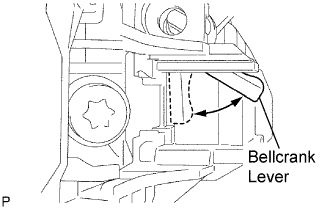
Pull and hold the ballcrank lever of the frame as shown in the illustration.
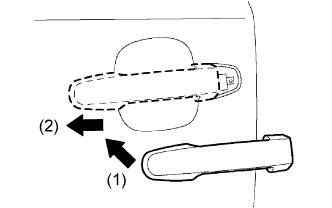 |
Install the handle by pushing it in the direction of the arrows in the illustration.
| 7. INSTALL FRONT DOOR LOCK ASSEMBLY LH |
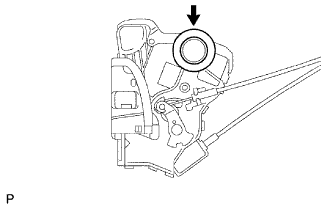 |
Install a new door lock wire harness packing.
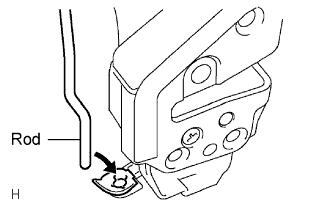 |
Install the control rod into the door lock, and then set it to the door panel.
Apply adhesive to the threads of the 3 screws.
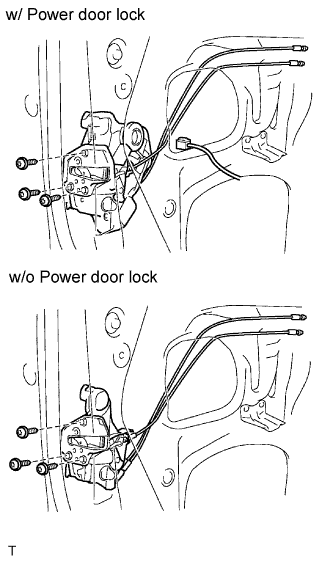 |
Using a T30 "torx" socket, install the door lock with the 3 screws.
w/ Power door lock:
Connect the door lock connector.
| 8. INSTALL FRONT DOOR OUTSIDE HANDLE COVER |
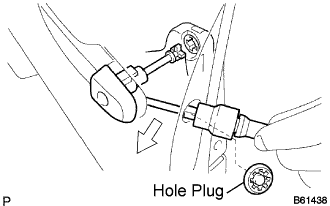 |
Using a T30 "torx" socket, install the cover (with the door key cylinder installed) with the screw.
Install the hole plug.
| 9. INSTALL FRONT DOOR FRAME SUB-ASSEMBLY REAR LOWER LH |
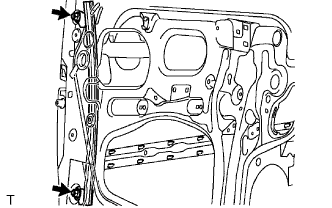 |
Install the frame with the 2 bolts.
| 10. INSTALL POWER WINDOW REGULATOR MOTOR ASSEMBLY LH (w/ Power window) |
 |
Using a T25 "torx" driver, install the motor with the 3 screws.
| 11. INSTALL FRONT DOOR REGULATOR SUB-ASSEMBLY LH |
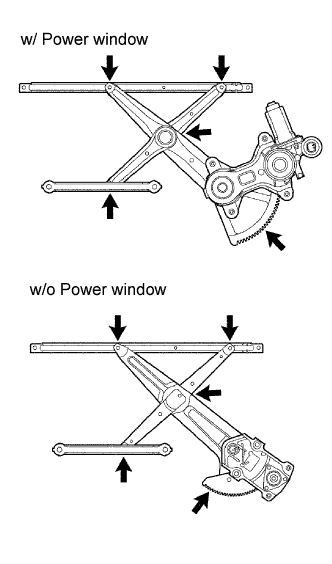 |
 |
w/ Power window:
Install the regulator with the 6 bolts.
w/o Power window:
Install the regulator with the 5 bolts.
w/ Power window:
Connect the window regulator connector.
| 12. INSTALL FRONT DOOR GLASS SUB-ASSEMBLY LH |
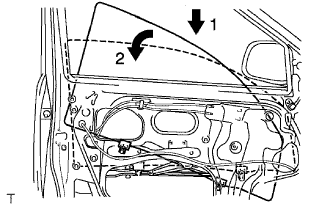 |
Insert the door glass into the door panel along the glass run as indicated by the arrows in the illustration.
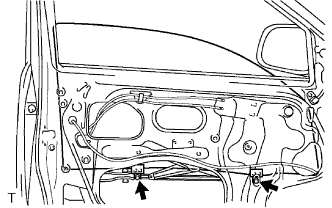 |
Install the door glass to the window regulator with the 2 bolts.
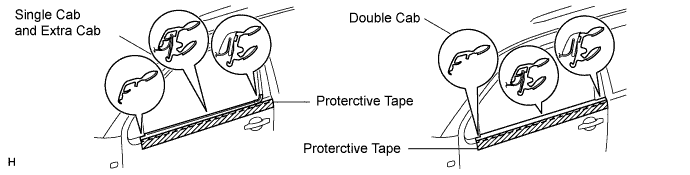
| 13. INSTALL FRONT DOOR BELT MOULDING LH |
Put protective tape to the upper part of the door.
Attach the claws to install the moulding.
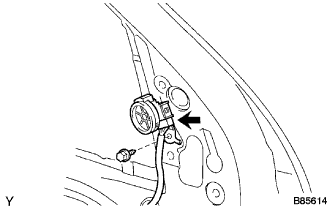
| 14. INSTALL OUTER REAR VIEW MIRROR SUB-ASSEMBLY LH |
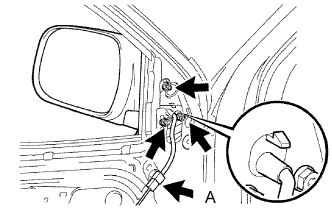 |
Install the mirror with the 3 nuts.
w/ Power mirror control:
Connect the connector labeled A.
| 15. INSTALL FRONT DOOR SERVICE HOLE COVER LH |
Install a new service hole cover.
Install the 2 grommets.
Install the bracket with the 2 screws.
| 16. INSTALL FRONT DOOR INSIDE HANDLE SUB-ASSEMBLY LH |
 |
Move the inside handle in the direction indicated by the arrow in the illustration to install the inside handle.
Connect the 2 cables to the inside handle.
| 17. INSTALL FRONT NO. 2 SPEAKER ASSEMBLY (w/ Front No. 2 speaker:) |
 |
Install the speaker with the screw.
Connect the connector.
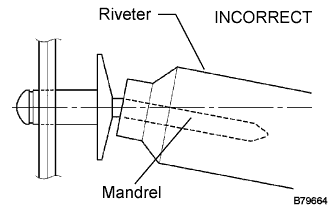
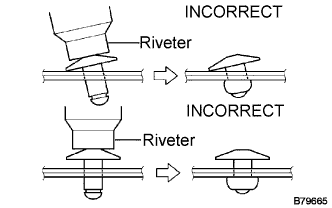
| 18. INSTALL FRONT NO. 1 SPEAKER ASSEMBLY |
 |
Install the speaker to the door.
Using an air riveter or hand riveter, install the speaker with 3 new rivets.
 |
 |
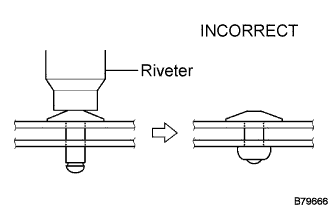 |
Connect the connector.
| 19. INSTALL FRONT DOOR TRIM BOARD SUB-ASSEMBLY LH |
 |
Attach the 7 claws to install the weatherstrip inner.
Install the trim board.
Double cab:
Attach the 8 clips to install the trim board.
Single cab:
Attach the 9 clips to install the trim board.
Install the screw and clip.
| 20. INSTALL FRONT ARMREST BASE PANEL UPPER LH (w/ Power window) |
 |
Passenger side:
Attach the 2 claws and install the window regulator switch to the base panel.
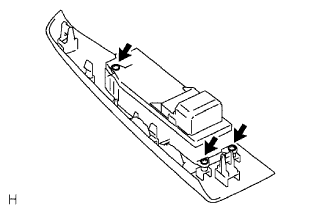 |
Driver side:
Install the window regulator master switch to the base panel.
Install the 3 screws.
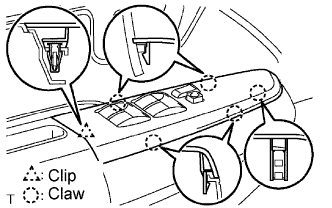 |
Connect the switch connector.
Attach the clip and 5 claws to install the panel together with the window regulator master switch.
| 21. INSTALL DOOR PULL HANDLE |
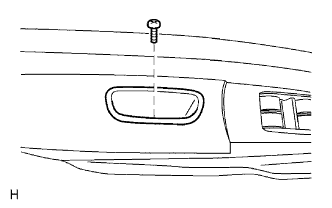 |
Install the screw and pull handle.
| 22. INSTALL FRONT DOOR LOWER FRAME BRACKET GARNISH LH |
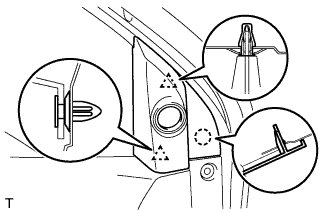 |
Attach the 2 clips to install the garnish.
| 23. INSTALL FRONT DOOR WINDOW REGULATOR HANDLE ASSEMBLY (w/o Power window) |
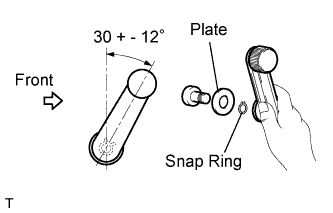 |
Install the snap ring to the regulator handle.
With the window fully closed, install the regulator handle and plate to the regulator shaft, as shown in the illustration.
| 24. CONNECT CABLE TO NEGATIVE BATTERY TERMINAL |
| 25. PERFORM INITIALIZATION |
Perform initialization (Click here).
