STEERING COLUMN ASSEMBLY > INSTALLATION |
| 1. INSTALL STEERING COLUMN ASSEMBLY |
Install the steering column with the 3 bolts.
| 2. INSTALL STEERING COLUMN HOLE COVER SUB-ASSEMBLY |
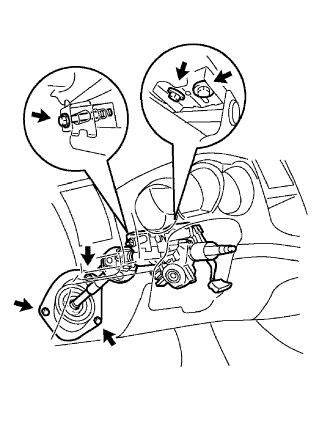 |
Install the cover with the 3 bolts.
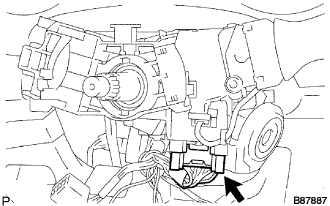
| 3. CONNECT CONNECTOR |
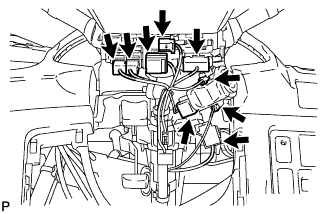 |
Connect the 9 connectors and attach the wire harness clamps to the steering column.
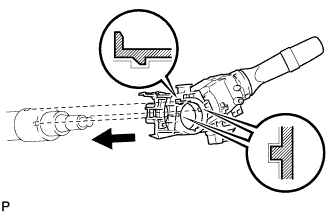
| 4. INSTALL STEERING SLIDING YOKE |
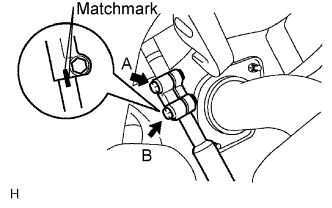 |
Align the matchmarks on the steering yoke and steering intermediate shaft.
Install the bolt labeled B.
Tighten the bolt labeled A.
| 5. INSTALL INSTRUMENT PANEL SUB-ASSEMBLY LOWER |
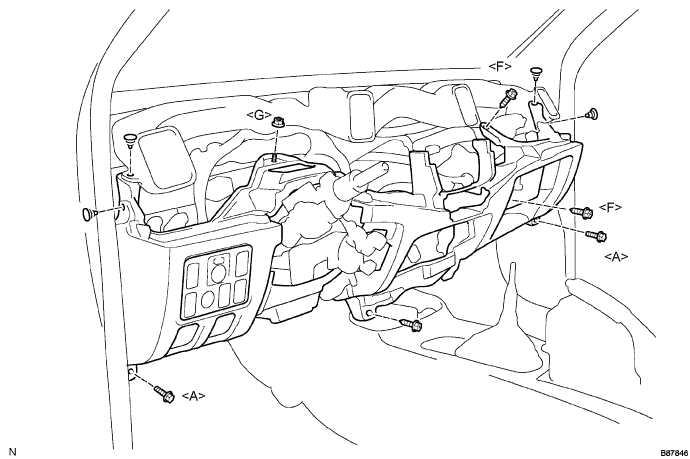
Install the hood lock control cable lever and fuel lid control cable lever.
Connect all connectors, and attach all clamps to install the panel.
Install the panel with the 3 screws <F>, 2 bolts <A> and nut <G>.
| 6. INSTALL INSTRUMENT PANEL SUB-ASSEMBLY UPPER |
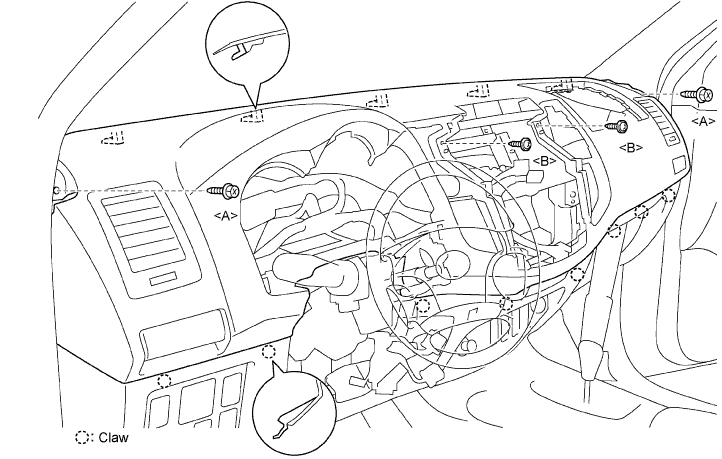
Securely attach the instrument panel claws to the vehicle body.
Install the instrument panel with the 2 bolts <A> and 2 screws <B>.
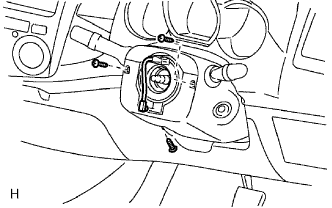
| 7. INSTALL HEADLIGHT DIMMER SWITCH ASSEMBLY |
 |
Install the headlight dimmer switch with the claw as shown in the illustration.
 |
Install the headlight dimmer switch with the clamp.
 |
Connect the connector.
| 8. INSTALL WIPER AND WASHER SWITCH ASSEMBLY |
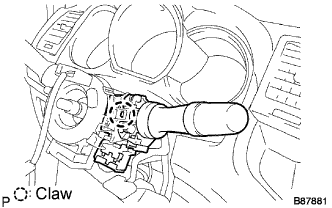 |
Attach the claw to install the wiper switch.
Connect the connectors.
| 9. INSTALL SPIRAL CABLE SUB-ASSEMBLY |
Check that the front wheels are facing straight ahead.
Set the turn signal switch to the neutral position.
Install the spiral cable.
Connect the connectors to the spiral cable.
| 10. INSTALL INSTRUMENT CLUSTER FINISH PANEL |
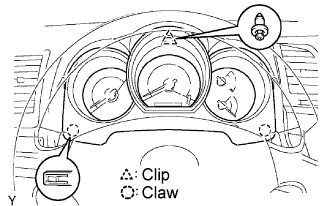 |
Attach the 2 claws to install the panel.
Install the clip.
| 11. INSTALL STEERING COLUMN UPPER COVER |
| 12. INSTALL STEERING COLUMN LOWER COVER |
 |
Install the cover lower with the 3 screws.
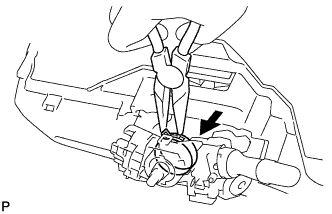
| 13. INSTALL STEERING WHEEL ASSEMBLY |
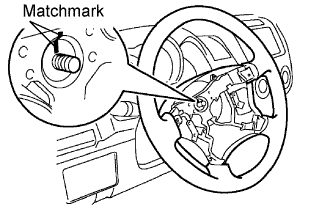 |
Align the matchmarks on the steering wheel and main shaft.
Install the steering set nut.
| 14. INSTALL STEERING PAD ASSEMBLY |
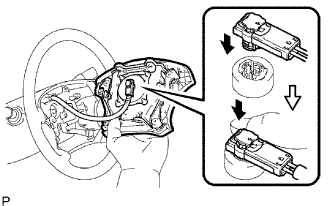 |
Support the steering pad with one hand as shown in the illustration.
Connect the airbag connector.
Connect the horn connector.
Install the steering pad after confirming that the circumference grooves of the screws are caught on the screw case.
Using a T30 "torx" socket, install the 2 screws.
| 15. PLACE FRONT WHEELS FACING STRAIGHT AHEAD |
| 16. CONNECT CABLE TO NEGATIVE BATTERY TERMINAL |
| 17. PERFORM INITIALIZATION |
Perform initialization (Click here).
