EXHAUST PIPE > INSTALLATION |
| 1. INSTALL FRONT EXHAUST PIPE ASSEMBLY |
Install the front pipe to the pipe support.
Install a new gasket and the front pipe to the exhaust manifold.
Install the front pipe with the 2 nuts.
| 2. INSTALL FRONT NO. 2 EXHAUST PIPE ASSEMBLY |
Install the front pipe to the pipe support.
Install 2 new gaskets and the front pipe to the exhaust manifold.
Install the front pipe with the 2 bolts and 2 nuts.
| 3. INSTALL CENTER EXHAUST PIPE ASSEMBLY |
Using a vernier caliper, measure the free length of the compression spring.
Install the center pipe to the 3 pipe supports.
Install a new gasket to the front exhaust pipe.
Install the exhaust pipe with the 2 bolts and 2 springs.
| 4. INSTALL TAILPIPE ASSEMBLY |
Install a new gasket on the center exhaust pipe.
Install the tailpipe with the 2 bolts.
| 5. INSTALL HEATED OXYGEN SENSOR (for Bank 1 Sensor 2) |
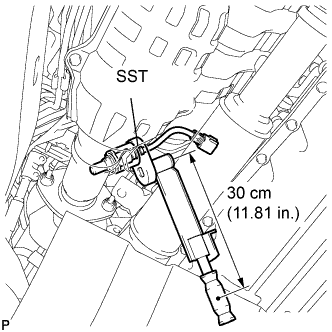 |
Using SST, install the sensor to the front exhaust pipe.
Connect the sensor connector.
| 6. INSTALL HEATED OXYGEN SENSOR (for Bank 2 Sensor 2) |
 |
Using SST, install the sensor to the front exhaust pipe.
Connect the sensor connector.
| 7. CONNECT CABLE TO BATTERY NEGATIVE TERMINAL |
| 8. CHECK EXHAUST GAS LEAKS |
| 9. PERFORM INITIALIZATION |
Perform initialization (Click here).
