EXHAUST PIPE > INSTALLATION

for Preparation Click here


1. INSTALL FRONT EXHAUST PIPE ASSEMBLY


    A111834
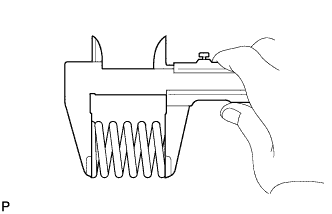
  1. Using a vernier caliper, measure the free length of the compression spring.

    Minimum length:
    40 mm (1.57 in.)
    If the free length is less than the minimum, replace the compression spring.

  1. Install the front pipe to the pipe support.


    A111803E01
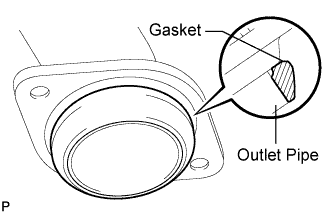
  1. Install a new gasket to the outlet pipe.

    NOTICE:
    1. Be careful with the installation direction of the gasket.
    1. Do not reuse the gasket.
    1. To ensure a proper seal, do not use the front pipe to force the gasket onto the outlet pipe.

    HINT:
    1. Using a plastic-faced hammer, uniformly strike the gasket so that the gasket and outlet pipe are properly fit.

  1. Install the front pipe with the 2 compression springs and 2 bolts. Alternately tighten the bolts in several passes.

    Torque:
    43 N*m{ 438 kgf*cm , 32 ft.*lbf }

    CAUTION:
    Do not reuse the gasket.


2. INSTALL CENTER EXHAUST PIPE ASSEMBLY
  1. Install the center pipe to the 3 pipe supports.

  1. Install a new gasket and the center pipe to the front pipe with the 2 bolts and 2 nuts. Alternately tighten the bolts in several passes.

    Torque:
    48 N*m{ 489 kgf*cm , 35 ft.*lbf }

    CAUTION:
    Do not reuse the gasket.


3. INSTALL TAILPIPE ASSEMBLY
  1. Install the tailpipe to the pipe support.

  1. Install a new gasket and the tailpipe to the center pipe with the 2 bolts and 2 nuts. Alternately tighten the bolts in several passes.

    Torque:
    48 N*m{ 489 kgf*cm , 35 ft.*lbf }

    CAUTION:
    Do not reuse the gasket.


4. CHECK FOR EXHAUST GAS LEAKS
If gas is leaking, tighten the problem areas to stop the leak. Replace damaged parts as necessary.