REAR BRAKE (for 4WD) > DISASSEMBLY |
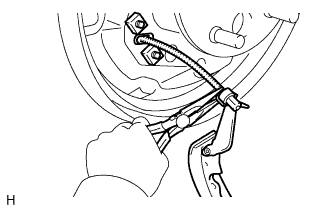
| 1. REMOVE REAR BRAKE AUTOMATIC ADJUST LEVER LH |
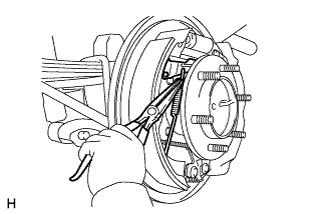 |
Using needle-nose pliers, remove the adjust lever tension spring and lever.
| 2. REMOVE BRAKE SHOES |
 |
Using pliers, remove the shoe hold down springs, pins, front brake shoe and rear brake shoe.
 |
Push the front or rear side of the wheel brake cylinder with the brake shoe. Then remove the side of the brake shoe opposite to the side of the cylinder being pushed. Finally remove the remaining side of the brake shoe.
 |
Move one of the shoes downward and remove the shoe tension spring.
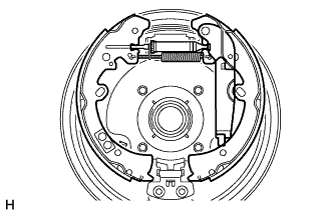 |
Remove the brake shoe front and rear side.
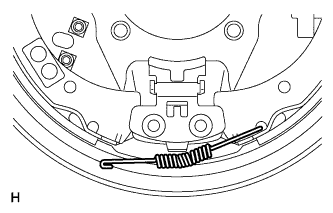
Remove the strut set and return spring from the shoe.
Remove the support clip from the strut set and return spring.
 |
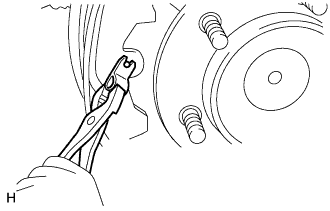
Using needle-nose pliers, disconnect the No. 3 parking brake cable from the parking brake shoe lever.
| 3. REMOVE REAR BRAKE PARKING BRAKE SHOE LEVER SUB-ASSEMBLY |
 |
Using a screwdriver, remove the C-washer and lever.
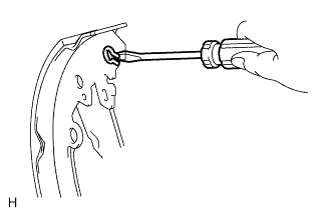
| 4. REMOVE REAR WHEEL BRAKE CYLINDER ASSEMBLY LH |
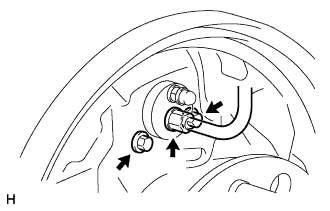 |
Using SST, disconnect the brake line.
Remove the 2 bolts and cylinder.
| 5. REMOVE REAR WHEEL BRAKE CYLINDER CUP |
Remove the 2 cylinder dust boots from the cylinder.
Remove the 2 pistons and compression spring.
Remove the 2 wheel cylinder cups from each piston.
| 6. REMOVE REAR BRAKE DRUM BLEEDER PLUG |
Remove the bleeder plug cap and bleeder plug from the cylinder.
