FRONT SHOCK ABSORBER WITH COIL SPRING (for 2WD) > INSTALLATION |
| 1. TEMPORARILY INSTALL FRONT SHOCK ABSORBER WITH COIL SPRING |
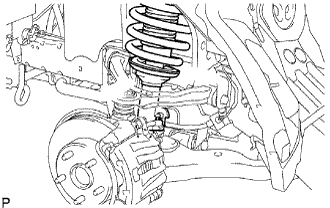 |
Install the shock absorber to the vehicle body so that: 1) the coil spring LH lower tip is facing away from the vehicle, and 2) the coil spring RH lower tip is facing toward the vehicle.
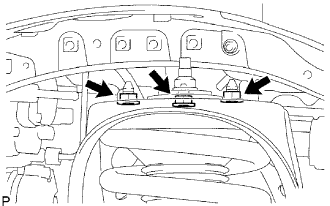 |
Install the 3 nuts on the upper side of the shock absorber with coil spring.
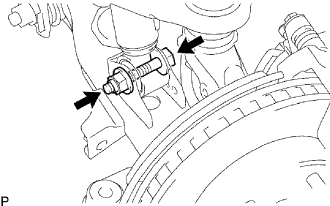 |
Temporarily install the bolt and nut as shown in the illustration.
| 2. INSTALL FRONT STABILIZE LINK ASSEMBLY LH |
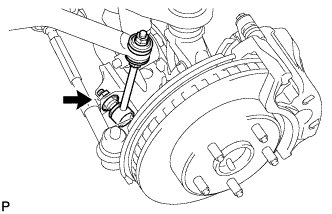 |
Connect the stabilizer link to the lower arm with the nut.
| 3. INSTALL FRONT STABILIZER LINK ASSEMBLY RH |
| 4. INSTALL FRONT WHEEL |
Install the front wheel.
| 5. STABILIZE SUSPENSION |
Lower the vehicle.
Press down on the vehicle several times to stabilize the suspension.
| 6. TIGHTEN FRONT SHOCK ABSORBER WITH COIL SPRING |
Fix the nut in place and tighten the bolt.
| 7. INSPECT AND ADJUST FRONT WHEEL ALIGNMENT |
Inspect and adjust the front wheel alignment (Click here).
