PARKING BRAKE CABLE (for 2WD) > REMOVAL |
| 1. DISCONNECT CABLE FROM NEGATIVE BATTERY TERMINAL |
| 2. REMOVE REAR WHEEL |
| 3. REMOVE REAR BRAKE DRUM SUB-ASSEMBLY |
| 4. REMOVE SHIFT LEVER KNOB SUB-ASSEMBLY |
| 5. REMOVE PARKING BRAKE HOLE COVER SUB-ASSEMBLY |
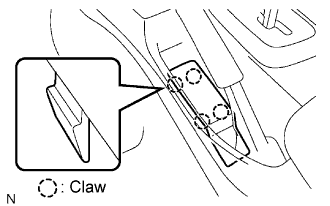 |
Detach the 4 claws and remove the hole cover.
| 6. REMOVE UPPER CONSOLE PANEL SUB-ASSEMBLY |
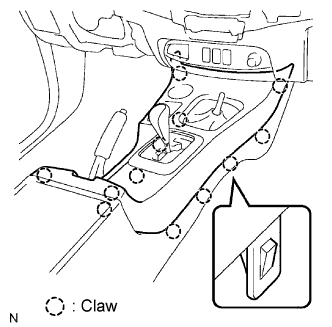 |
Detach the 12 claws and remove the console panel.
| 7. REMOVE CONSOLE BOX ASSEMBLY |
 |
Remove the 4 screws <F> and 2 bolts <E>.
Using a clip remover, remove the 2 clips and console box.
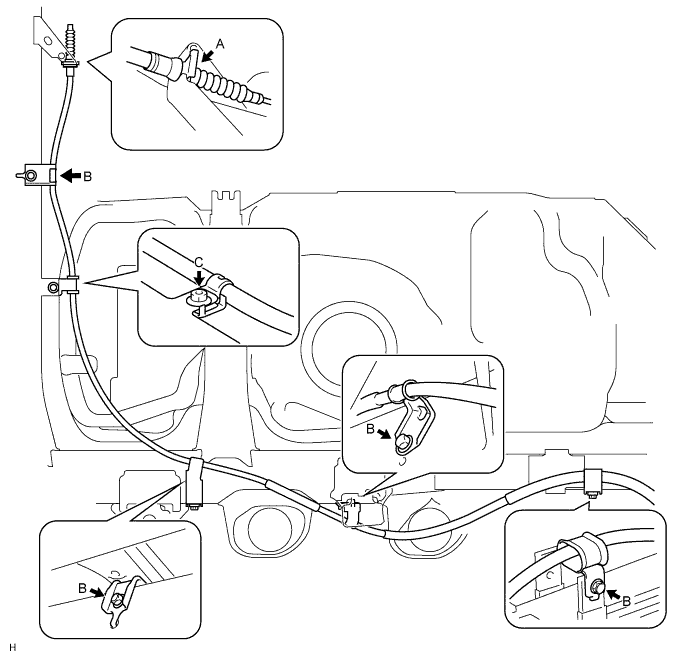
| 8. REMOVE NO. 1 PARKING BRAKE CABLE ASSEMBLY |
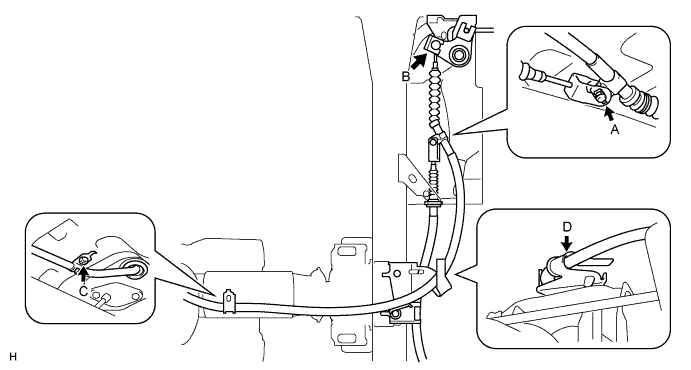
Disconnect the cable from the parking brake lever (Click here).
Remove the 2 bolts and No. 1 heat insulator.
Remove the No. 1 clip and pin labeled A.
Disconnect the cable from the No. 3 cable.
Disconnect the cable from the equalizer labeled B.
Remove the bolt holding the cable labeled C.
Remove the cable from the cable support bracket labeled D.
| 9. REMOVE NO. 2 PARKING BRAKE CABLE ASSEMBLY |
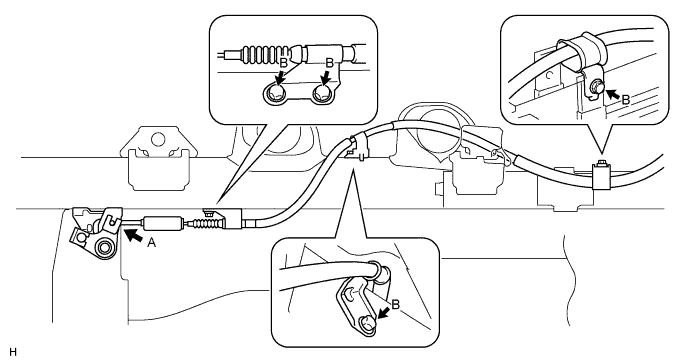
Disconnect the cable from the parking brake shoe lever RH and backing plate RH.
Disconnect the cable from the lever (Click here).
Remove the 2 bolts and disconnect the cable from the backing plate.
Disconnect the cable from the equalizer labeled A.
Remove the 4 bolts labeled B and cable.
| 10. REMOVE NO. 3 PARKING BRAKE CABLE ASSEMBLY |
Disconnect the cable from the parking brake shoe lever LH and backing plate LH.
Disconnect the cable from the lever (Click here).
Remove the 2 bolts and disconnect the cable from the backing plate.
Remove the No. 3 clip labeled A.
Remove the 4 bolts labeled B, nut labeled C and cable.
