FRONT DRIVE SHAFT ASSEMBLY > REASSEMBLY |
| 1. INSTALL FRONT AXLE HUB DUST SEAL |
 |
Using a screwdriver and hammer, tap in a new dust seal.
| 2. INSTALL FRONT DRIVE SHAFT DUST COVER |
 |
Using SST and a press, press in a new dust cover.
| 3. INSTALL HOLE SNAP RING |
Install a new snap ring.
| 4. INSTALL INBOARD JOINT BOOT |
 |
Temporarily install a new outboard joint boot (with 2 boot clamps) to the drive shaft.
Pack the inboard joint and boot with grease from a boot kit.
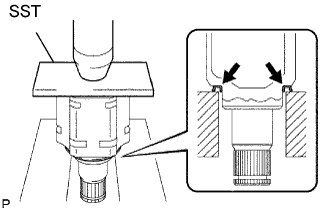
| 5. INSTALL FRONT AXLE OUTBOARD JOINT BOOT CLAMP LH |
 |
Mount the drive shaft in a soft vise.
Secure the outboard joint large boot clamp onto the boot.
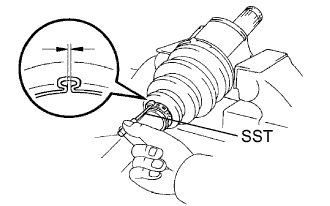
Place SST onto the clamp.
Tighten SST so that the boot clamp is pinched.
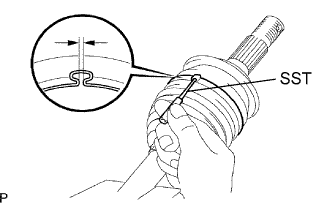 |
Using SST, adjust the clearance of the clamp.
For the outboard joint small boot clamp, use the same procedures described above.
| 6. INSTALL INBOARD JOINT BOOT |
Install a new inboard joint boot to the outboard joint shaft.
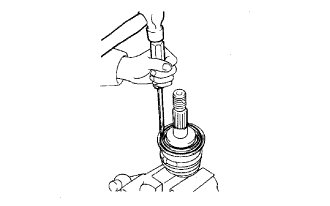
| 7. INSTALL INBOARD JOINT |
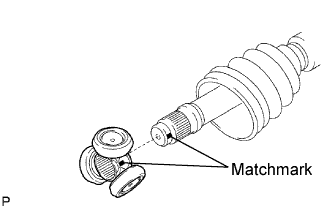 |
Align the matchmarks of the tripod and outboard joint.
Using a brass bar and hammer, tap the tripod onto the outboard joint.
Pack the inboard joint and boot with grease from a boot kit.
align the matchmarks of the inboard joint and outboard joint.
Install the inboard joint to the outboard joint.
Using a snap ring expander, install a new snap ring.
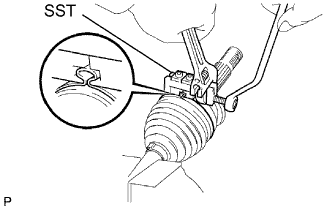
| 8. INSTALL FRONT AXLE INBOARD JOINT BOOT CLAMP |
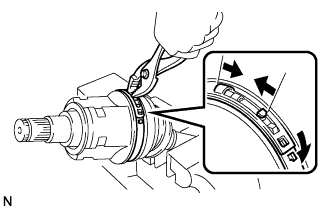 |
Using pliers, compress the large clamp and attach the claws.
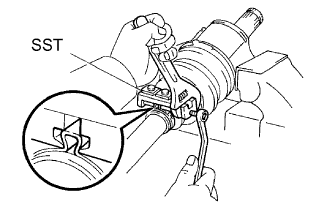 |
Secure the boot clamp onto the boot.
Place SST onto the clamp.
Tighten SST so that the boot clamp is pinched.
 |
Using SST, adjust the clearance of the small boot clamp.
| 9. INSPECT FRONT DRIVE SHAFT ASSEMBLY LH |
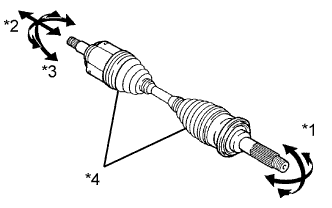 |
*1:
Check that there is no excessive play in the outboard joint.
*2:
Check that the inboard joint slides smoothly in the thrust direction.
*3:
Check that there is no excessive play in the radial direction of the inboard joint.
*4:
Check the boots for damage.
