FUEL TANK > INSTALLATION |
| 1. INSTALL FUEL SUCTION WITH PUMP AND GAUGE TUBE ASSEMBLY |
Put the retainer on the fuel tank. While holding the pump and gauge tube, tighten the retainer one complete turn by band.
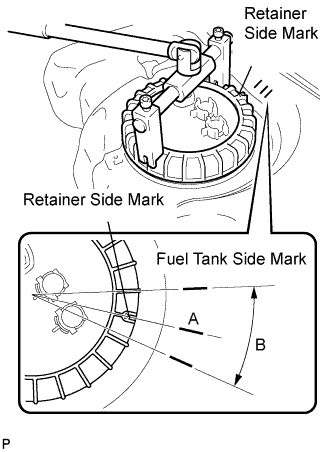 |
Using SST, tighten the retainer until the mark on the retainer aligns with mark A on the fuel tank, as shown in the illustration.
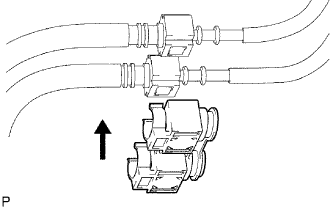
Install the 2 fuel tank tubes with the 2 tube joint clips.
| 2. INSTALL NO. 1 FUEL TANK CUSHION |
 |
Install 2 new fuel tank cushions.
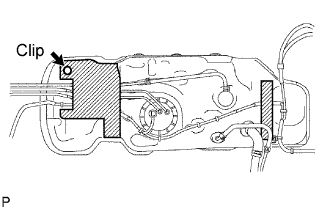
Install the clip to the cushion on the front side.
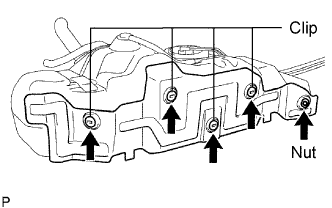 |
Install the heat insulator with 4 new clips and nut.
| 3. INSTALL FUEL TANK ASSEMBLY |
 |
Set a mission jack to the fuel tank.
Lift up the mission jack.
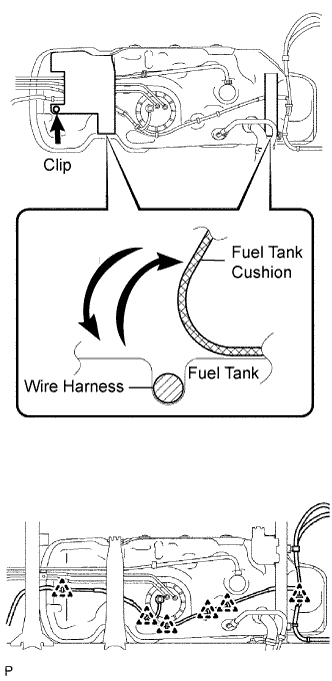
Fold back the 2 cushion rubbers.
Connect the 6 harness clips and fuel pump connector to the fuel tank.
Install the cushion rubber on the front side with the remaining clip.
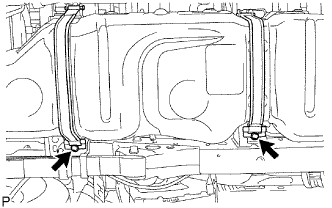 |
Install the 2 fuel tank bands with the 2 pipes and 2 clips.
Connect the 2 fuel tank bands with the 2 bolts.
| 4. INSTALL FUEL TANK FILLER PIPE |
Install the filler pipe with the bolt.
| 5. CONNECT FUEL TANK TO FILLER PIPE HOSE |
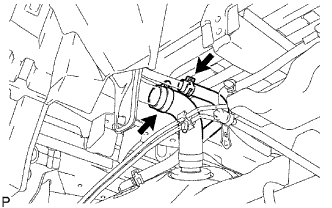 |
Connect the filler pipe hose to the fuel tank filler pipe.
| 6. CONNECT FUEL TANK BREATHER HOSE |
Connect the fuel tank breather hose to the fuel tank filler pipe.
| 7. CONNECT FUEL MAIN TUBE |
 |
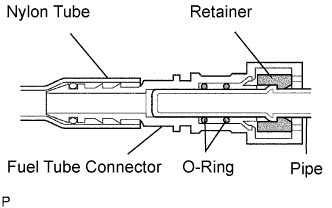 |
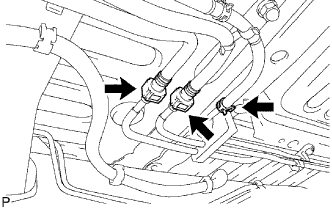
Connect the return tube connector to the pipe. Then connect the main tube connector to the pipe. Push the 2 parts together firmly until a "click" sound is heard.
Connect the EVAP hose.
| 8. INSTALL NO. 3 FUEL TUBE CLAMP |
 |
Install the tube clamp to the fuel tube.
| 9. INSTALL FUEL TANK CAP |
| 10. CONNECT CABLE TO NEGATIVE BATTERY TERMINAL |
| 11. PERFORM INITIALIZATION |
Perform initialization (Click here).
| 12. CHECK FOR FUEL LEAKS |
Connect the intelligent tester to the DLC3.
Turn the ignition switch ON.
Push the intelligent tester main switch ON.
Select the Active Test and enter the following menus: Powertrain / Engine and ECT / Active Test / Control the Fuel Pump / Speed.
Check for fuel leaks.
Check that there are no fuel leaks after performing maintenance anywhere on the fuel system.
