INSTRUMENT PANEL SAFETY PAD > INSTALLATION |
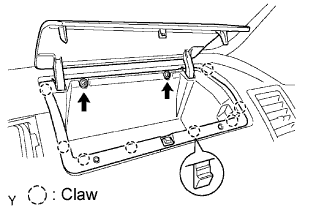
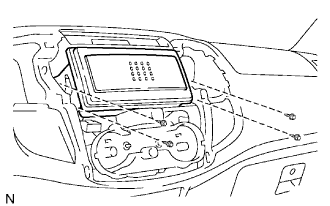
| 1. INSTALL INSTRUMENT PANEL SUB-ASSEMBLY UPPER |
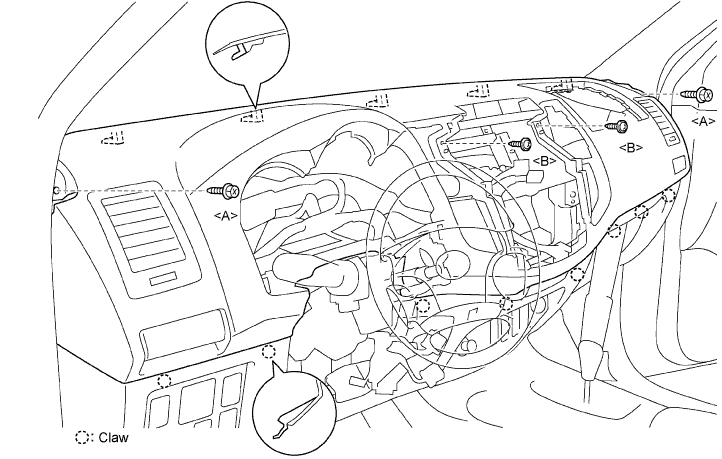
Securely attach the instrument panel claws to the vehicle body.
Install the instrument panel with the 2 bolts <A> and 2 screws <B>.
| 2. INSTALL FRONT PILLAR GARNISH LH |
Install the front pillar garnish LH (Click here or Click here or Click here).
| 3. INSTALL FRONT PILLAR GARNISH RH |
Install the front pillar garnish RH (Click here or Click here or Click here).
| 4. INSTALL FRONT PASSENGER AIRBAG ASSEMBLY (w/ Airbag System) |
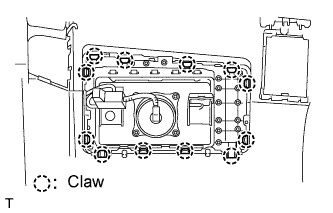 |
Attach the 12 claws to install the airbag.
Attach the clamp to the bracket.
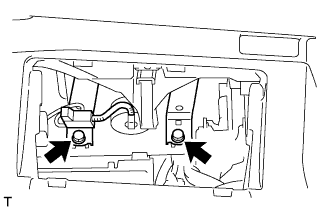 |
Tighten the 2 bolts.
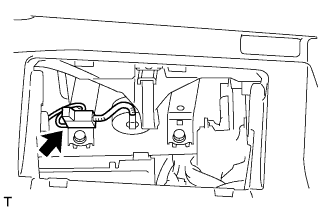 |
Connect the connector to the airbag.
| 5. INSTALL INSTRUMENT PANEL DOOR (w/o Airbag System) |
 |
Attach the 8 claws to install the door.
Install the door with the 2 screws <D>.
| 6. INSTALL GLOVE COMPARTMENT DOOR ASSEMBLY |
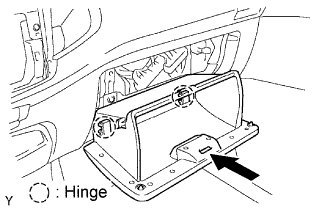 |
Attach the 2 hinges to install the door.
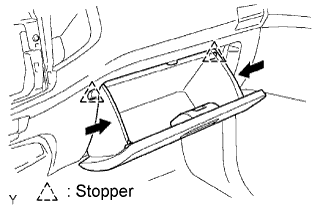 |
Push in the sides of the glove compartment door, as indicated by the arrows in the illustration. Then close the door to engage it to the 2 stoppers.
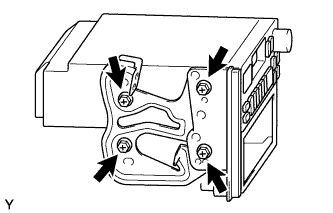
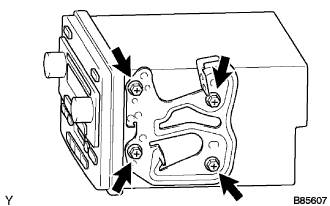
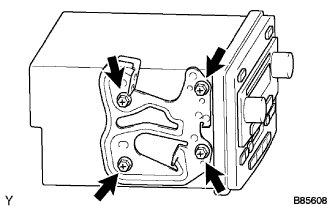
| 7. INSTALL RADIO RECEIVER ASSEMBLY WITH BRACKET (w/ Audio) |
 |
w/ Stereo opening cover:
Install the No. 1 radio bracket.
Install the 4 screws and radio bracket to the radio receiver.
 |
w/Stereo opening cover:
Install the No. 2 radio bracket.
Install the 4 screws and radio bracket to the radio receiver.
 |
w/o Stereo opening cover:
Install the No. 1 radio bracket.
Install the 4 screws and radio bracket to the radio receiver.
 |
w/o Stereo opening cover:
Install No. 2 radio bracket.
Install the 4 screws and radio bracket to the radio receiver.
Connect all connectors and install the radio receiver.
Install the radio receiver with the 4 screws.
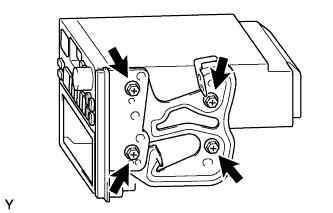
| 8. INSTALL RADIO TUNER OPENING COVER WITH BRACKET |
 |
Install the opening cover with the 4 screws <F>.
| 9. INSTALL AIR CONDITIONING CONTROL ASSEMBLY |
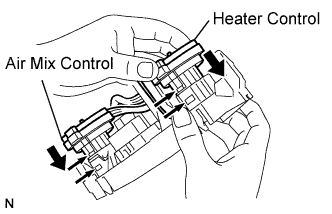 |
Attach the 2 claws to connect the air mix damper control cable.
Attach the 2 claws to connect the heater control cable.
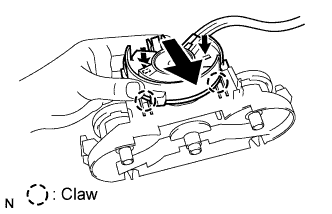 |
Connect the connector.
Attach the 2 claws to connect the air inlet damper control cable.
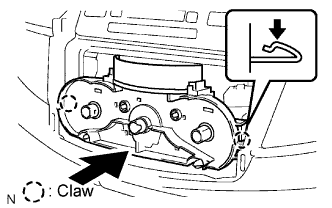 |
Attach the 2 claws to connect the A/C control.
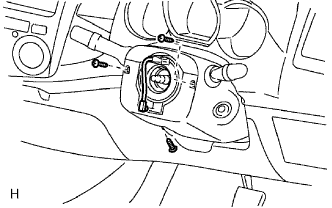
| 10. INSTALL INSTRUMENT CLUSTER FINISH PANEL ASSEMBLY CENTER |
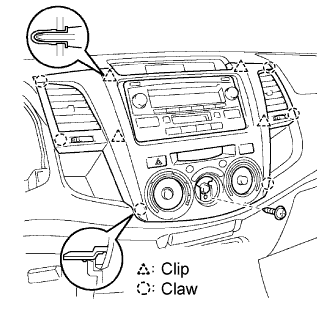 |
Connect all connectors.
Attach the 6 claws and 4 clips to install the panel.
Install the panel with the screw <C>.
| 11. INSTALL FRE/REC CONTROL KNOB |
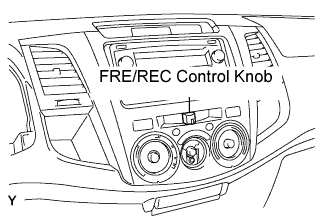 |
Install the control knob.
| 12. INSTALL HEATER CONTROL KNOB |
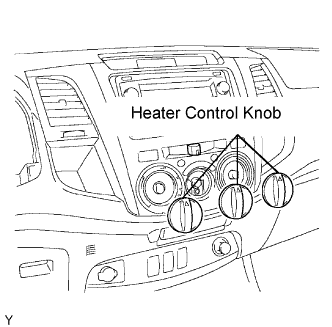 |
Install the 3 control knobs.
| 13. INSTALL COMBINATION METER ASSEMBLY |
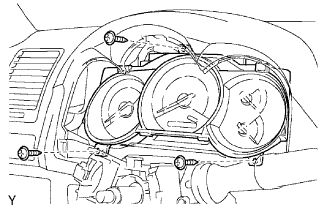 |
Connect all connectors.
Install the combination meter with the 3 screws <B>.
| 14. INSTALL INSTRUMENT CLUSTER FINISH PANEL |
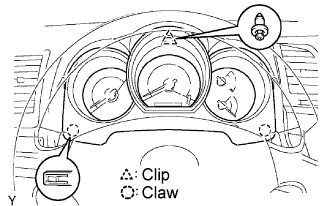 |
Attach the 2 claws to install the panel.
Install the clip.
| 15. INSTALL STEERING COLUMN COVER UPPER |
 |
Install the cover lower with the 3 screws.
| 16. INSTALL STEERING COLUMN COVER LOWER |
|
Install the cover lower with the 3 screws.
| 17. INSTALL STEERING WHEEL ASSEMBLY |
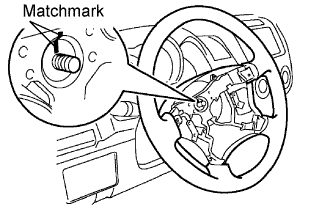 |
Align the matchmarks on the steering wheel and main shaft.
Install the steering set nut.
| 18. INSTALL STEERING PAD ASSEMBLY |
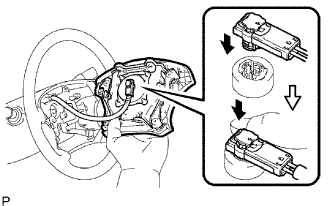 |
Support the steering pad with one hand as shown in the illustration.
Connect the airbag connector.
Connect the horn connector.
Install the steering pad after confirming that the circumference grooves of the screws are caught on the screw case.
Using a T30 "torx" socket, install the 2 screws.
| 19. PLACE FRONT WHEELS FACING STRAIGHT AHEAD |
| 20. CONNECT CABLE TO NEGATIVE BATTERY TERMINAL |
| 21. PERFORM INITIALIZATION |
Perform initialization (Click here).
| 22. CHECK SRS WARNING LIGHT |
Check the SRS warning light (Click here).
