|
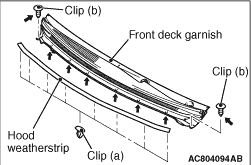
2.Remove the hood weather strip clips (a) and front deck garnish clips (b).
| note |
Remain the left and right end clips (a) of hood weatherstrip installed.
|
|
|
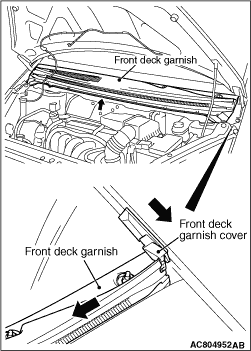
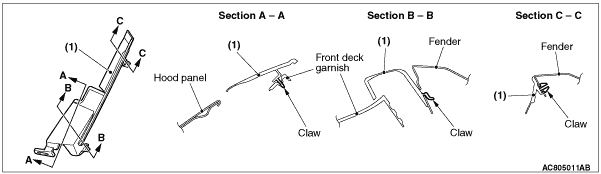
3.Lift the front deck garnish at centre and slide it to a direction opposite against a removing front deck garnish cover. By doing this, the claw of the front deck garnish cover is disconnected from the front deck garnish.
4.Close the hood.
5.Remove the clip at the front end of the front deck garnish cover. Slide the cover forward and remove it.
|
|
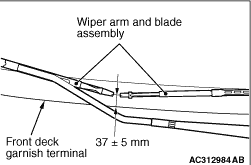
Install the wiper blade at the specified position (standard value).
Standard value: 37 ± 5 mm
|
|
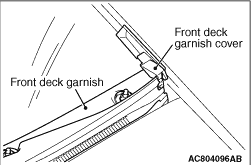
2.Set the front deck garnish cover in position.
3.
| caution |
Make sure that the front deck garnish cover (1) is fixed to the adjacent body parts with the claws and clip securely.
|
4.Fix the front deck garnish cover (1) with a clip.
|
)
)

)
)
)
)
)