
|
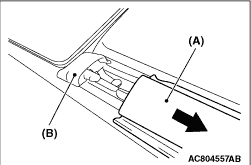
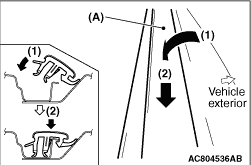
1.Twist the roof drip moulding (A) gently (approx. 90°) as shown in the illustration
from rear to front direction. At the same time, pull the moulding to vehicle exterior while pushing
it downwards with other hand so that the moulding can be removed from the hooked parts (B) of
the roof.
|
|
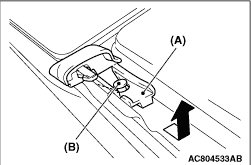
2.Pull the roof drip moulding (A) out from the front cap (B).
|
|
Remove the front cap (A) from a T-stud (B) located at the front corner part of the roof.
|
|
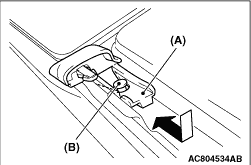
Install the front cap (A) to a T-stud (B) located at the front corner part of the roof.
|
|
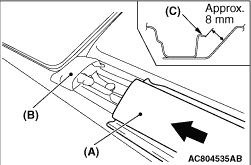
| caution |
Before installing the roof drip moulding (A) onto the roof, to
prevent a poor fitting of the moulding, make certain that the dimension shown in the illustration
where the moulding is installed to roof is approx. 8 mm. If not, repair a hooked part(s) (C)
to get an appropriate dimension.
|
1.Insert the roof drip moulding (A) to the front cap (B).
|
|
| caution |
After installing the roof drip moulding (A) onto the roof, pull
it up at each hooked part to check for secure installation.
|
2.Set the roof drip moulding (A) in position and rotate it inwards (1) as shown in the
illustration. Push down the moulding (2) to install it to the hooked parts of the roof securely
from front to rear direction in order.
|
)

)
)
)
)
)
)