
|
1.
| caution |
- To prevent the ball joint thread damage,
only loosen the nut from the ball joint (do not remove it), then disconnect the steering knuckle
from the tie-rod using the special tool.
- To prevent the special tool from dropping off, suspend it with a rope.
|
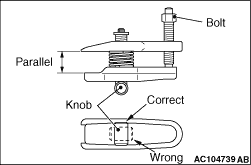
Install the ball joint remover (special tool MB991897) as shown in the figure.
|
|
2.Turn the bolt and knob to make the special tool insert horizontal, then hand-tighten the
bolt. After tightening, verify that the insert is still horizontal.
| note |
When adjusting the special tool wedge horizontally, move the knob to the position shown
in the figure so that it functions as a fulcrum of the insert.
|
3.Turn the bolt and disconnect the tie-rod end from the steering knuckle.
|
|
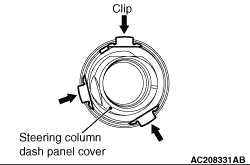
1.Remove the 3 clips (shown in the figure) from inside of the vehicle and drop the steering
column dash panel cover through the body panel.
2.Remove the front axle No.1 crossmember.
|
|
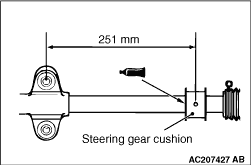
Apply the specified adhesive to the steering gear cushion and install
it to the steering gear and linkage assembly as shown.
Instant adhesive: 3M ATD Part No. 1741 or equivalent
|
|
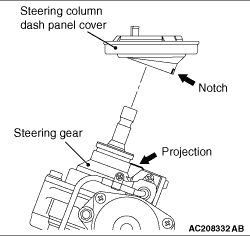
Install the steering column dash panel cover so that the cover notch is
aligned with the projection of the steering gear and linkage assembly.
|
|
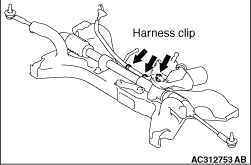
After installing the steering gear and linkage assembly to the front axle
No.1 crossmember, secure the 3 harness clips of the steering gear and linkage assembly to the
front axle No.1 crossmember.
|
|
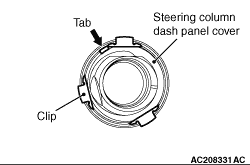
After installing the front axle No.1 crossmember to the body, pull the
steering column dash panel cover tab (shown in the figure) from inside of the vehicle and secure
the 3 clips to the body panel.
|
|
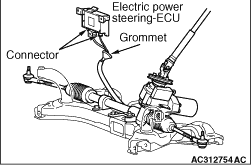
Firmly secure the grommet to the body panel and connect the connector
to the Electric power steering-ECU.
|
|
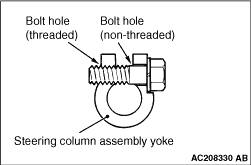
Insert the steering column bolt into the non-threaded bolt hole.
|
 ) and Driver’s
Air Bag Module and Clock Spring (
) and Driver’s
Air Bag Module and Clock Spring ()
)
)
)
)
)
)
)
)
)