REMOVAL AND INSTALLATION


Post-installation Operation
  • Brake fluid filling and air bleeding <Drum brake> (Refer to ).
  • Rear Wheel Alignment Check and Adjustment (Refer to ).


Removal steps
<<A>>

1.
Bolt (securing the shock absorber assembly to the torsion axle arm assembly)


·
Quarter trim cap removal and installation (Refer to GROUP 52A, Interior Trim , ).


2.
Self-locking nut


3.
Washer


4.
Collar


5.
Upper bushing


6.
Lower bushing


7.
Cup


8.
Bump rubber


9.
Dust cover


10.
Shock absorber assembly
<<B>>
>>A<<
11.
Lower spring pad
<<B>>
>>A<<
12.
Upper spring pad
<<B>>
>>A<<
13.
Coil spring

REMOVAL SERVICE POINTS


<<A>> BOLT REMOVAL


Jack up and support the torsion axle arm assembly, and remove the bolt.

<<B>> LOWER SPRING PAD/UPPER SPRING PAD/COIL SPRING REMOVAL


1.Brake hose removal

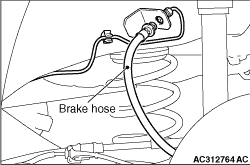
2.Cover the brake pipe to prevent brake fluid from leaking. Then, disconnect the rear brake hose from the body. <Drum brake>

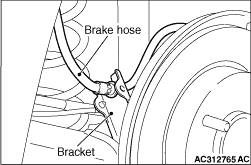
3.Remove the rear brake hose from the torsion axle-side bracket. <Disc brake>

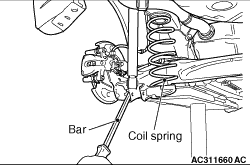
4.Use a bar to lower the torsion axle arm assembly, and then remove the lower spring pad, the upper spring pad and the coil spring.

INSTALLATION SERVICE POINT


>>A<< COIL SPRING/UPPER SPRING PAD/LOWER SPRING PAD INSTALLATION


1.Fit the lower spring pad and the upper spring pad into the coil spring ends.
2.The end of the right and left coil springs should be position 90° anticlockwise away from the vehicle front direction.