VALVE CLEARANCE MEASUREMENT |
| Measure the valve clearance as illustrated. |
 |
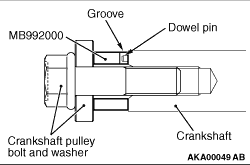
Set the special tool Crankshaft adapter (MB992000) to the crankshaft, and install the
crankshaft pulley bolt and washer. |
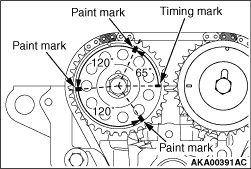 |
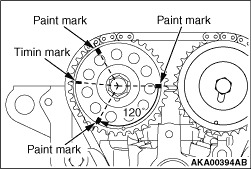
2.Make paint marks on 3 places at the camshaft sprocket exhaust by means of the following
procedure as shown in Figure. (1) Make a paint mark on the place of 65 degree angle (6.5th tooth) in the counterclockwise direction of the timing mark. (2) Moreover, make a paint mark on the place of 120 degree angle (12th tooth). (3) Also, make a paint mark on the place of 120 degree angle (12th tooth).
|
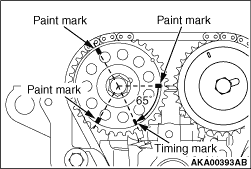 |
3.Turn the crankshaft clockwise and locate the paint mark of the camshaft sprocket exhaust
on the upper surface of the cylinder head as shown in Figure. |
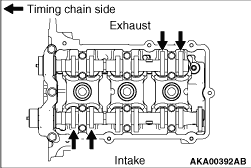 |
4.The valve clearances (Arrows) shown in Figure are measured. |
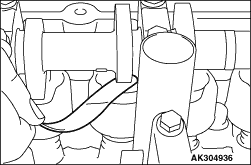 |
5.Using a thickness gauge, measure the clearance between the cam base circle and the valve
tappet. If the measured value does not conform to the standard value, record the measured value. Standard value (cold engine):
Exhaust valve 0.30 ± 0.04 mm |
 |
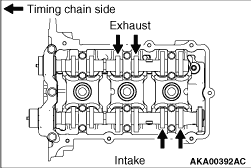
6.Turn the crankshaft clockwise and locate the paint mark of the camshaft sprocket exhaust
on the upper surface of the cylinder head as shown in Figure. |
 |
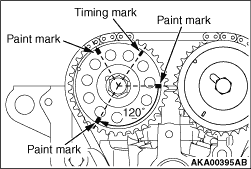
7.Measure the valve clearance at the location shown with an arrow. If the measured value does not conform to the standard value, record the measured value. |
 |
8.Turn the crankshaft clockwise and locate the paint mark of the camshaft sprocket exhaust
on the upper surface of the cylinder head as shown in Figure. |
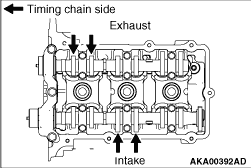 |
9.Measure the valve clearance at the location shown with an arrow. 10.If the measured value does not conform to the standard value, record the measured value. 11.Replace the valve tappet for the valve whose clearance is out of the standard value.
|
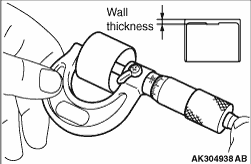 |
12.Valve tappets should be selected in the following manner. (1) Remove the valve tappet and measure its thickness. (2) Calculate the correct thickness for a new valve tappet as follows that achieves the standard valve clearance. A: Thickness of new valve tappet B: Thickness of old valve tappet C: Measured valve clearance Equation: Intake valve A = B + (C - 0.22 mm) Exhaust valve A = B + (C - 0.30 mm) For removal and installation procedures for the valve tappet, refer to "CAMSHAFT REMOVAL AND INSTALLATION." (Refer to Camshaft Removal and Installation.  ) ) |