|
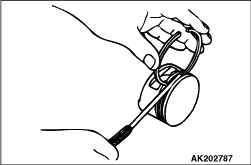
1.Measure the clearance between each piston ring and its groove. If the limit is exceeded,
replace the ring or piston, or both.
Standard values:
No. 1 ring 0.03 - 0.07 mm
No. 2 ring 0.02 - 0.06 mm
Limits: 0.1 mm
|
|
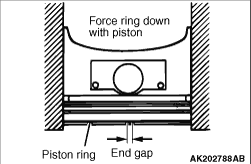
2.Install the piston ring into the cylinder bore and force it down with the head of the
piston until the ring becomes right-angled to the cylinder wall. Then, measure the end gap of the
ring with a thickness gauge. If the end gap is excessive, replace the piston ring.
Standard values:
No. 1 ring 0.15 - 0.30 mm
No. 2 ring 0.30 - 0.45 mm
Oil ring 0.20 - 0.50 mm
Limits:
No. 1 ring 0.8 mm
No. 2 ring 0.8 mm
Oil ring 1.0 mm
|
|
|
1.Wipe off oil from the crankshaft pin and connecting rod bearing.
|
|
|
2.Cut a piece of plastic gauge whose length is equivalent to the width of the bearing
and place it on the crankshaft pin in parallel with its axis.
|
|
|
3.Install the connecting rod cap carefully and tighten the nuts according to INSTALLATION
SERVICE POINTS >>G<< . .
|
|
|
4.Remove the nuts, then remove the connecting rod cap carefully.
|

|
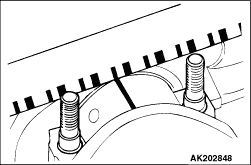
5.Measure the largest width of the crushed plastic gauge using the ruler printed on the
bag of the plastic gauge.
Standard value: 0.025 - 0.040 mm
Limit: 0.1 mm
|

 .
.