|
|
1.Remove the engine oil pan mounting bolts.
|
|
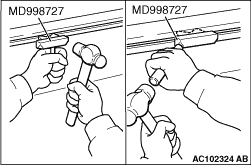
2.Use special tool oil pan FIPG cutter (MD998727) to remove the engine oil pan.
|
|
|
1.Remove sealant from the engine oil pan and cylinder block surfaces.
|
|
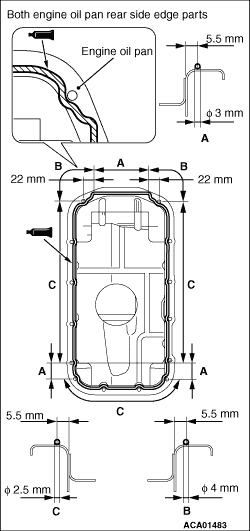
2.
| caution |
As oil leak is likely to occur at both ends of the rear
side of the engine oil pan, be sure to apply the specified sealant as shown.
|
Apply a bead of the sealant to the cylinder block mating surface of the engine oil pan
as shown.
Specified sealant: ThreeBond 1217G or equivalent
| note |
Install the engine oil pan immediately after the application of sealant.
|
3.
| caution |
After the installation, until a sufficient period of time (one hour or
more) elapses, do not apply the engine oil or water to the sealant application area or start
the engine.
|
Tighten the engine oil pan mounting bolts to the specified torque.
Tightening torque: 11 ± 3 N·m
|
 ).
).)
)
)