|
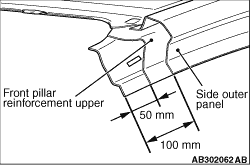
1.To reinforce the strength of the front pillar cut area, cut the side outer panel 100 mm
above the cut-out area and front pillar reinforcement upper 50 mm above the cut-out area.
|

|
2.To reinforce the strength of the side sill cut area, cut the side outer panel 50 mm back
from the cut-out area of side sill
|
|
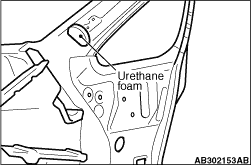
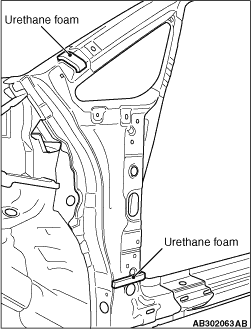
3.After assembling the front inner pillar, attach the urethane foam to the area shown in
the figure in order to prevent sound dampening foam material from flowing out.
|
|
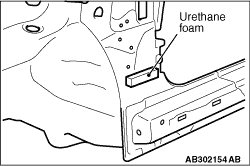
4.Before assembling the new front pillar reinforcement outer part, attach urethane foam
to the area shown in the figure as an alternative to the sound dampening foam material.
| note |
A body loose panel cushion (genuine part number; 7260A114) should be used as the urethane
foam. Cut this cushion to a height of 30 mm and to a thickness which it can fill the space between
the front pillar reinforcements outer and inner at.
|
|
|
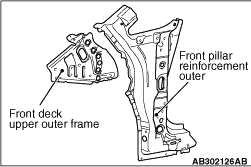
5.Remove the front deck frame upper outer from the new front pillar reinforcement part.
|
|
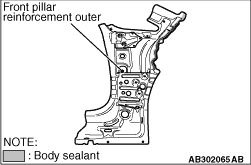
6.Apply in advance the body sealant in the areas shown in the figure when assembling the
front pillar reinforcement outer.
|
|
7.Before assembling the new front outer pillar part, attach urethane foam to the area shown
in the figure as an alternative to the sound dampening foam material.
| note |
A body loose panel cushion (genuine part number; 7260A114) should be used as the urethane
foam. Cut this cushion to a height of 30 mm and to a thickness which it can fill the space between
the front outer pillar and inner at.
|
|
|
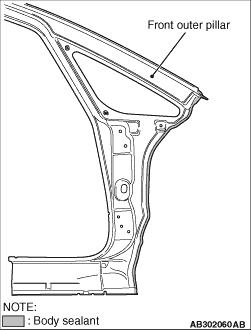
8.Apply in advance the body sealant in the area shown in the figure when assembling the
front outer pillar.
|
|
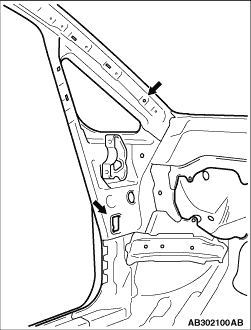
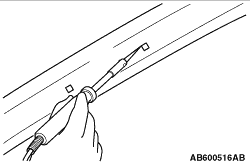
9.Assemble the front outer pillar, seal the hole and flange with the bolt and plated tape,
and fill the hole with sound dampening foam material as shown in the figure.
Sound dampening foam material: 3M ATD Part No.08463
|
|
10.Wait 2 hours after filling the sound dampening foam material to remove the bolt and aluminium
tape, then melt the sound dampening foam material with a soldering gun so a clip, etc. can thoroughly
be inserted in the hole filled with sound dampening foam material.
|
)
)
)
)
)
)
)
)
)
)
)
)
)