Valve Clearance Adjustment
NOTE: Valves should be adjusted only when the cylinder head temperature is less than 38°C (100°F).
| 2. | Set the No. 1 piston at Top Dead Center (TDC). The ‘‘UP'' mark (A) on the camshaft sprocket should be at the top, and the TDC grooves (B) on the camshaft sprocket should line up with the top edge of the head.
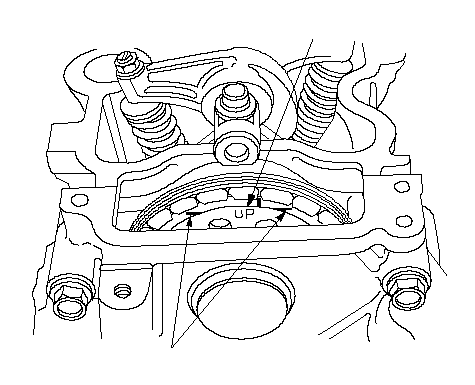 AB AB |
| 3. | Select the correct thickness feeler gauge for the valves you're going to check.
| Intake: | 0.15-0.19 mm (0.006-0.007 in.) | | Exhaust: | 0.26-0.30 mm (0.010-0.012 in.) |
Adjusting screw locations: 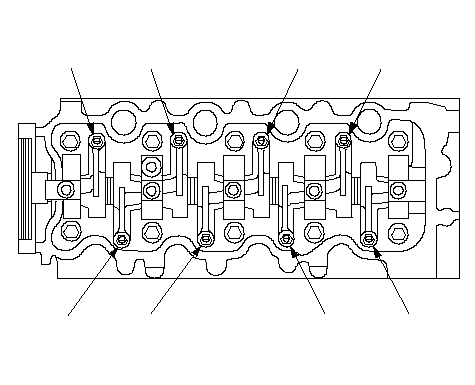 No. 1No. 2No. 3No. 4No. 1No. 2No. 3No. 4EXHAUSTINTAKE No. 1No. 2No. 3No. 4No. 1No. 2No. 3No. 4EXHAUSTINTAKE |
| 4. | Insert the feeler gauge (A) between the adjusting screw and the end of the valve stem and slide it back and forth; you should feel a slight amount of drag.
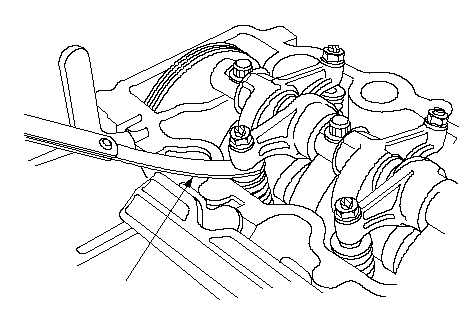 A A |
| 5. | If you feel too much or too little drag, loosen the locknut (A), and turn the adjusting screw (B) until the drag on the feeler gauge is correct.
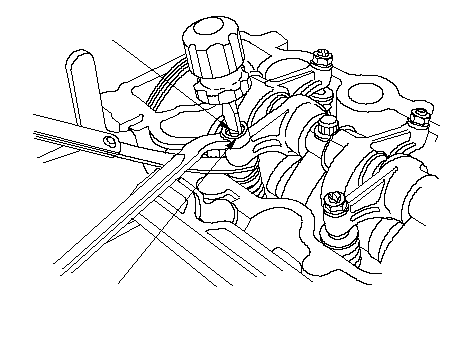 A A
14 N·m
(1.4 kgf·m, 10 lbf·ft)B |
| 6. | Tighten the locknut and recheck the clearance. Repeat the adjustment if necessary.
|
| 7. | Rotate the crankshaft clockwise. Align the No. 3 piston TDC groove (A) on the camshaft sprocket with the top edge of the head.
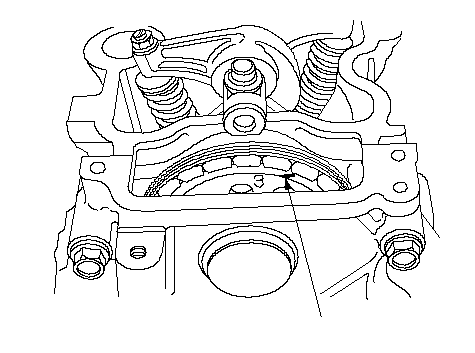 A A |
| 8. | Check and if necessary, adjust the valve clearance on No. 3 cylinder.
|
| 9. | Rotate the crankshaft clockwise. Align the No. 4 piston TDC groove (A) on the camshaft sprocket with the top edge of the head.
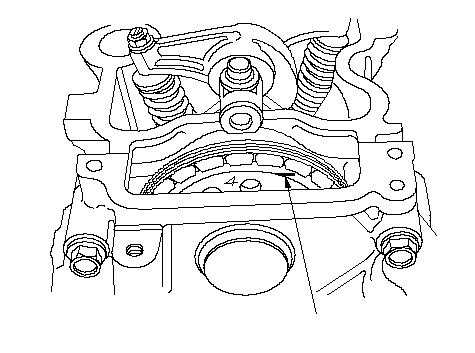 A A |
| 10. | Check and if necessary, adjust the valve clearance on No. 4 cylinder.
|
| 11. | Rotate the crankshaft clockwise. Align the No. 2 piston TDC groove (A) on the camshaft sprocket with the top edge of the head.
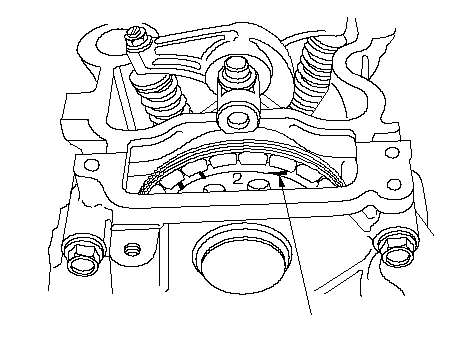 A A |
| 12. | Check and if necessary, adjust the valve clearance on No. 2 cylinder.
|