Engine Removal
Special Tools Required
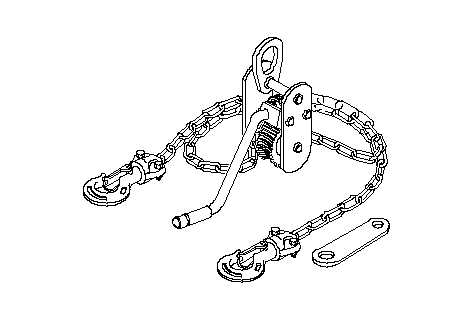
Engine tilt hanger set ( 07KAK-SJ40101)
NOTE:
- Use fender covers to avoid damaging painted surfeces.
- To avoid damage, unplug the wiring connectors carefully while holding the connector portion.
- Mark all wiring and hoses to avoid misconnection. Also, be sure that they do not contact other wiring or hoses, or interfere with other parts.
| 1. | Secure the hood in the wide open position (support rod in the lower hole).
|
| 2. | Disconnect the battery negative cable first, then the positive cable from the battery.
|
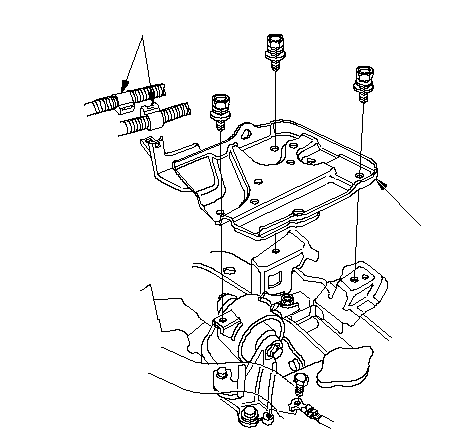
| 5. | Remove the harness clamps (A), then remove the battery base (B).
 BA BA |
| 6. | Disconnect the Engine Control Module (ECM)/Powertrain Control Module (PCM) connectors (A) and main wire harness connector (B).
LHD models: 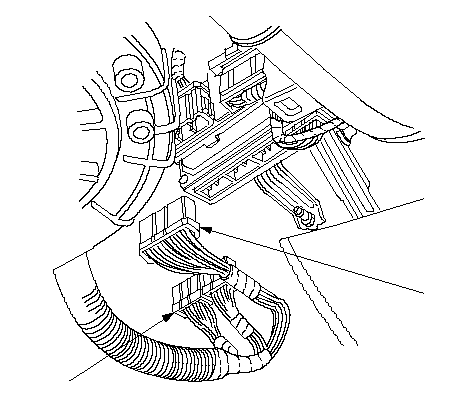 AB ABRHD models: 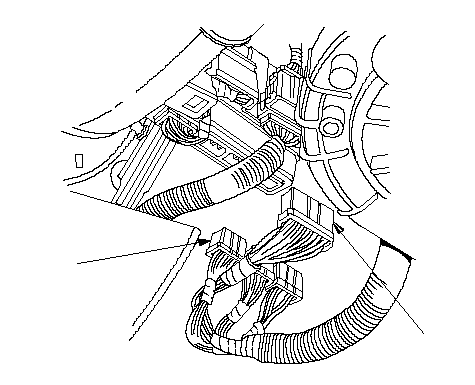 AB AB |
| 7. | Remove the harness clamps (A) and grommet (B), then pull the engine wire harness through the bulkhead.
LHD models: 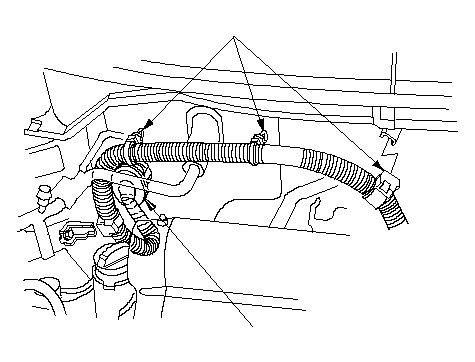 AB ABRHD models: 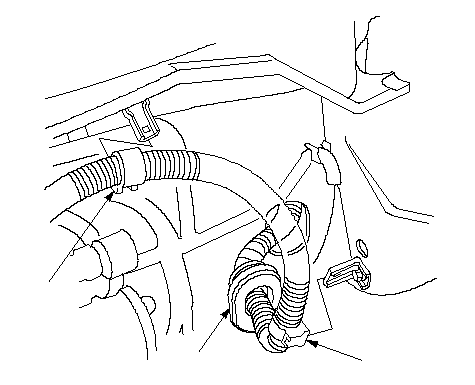 ABA ABA |
| 8. | Remove the battery cables (A) from the under-hood fuse/relay box, then remove the harness clamp(s) (B).
LHD models: 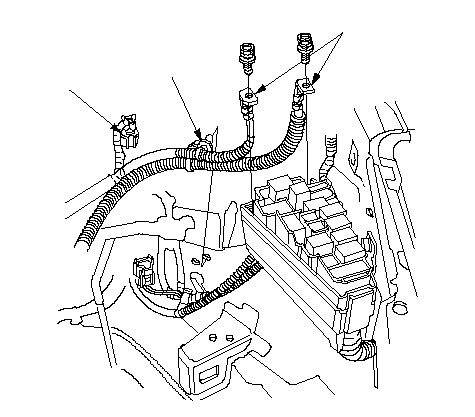 CBA CBARHD models: 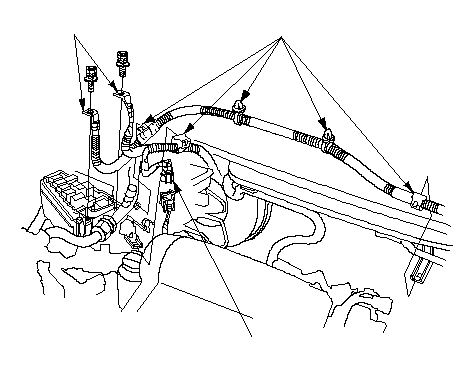 ABC ABC |
| 9. | Disconnect the wire harness connector (C).
|
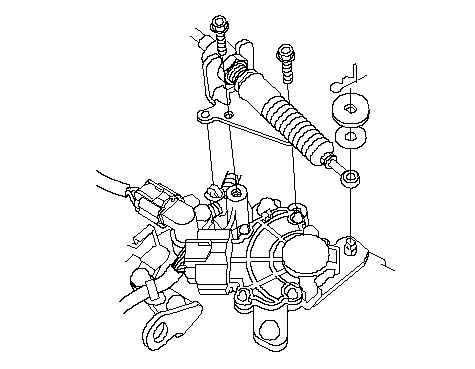
| 10. | Remove the throttle cable (A) by loosening the locknut (B), then slipping the cable end out of the accelerator linkage.
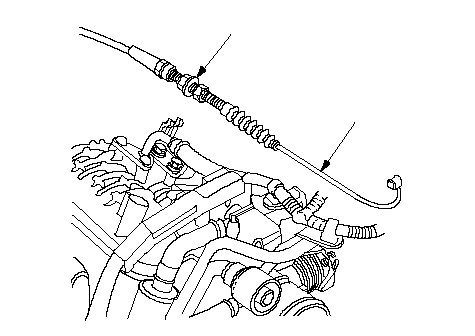 BA BA |
| 12. | Remove the Evaporative Emission (EVAP) canister hose (A) and brake booster vacuum hose (B).
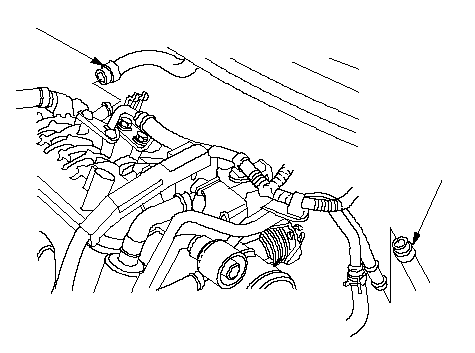 BA BA |
| 13. | Remove the shift cable (A) and select cable (B). Take care not to bend the cables when removing them. Always replace any kinked cable with a new one (M/T).
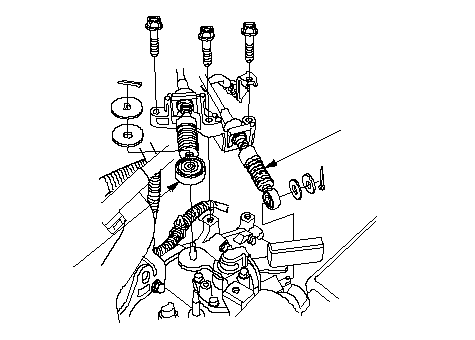 BA BA |
| 14. | Remove the clutch slave cylinder (A) and clutch line bracket mounting bolt (B). Do not operate the clutch pedal once the slave cylinder has been removed (M/T).
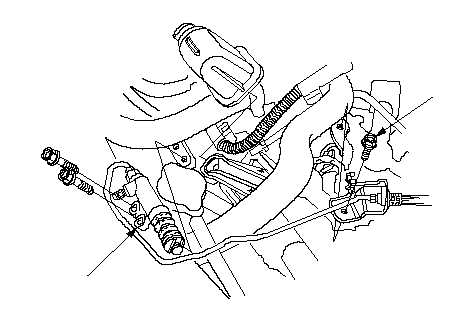 BA BA |
| 15. | Remove the shift cable. Take care not to bend the cable when removing it. Always replace any kinked cable with a new one (CVT).
|
| 17. | Remove the radiator cap.
|
| 18. | Raise the hoist to full height.
|
| 19. | Remove the front tires/wheels.
|
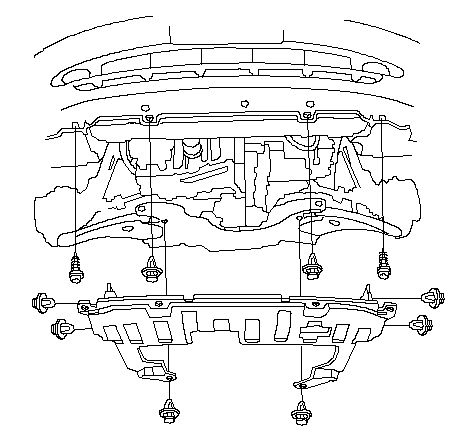
| 20. | Remove the splash shield.
|
| 22. | Drain the transmission fluid:
|
| 24. | Disconnect the primary Heated Oxygen Sensor (primary HO2S) connector (A) (except KU model) or Heated Oxygen Sensor (HO2S) connector (A) (KU model).
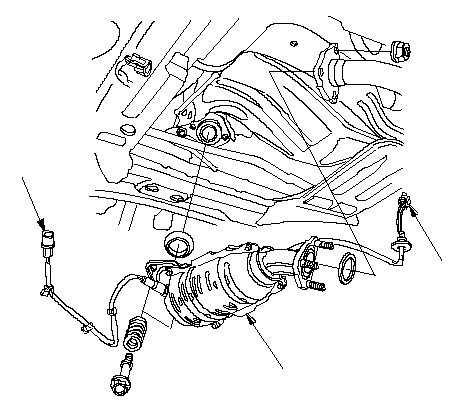 ACB ACB |
| 25. | Disconnect the secondary Heated Oxygen Sensor (secondary HO2S) connector (B) (except KU model).
|
| 26. | Remove the Three Way Catalytic Converter (TWC)(C).
|
| 29. | Remove the driveshafts. Coat all precision finished surfaces with clean engine oil. Tie plastic bags over the driveshaft ends.
|
| 31. | Disconnect the compressor clutch connector (A), then remove the A/C compressor (B) without disconnecting the A/C hoses.
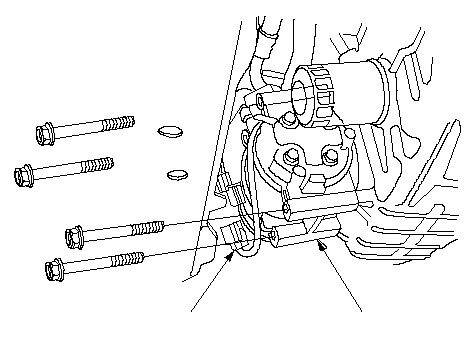 AB AB |
| 32. | Remove the condenser fan shroud.
|
| 33. | Remove the Automatic Transmission Fluid (ATF) cooler hoses, then plug the ATF cooler hoses and lines (CVT).
|
| 35. | Remove the upper radiator hose (A) and lower radiator hose (B).
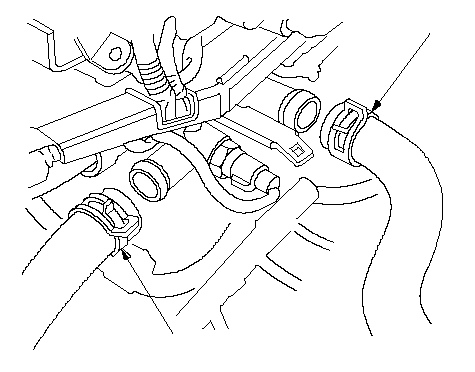 AB AB |
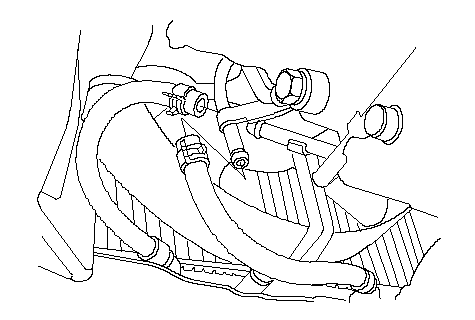
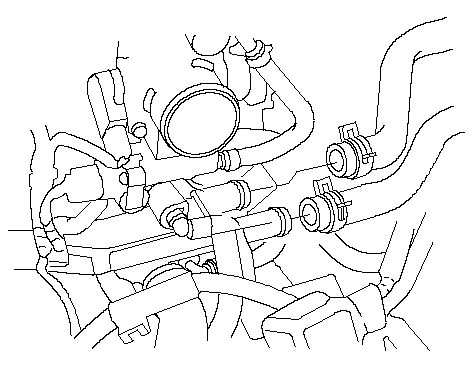
| 36. | Remove the heater hoses.
|
| 37. | Attach the engine tilt hanger set (Commercially available tool for EU models) to the engine as shown.
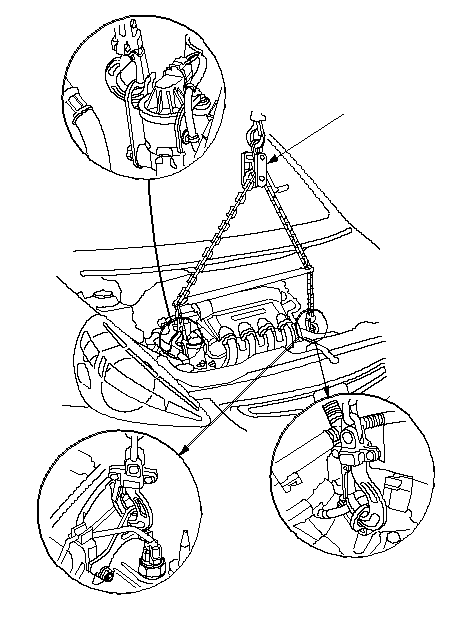 07KAK-SJ40101M/T:CVT: 07KAK-SJ40101M/T:CVT: |
| 38. | Remove the ground cable (A), then remove the transmission mount bracket (B).
M/T: 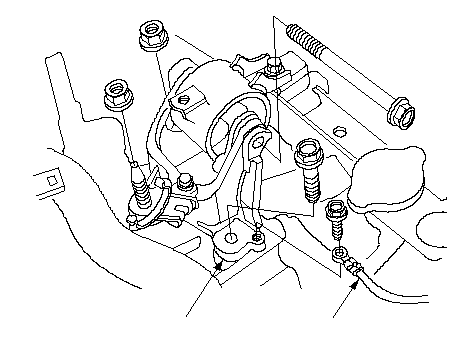 BA BACVT: 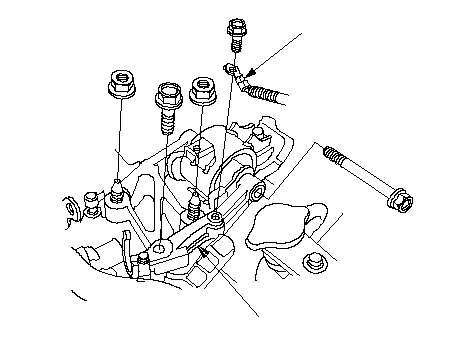 BA BA |
| 39. | Remove the ground cable (A), then remove the side engine mount/bracket assembly (B).
M/T: 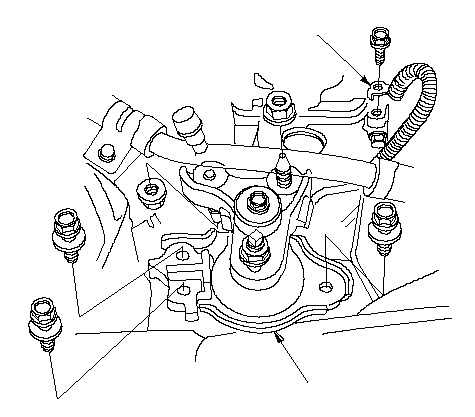 AB ABCVT: 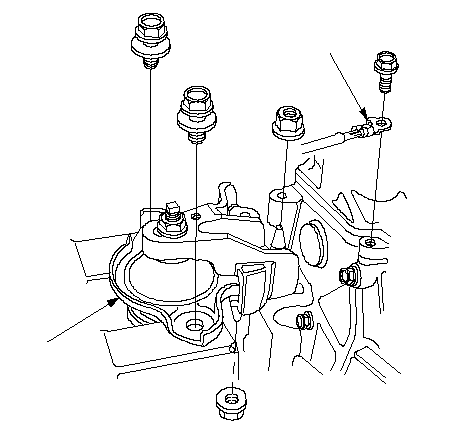 AB AB |
| 40. | Make sure the hoist brackets are positioned properly. Raise the hoist to full height.
|
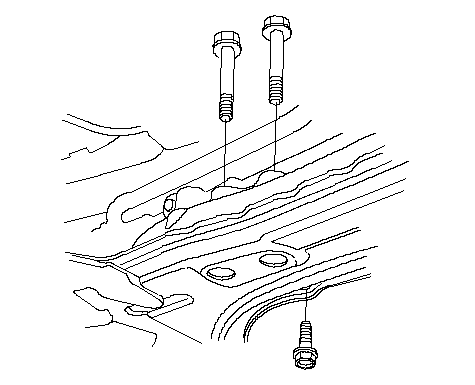
| 41. | Remove the rear mount mounting bolts.
|
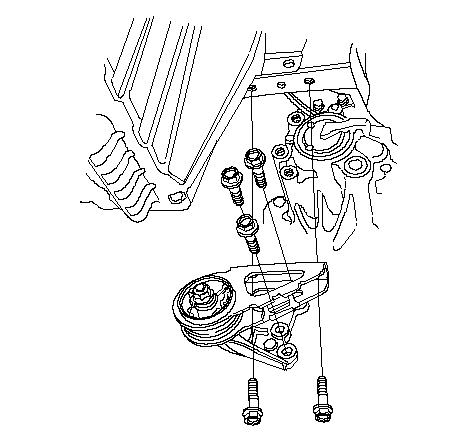
| 42. | Remove the left front mount/bracket assembly(M/T).
|
| 43. | Remove the two clips (A) securing the under covers, then remove the front sub-frame (B).
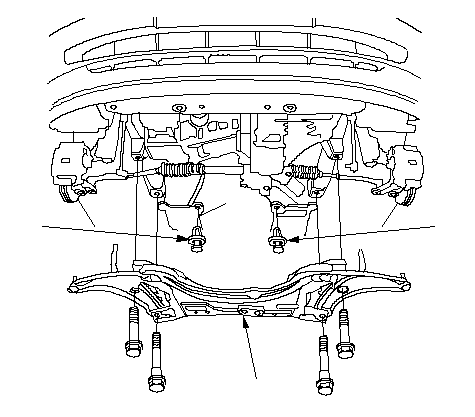 AAB AAB |
| 44. | Check that the engine/transmission is completely free of vacuum hoses, fuel and coolant hoses, and electrical wiring.
|
| 45. | Slowly lower the engine about 150 mm (6 in.). Check once again that all hoses and wires are disconnected from the engine/transmission.
|
| 46. | Lower the engine all the way. Remove the chain hoist from the engine.
|
| 47. | Remove the engine from under the vehicle.
|