Master Cylinder Removal/Installation
Master Cylinder Removal/Installation
NOTE: Do not spill brake fluid on the vehicle; it may damage the paint; if brake fluid does contact the paint, wash it off immediately with water.| 1. | On vehicle's with M/T; remove the clutch reservoir bracket (A), and move it aside. Do not disconnect the clutch line from the reservoir.
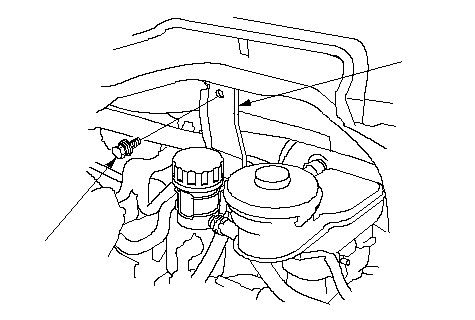 A6 x 1.0 mm A6 x 1.0 mm9.8 N·m (1.0 kgf·m, 7.2 lbf·ft) |
| 2. | Remove the reservoir cap and brake fluid from the master cylinder reservoir. |
| 3. | Remove the brake fluid level sensor connector (A).
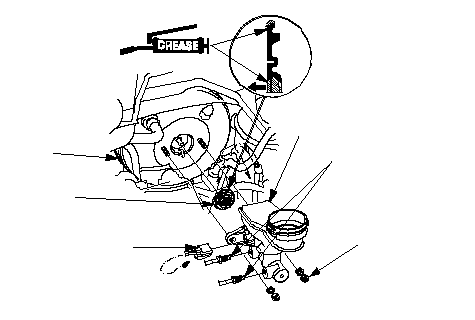 GCB GCB15 N·m (1.5 kgf·m, 11 lbf·ft)D 15 N·m (1.5 kgf·m, 11 lbf·ft)AFE |
| 4. | Disconnect the brake lines (B) from the master cylinder (C). To prevent spills, cover the hose joints with rags or shop towels. |
| 5. | Remove the master cylinder mounting nuts (D) and washers. |
| 6. | Remove the master cylinder from the brake booster (E). Be careful not to bend or damage the brake lines when removing the master cylinder. |
| 7. | Remove the rod seal (F) from the brake booster. |
| 8. | Install the master cylinder in the reverse order of removal, and note these items:
|