Rear Door Outer Molding Replacement (5D)
Rear Door Outer Molding Replacement
NOTE:- Once you remove the door outer molding, replace it with a new one because it will bend during removal.
- Put on gloves to protect your hands.
- Take care not to scratch the door.
- When prying with a flat-tip screwdriver, wrap it with protective tape to prevent damage.
| 1. | Pry the clip at each end with a flat-tip screwdriver.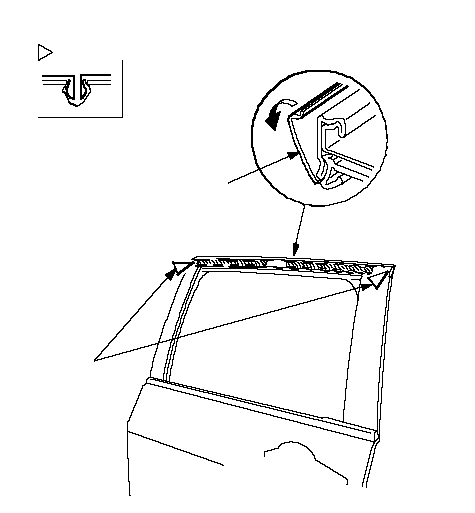 BAFastener Locations: Clip, 2 BAFastener Locations: Clip, 2 |
| 2. | While removing the upper edge of the door outer molding (A) from the edge of the sash, cut the double-sided adhesive tapes (B) with a utility knife, then remove the molding. |
| 3. | Scrape off the remaining double-sided adhesive tape from the sash, then clean the sash surface with a sponge dampened in alcohol. |
| 4. | Install new door outer molding in the reverse order of removal, and note these items.
|