Trailing Arm Replacement (5D)
Trailing Arm Replacement
| 1. | Raise the rear of the vehicle, and support it with safety stands in the proper locations. |
| 2. | Remove the rear wheel. |
| 3. | Remove the brake hose bracket (A).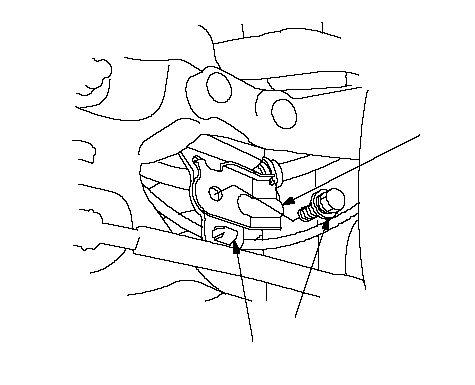 AB8 x 1.25 mm AB8 x 1.25 mm21 N·m (2.1 kgf·m, 15 lbf·ft) |
| 4. | Remove the wheel sensor wire clip (B). |
| 5. | Remove the flange nut (A) while holding the joint pin (B) with a hex wrench (C), and remove the stabilizer link (D) from trailing arm (E).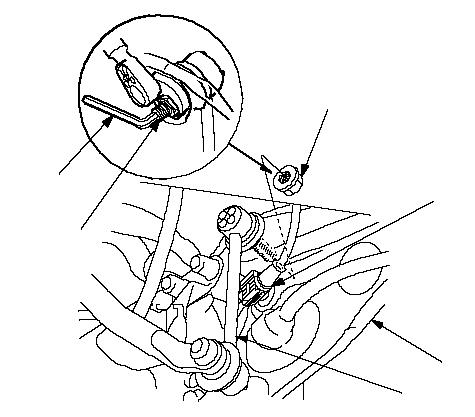 CBFEDA CBFEDA10 x 1.25 mm 39 N·m (4.0 kgf·m, 29 lbf·ft) |
| 6. | Remove the wheel sensor wire clip (F) from trailing arm. |
| 7. | Disconnect the parking brake cable (A) and the parking brake shoe assembly with a wrench (B).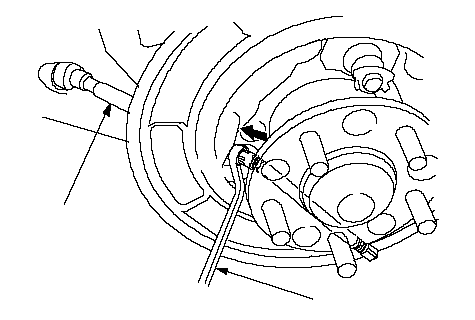 AB AB |
| 8. | Remove the parking brake cable (A) from the trailing arm (B).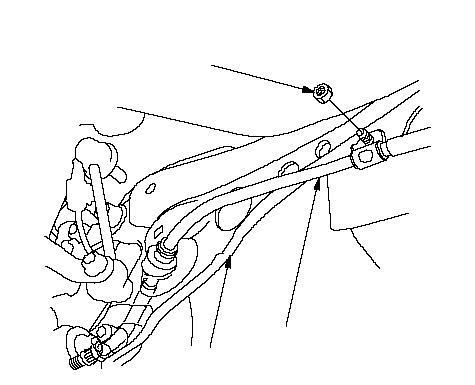 8 x 1.25 mm 8 x 1.25 mm21 N·m (2.1 kgf·m, 15 lbf·ft)AB |
| 9. | Remove the self-locking nuts and remove the trailing arm (A) from the knuckle.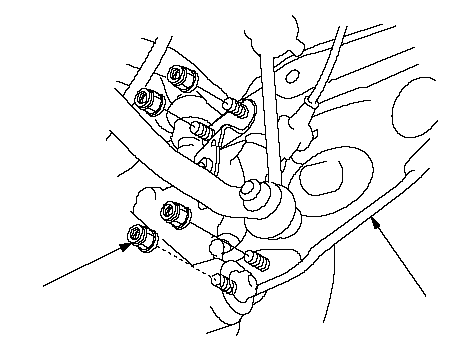 10 x 1.25 mm 10 x 1.25 mm64 N·m (6.5 kgf·m, 47 lbf·ft)A |
| 10. | Remove the trailing arm bracket mounting bolt (A), and lower the trailing arm (B).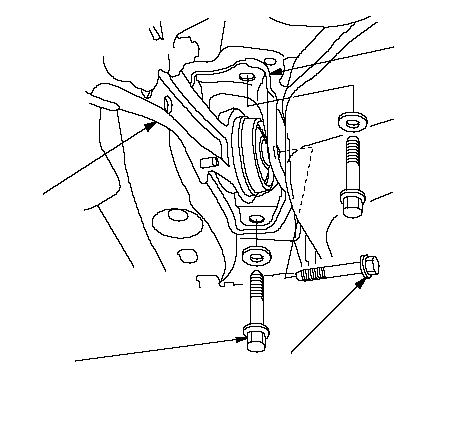 14 x 1.5 mm 14 x 1.5 mm103 N·m (10.5 kgf·m, 75.9 lbf·ft)14 x 1.5 mm 103 N·m (10.5 kgf·m, 75.9 lbf·ft)ABCD |
| 11. | Remove the trailing arm mounting bolt (C), and disconnect the trailing arm and trailing arm bracket (D). |
| 12. | Install the trailing arm in the reverse order of removal, and note these items:
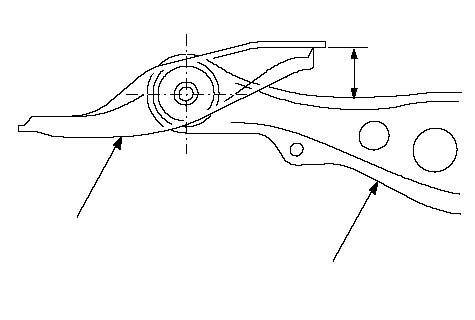 30.8 mm 30.8 mm(1.21 in.)AB |