Rear Damper Replacement (5D)
Rear Damper Replacement
Exploded View
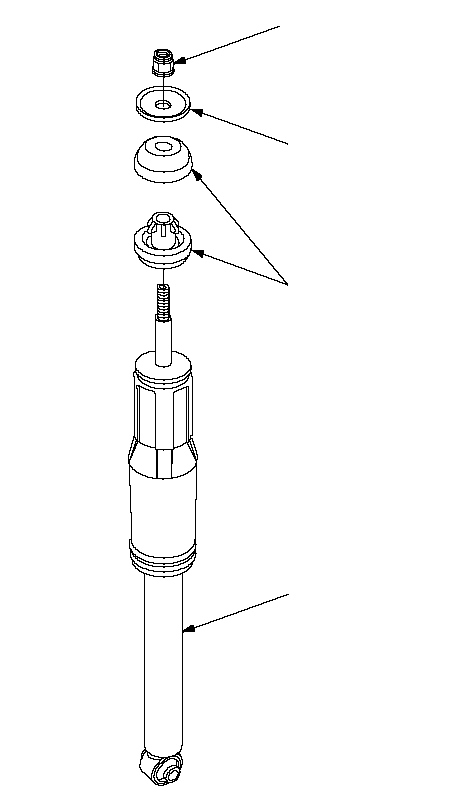 SELF-LOCKING NUT
10 x 1.25 mm
29 N·m
(3.0 kgf·m, 22 lbf·ft)
Replace.DAMPER MOUNTING
RUBBER
Check for weakness
and damage.DAMPER MOUNTING
WASHER
Check for deformation.DAMPER UNIT
Check for oil leaks,
gas leaks, and smooth
operation.
Removal
| 1. | Raise the rear of the vehicle, and support it with safety stands in the proper locations. |
| 2. | Remove the rear wheel. |
| 3. | Place a floor jack under the lower arm B to support the suspension. |
| 4. | Remove the lid on the trunk side trim. |
| 5. | Hold the damper shaft (A) with a hex wrench (B), and loosen the self-locking nut (C).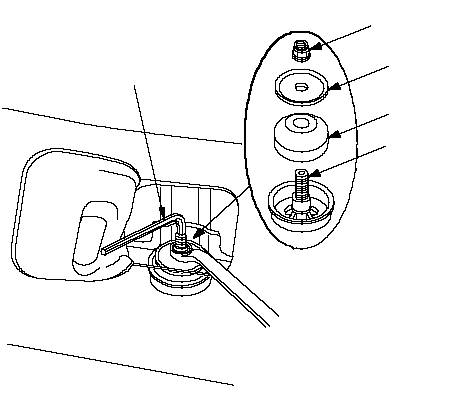 10 x 1.25 mmABCDE 10 x 1.25 mmABCDE |
| 6. | Remove the self-locking nut, damper mounting washer (D), and damper mounting rubber (E) from the top of damper. |
| 7. | Disconnect the lower arm B and dumper (A).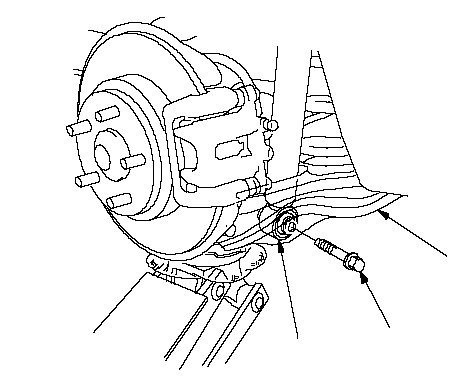 12 x 1.25 mmAB 12 x 1.25 mmAB |
| 8. | Lower the jack, then remove the damper unit (A).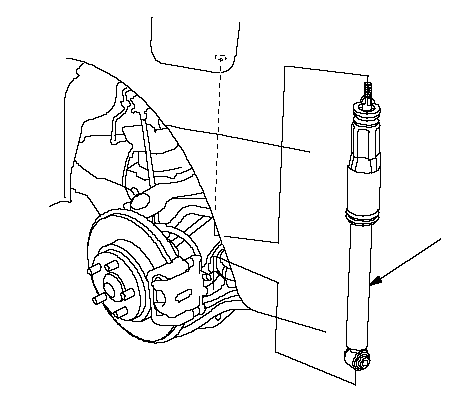 A A |
Inspection
| 1. | Install the 10 mm flange nut on the top of the damper rod. |
| 2. | Push on the damper by hand as shown.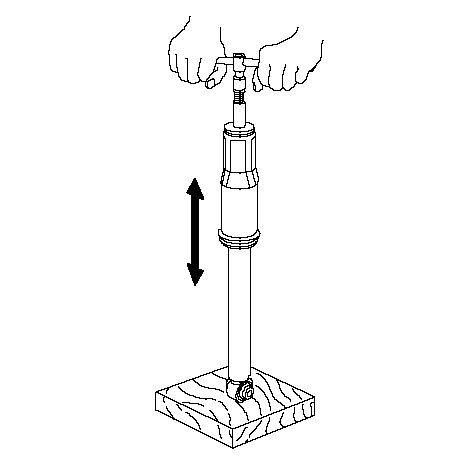 |
| 3. | Check for smooth operation through a full stroke, both compression and extension. The damper should extend in a smooth, continuous motion when the compression is released. If it does not (no compression or no extension), the gas is leaking, and the damper should be replaced. |
| 4. | Check for oil leaks, abnormal noises, or binding during these tests. |
Installation
| 1. | Install the damper mounting rubber (A) onto the damper unit. Position the damper assembly (C) between the body and lower arm B.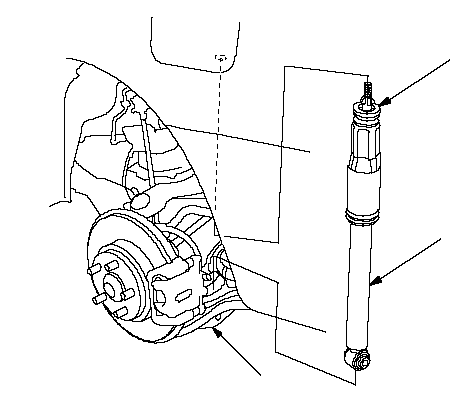 ABC ABC |
| 2. | Place a jack under the lower arm B to support the suspension.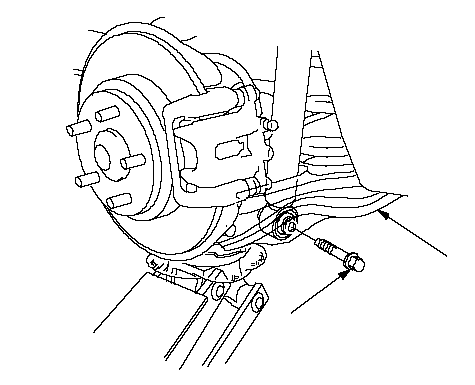 AB12 x 1.25 mm AB12 x 1.25 mm103 N·m (10.5 kgf·m, 75.9 lbf·ft) |
| 3. | Loosely tighten the damper mounting bolt (A). |
| 4. | Raise the rear suspension with the jack until the vehicle just lifts off the safety stands, then tighten the damper mounting bolt to the specified torque values. |
| 5. | Install the damper mounting rubber (A), damper mounting washer (B), and new self-locking nut on the damper shaft. NOTE: Use a new self-locking nut on reassembly. 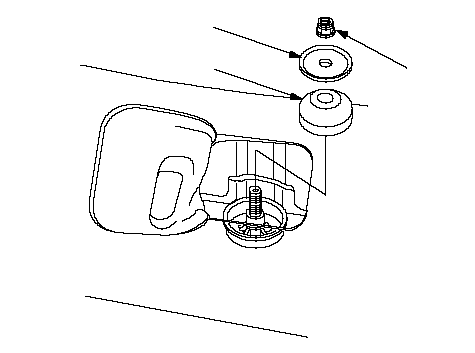 10 x 1.25 mm 10 x 1.25 mm29 N·m (3.0 kgf·m, 22 lbf·ft)AB |
| 6. | Tighten the self-locking nut to the specified torque values while holding the damper shaft (A) with a hex wrench (B).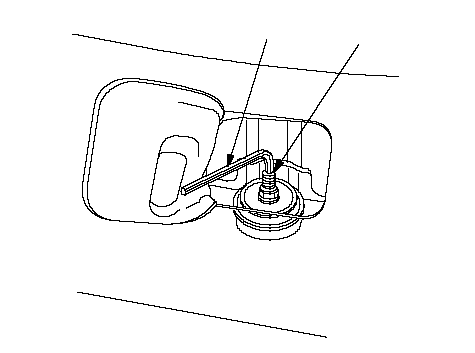 AB AB |
| 7. | Reinstall the lid on the trunk side trim. |
| 8. | Install the rear wheel. |