Interior Trim Removal/Installation - Trunk Area (4D)
Interior Trim Removal/Installation - Trunk Area
Without Trunk Side Spacer
NOTE:
- Put on gloves to protect your hands.
- When prying with a flat-tip screwdriver, wrap it with protective tape to prevent damage.
- Take care not to bend or scratch the trim and panels.
| 1. | Remove the trim as shown. |
| 2. | Install the trim in the reverse order of removal, and replace any damaged clips.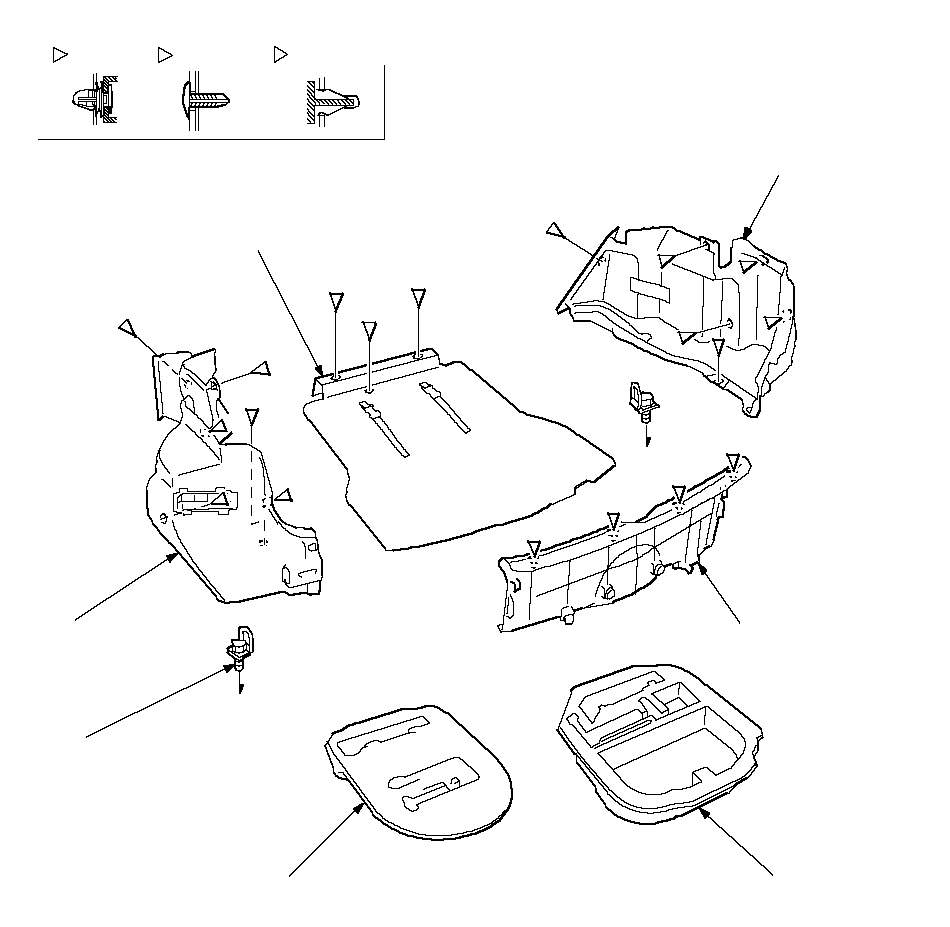 SPARE TYRE LIDRIGHT TRUNK SIDE SPARE TYRE LIDRIGHT TRUNK SIDETRIM PANELTRUNK REAR TRIM PANELLEFT TRUNK SIDE TRIM PANELBBBAAABBBCBBBFastener LocationsA: Clip, 4B: Clip, 11C: Clip, 4CACCBBTRUNK FLOOR SPACER (With spare tyre)TRUNK FLOOR SPACER (Without spare tyre)TIE DOWN HOOK 6 x 1.0 mm 9.8 N·m (1.0 kgf·m, 7.2 lbf·ft)To body.To body. |
With Trunk Side Spacer
NOTE:
- Put on gloves to protect your hands.
- When prying with a flat-tip screwdriver, wrap it with protective tape to prevent damage.
- Take care not to bend or scratch the trim and panels.
| 1. | Remove the trim as shown. |
| 2. | Install the trim in the reverse order of removal, and replace any damaged clips.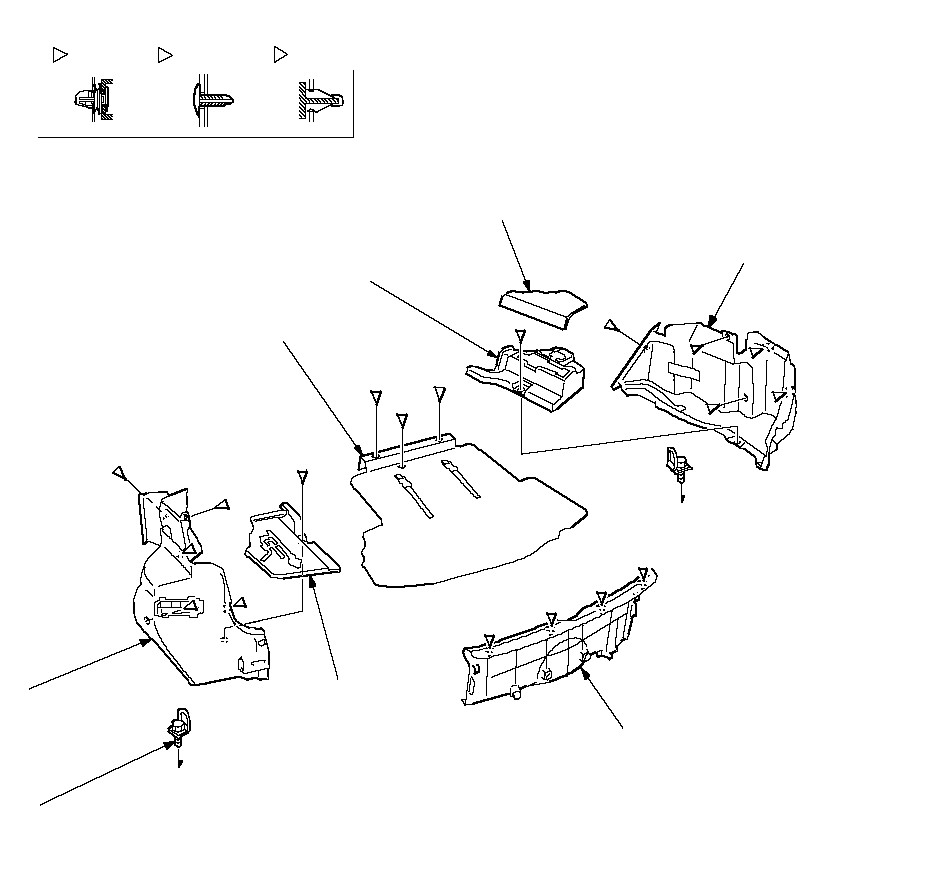 SPARE TYRE LIDRIGHT TRUNK SIDE SPARE TYRE LIDRIGHT TRUNK SIDETRIM PANELTRUNK REAR TRIM PANELLEFT TRUNK SIDE TRIM PANELBAAABBBBBBFastener LocationsA: Clip, 4B: Clip, 11C: Clip, 4CACCBTIE DOWN HOOK 6 x 1.0 mm 9.8 N·m (1.0 kgf·m, 7.2 lbf·ft)CBLEFT TRUNK SIDE SPACERBBRIGHT TRUNK SIDE SPACERRIGHT TRUNK SIDE SPACER MATTo body.To body. |