Front Door Outer Handle Replacement
Front Door Outer Handle Replacement
NOTE: Put on gloves to protect your hands.| 1. | Remove these items: |
| 2. | Raise the glass fully. |
| 3. | Remove the maintenance hole seal (A), then disconnect the outer handle rod (B).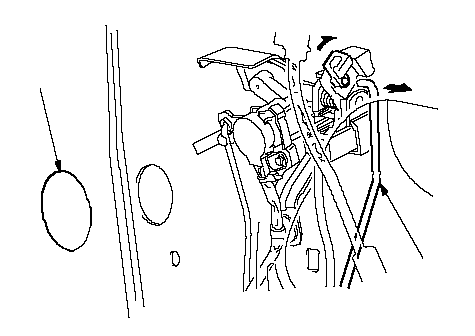 BA BA |
| 4. | Remove the center lower channel (A):
Without Super Locking and Passenger's with Super Locking: 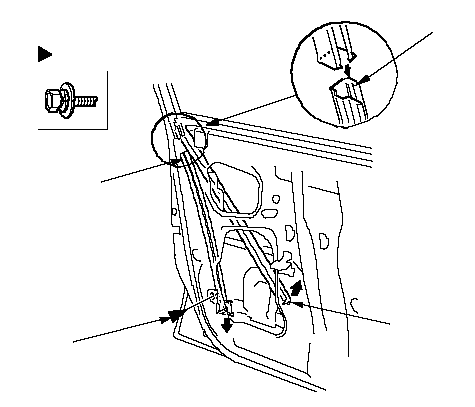 Fastener Location: Bolt, 1ABB6 x 1.0 mm Fastener Location: Bolt, 1ABB6 x 1.0 mm8 N·m (0.8 kgf·m, 6 lbf·ft) Driver's with Super Locking: 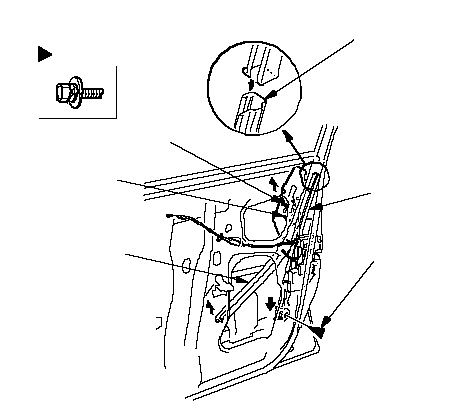 Fastener Location: Bolt, 1ABB6 x 1.0 mm Fastener Location: Bolt, 1ABB6 x 1.0 mm8 N·m (0.8 kgf·m, 6 lbf·ft)CD |
| 5. | Disconnect the cylinder rod (A) on driver's side.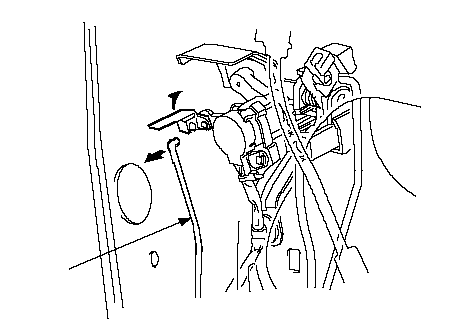 A A |
| 6. | Remove the maintenance cap (A) from the rear of the door, then loosen the screw securing the cylinder protector (B) and the outer handle (C).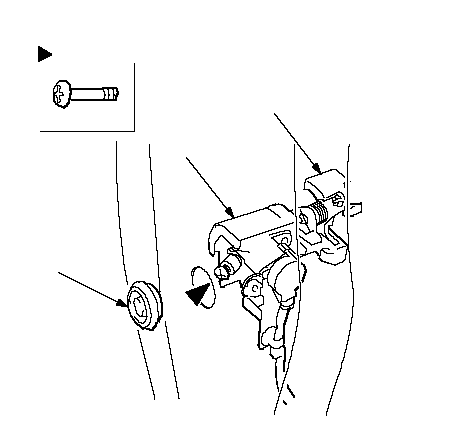 Fastener Location: Screw, 1CBA Fastener Location: Screw, 1CBA |
| 7. | Remove the bolt securing the cylinder protector (A), then remove the cylinder switch, lock cylinder (driver's), and cylinder protector as an assembly. Driver's: 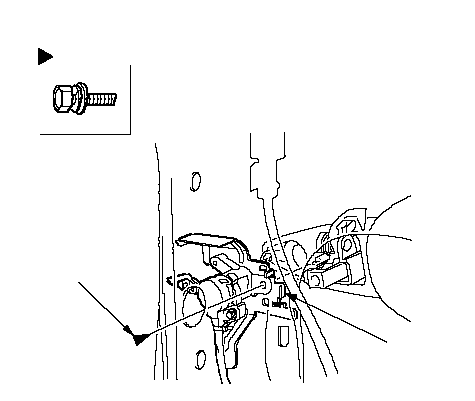 Fastener Location: Bolt, 1A6 x 1.0 mm Fastener Location: Bolt, 1A6 x 1.0 mm9.8 N·m (1.0 kgf·m, 7.2 lbf·ft) Passenger's: 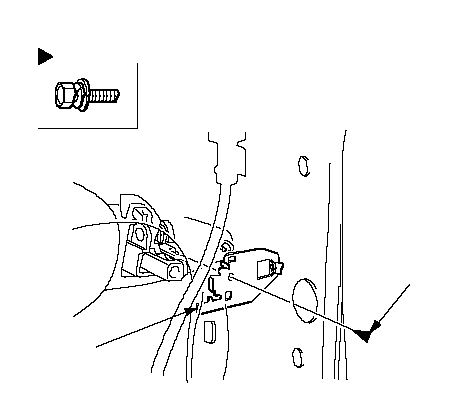 Fastener Location: Bolt, 1A6 x 1.0 mm Fastener Location: Bolt, 1A6 x 1.0 mm9.8 N·m (1.0 kgf·m, 7.2 lbf·ft) |
| 8. | Driver's: Disconnect the cylinder switch connector (A), and detach the harness clips (B), then remove the cylinder switch (C).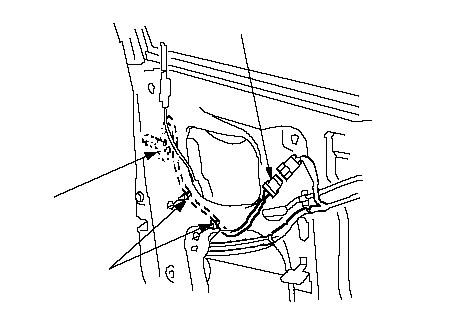 ACB ACB |
| 9. | Remove the screws (A, B), then separate the lock cylinder (C), cylinder switch (D), and cylinder protector (E).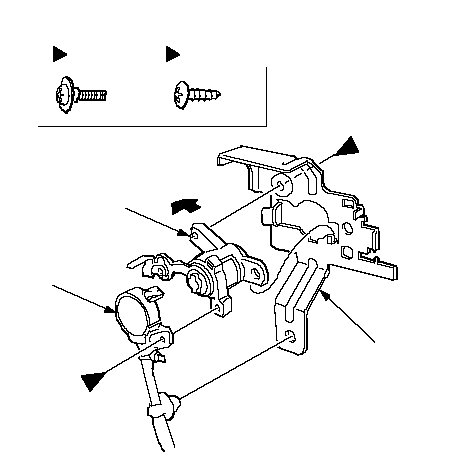 Fastener LocationsA: Screw, 1B: Screw, 1BACED Fastener LocationsA: Screw, 1B: Screw, 1BACED |
| 10. | Remove the bolt, then remove the spacer (A).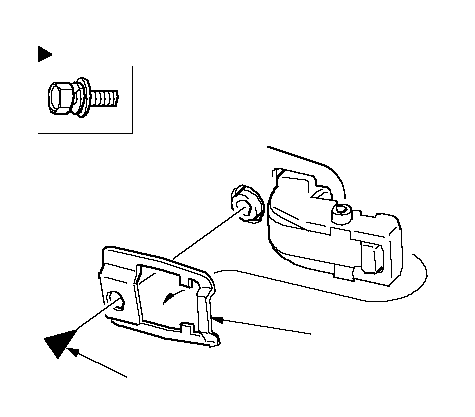 Fastener Location: Bolt, 1A6 x 1.0 mm Fastener Location: Bolt, 1A6 x 1.0 mm9.8 N·m (1.0 kgf·m, 7.2 lbf·ft) |
| 11. | While pulling the outer handle (A), remove the handle from the holes in the door panel. Take care not to scratch the door.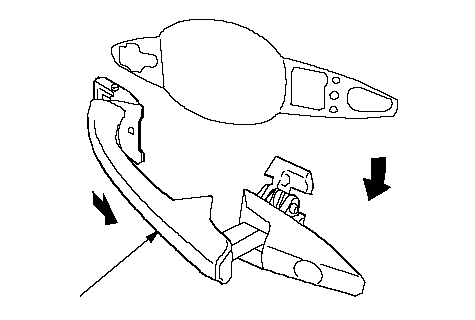 A(2)(1) A(2)(1) |
| 12. | Install the handle in the reverse order of removal, and note these items:
|