Front Knuckle/Hub/Wheel Bearing Replacement
Front Knuckle/Hub/Wheel Bearing Replacement
Exploded View
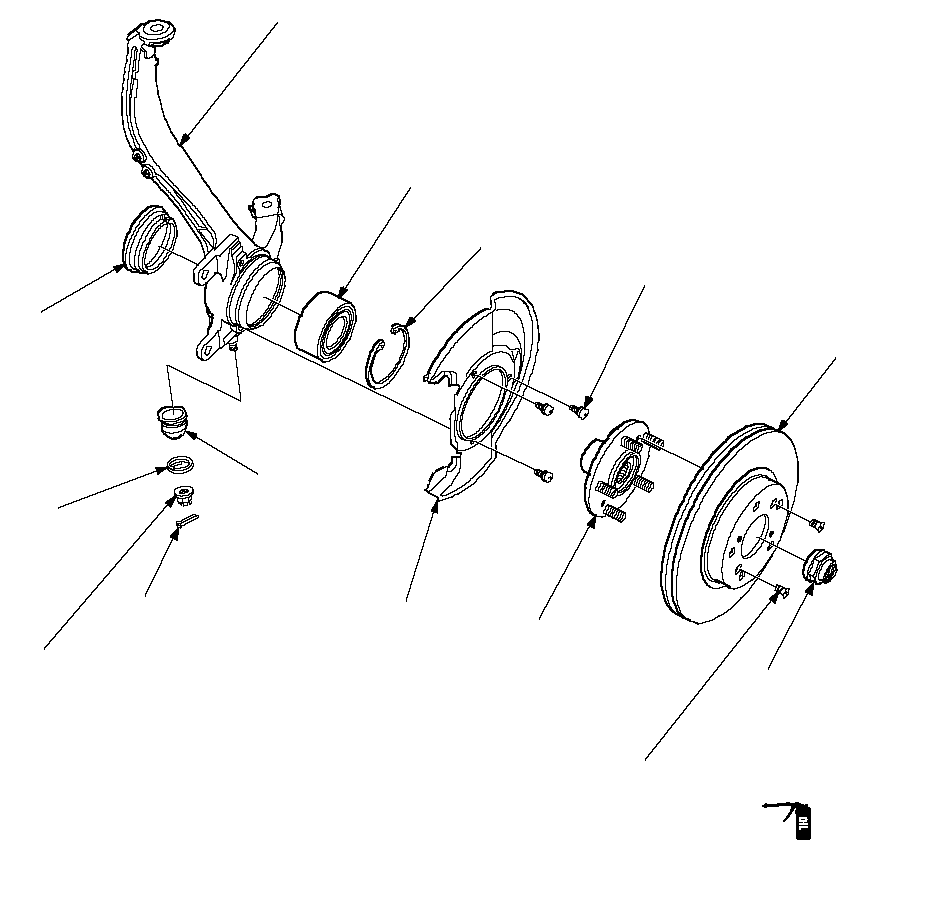 WHEEL BEARING
Replace.BALL JOINT BOOT
Check for deterioration
and damage.CLIPCOTTER PIN
Replace.CASTLE NUT
12 x 1.25 mm
78-88 N·m
(8.0-9.0 kgf·m, 58-65 lbf·ft)BRAKE DISCSPINDLE NUT
Replace.SPLASH GUARD
Check for corrosion,
deformation,
and damage.
Replace if rusted.KNUCKLE
Check for deformation and damage.FRONT KNUCKLE
RING
Check for deformation
and damage.SNAP RING6 mm
9.8 N·m (1.0 kgf·m, 7.2 lbf·ft)FLAT SCREW
6 x 1.0 mm
9.8 N·m
(1.0 kgf·m,
7.2 lbf·ft)22 x 1.5 mm
181 N·m
(18.5 kgf·m, 134 lbf·ft)
24 x 1.5 mm
245 N·m
(25.0 kgf·m, 181 lbf·ft)Apply a small amount
of engine oil to the
surface of the nut. HUB
Check for deformation,
damage, and cracks.
Special Tools Required
Hub dis/assembly tool, 42 mm ( 07GAF-SD40100)
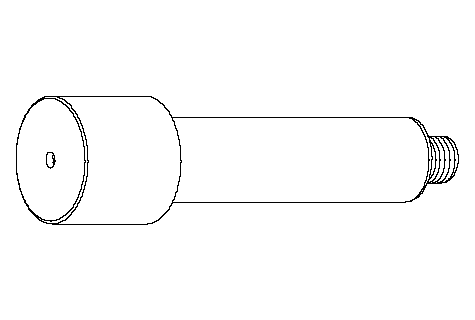
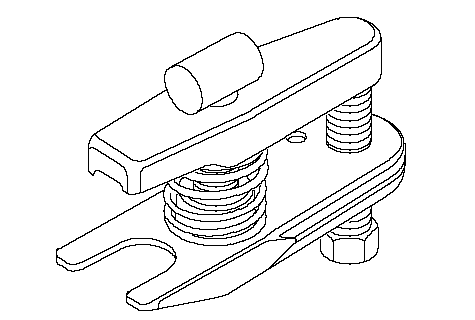
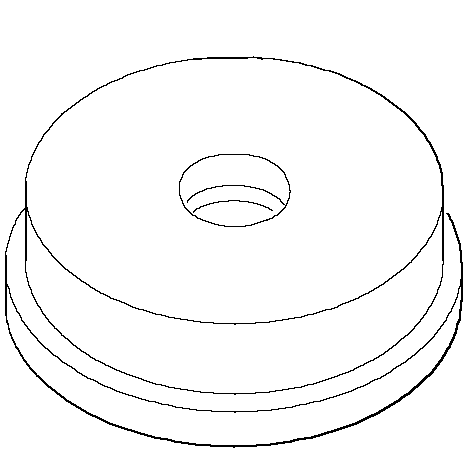
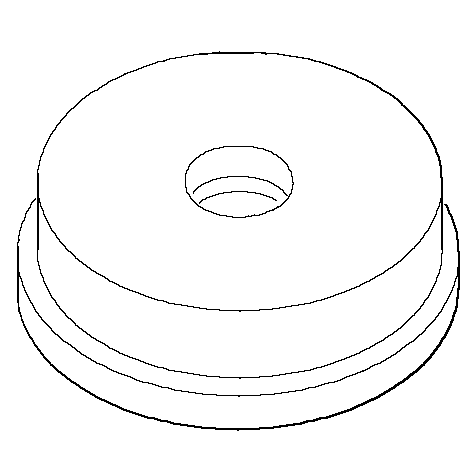
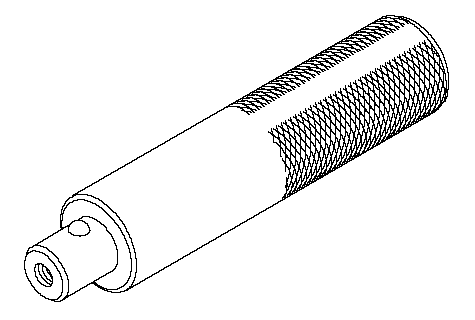
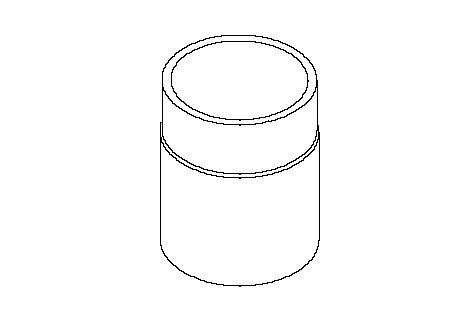
Knuckle/Hub Replacement
| 1. | Raise the front of the vehicle, and support it with safety stands in the proper locations. |
| 2. | Remove the wheel nuts, and front wheel.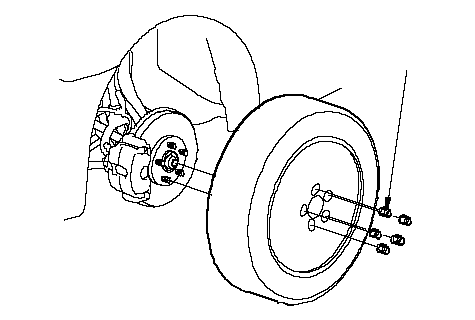 108 N·m 108 N·m(11.0 kgf·m, 80 lbf·ft) |
| 3. | Remove the brake hose mounting bracket (A).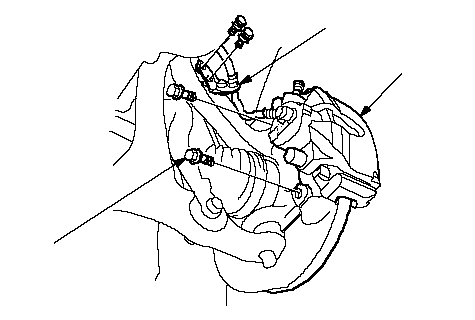 CB CB12 x 1.25 mm 108 N·m (11.0 kgf·m, 80 lbf·ft)A |
| 4. | Remove the brake caliper bracket mounting bolts (B), and remove the caliper assembly (C) from the knuckle. To prevent damage to the caliper assembly or brake hose, use a short piece of wire to hang the caliper assembly from the undercarriage. Do not twist the brake hose with force. |
| 5. | Remove the wheel sensor (A) from the knuckle. Do not disconnect the wheel sensor connector.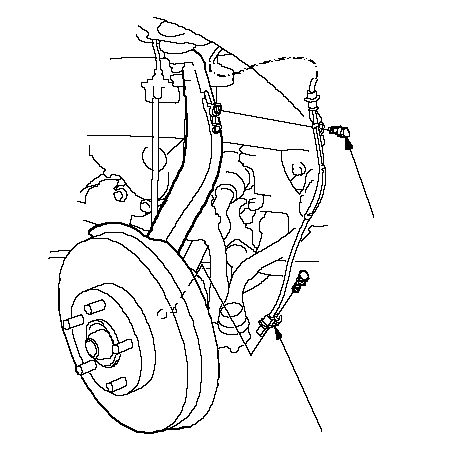 6 x 1.0 mm 6 x 1.0 mm9.8 N·m (1.0 kgf·m, 7.2 lbf·ft)A |
| 6. | Raise the stake (A), and remove the spindle nut (B).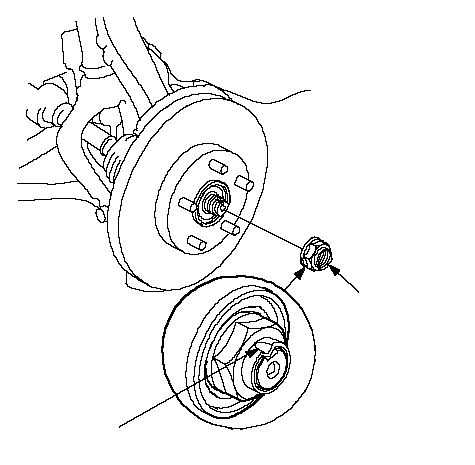 B B22 x 1.5 mm 181 N·m (18.5 kgf·m, 134 lbf·ft) 24 x 1.5 mm 245 N·m (25.0 kgf·m, 181 lbf·ft)A |
| 7. | Remove the 6 mm brake disc retaining screws (A).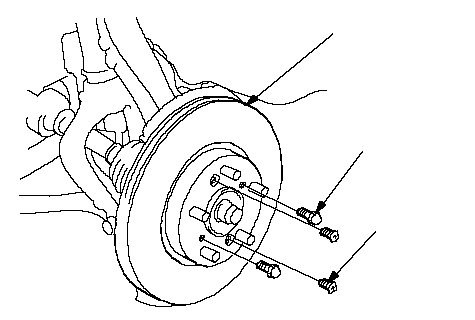 A A6 x 1.0 mm 9.8 N·m (1.0 kgf·m, 7.2 lbf·ft)B 8 x 1.25 mmC |
| 8. | Screw two 8X1.25 mm bolts (B) into the disc to push it away from the hub. Turn each bolt two turns at a time to prevent cocking the disc excessively. |
| 9. | Remove the brake disc (C) from the knuckle. |
| 10. | Remove the cotter pin (A) from the tie-rod end ball joint, and loosen the nut (B). NOTE: During installation, install the new cotter pin after tightening the nut, and bend its end as shown. 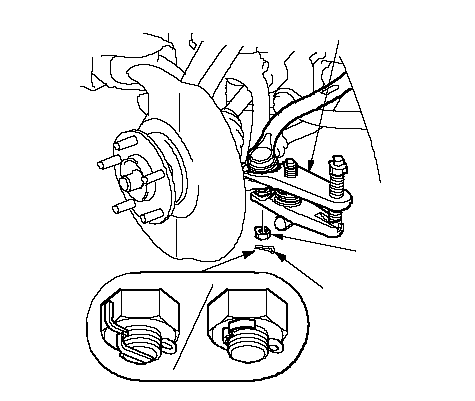 B B10 x 1.25 mm 43 N·m (4.4 kgf·m, 32 lbf·ft)A07MAC-SL00200 |
| 11. | Disconnect the tie-rod end ball joint from the knuckle using the special tool. |
| 12. | Remove the cotter pin (A) from the lower arm ball joint, and loosen the nut (B) NOTE:
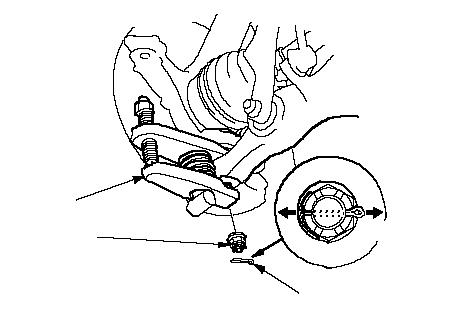 B B12 x 1.25 mm 88-98 N·m (9.0-10.0 kgf·m, 65-72 lbf·ft)A07MAC-SL00200FORWARD |
| 13. | Disconnect the lower arm ball joint from the lower arm using the special tool. |
| 14. | Remove the cotter pin (A) from the upper arm ball joint, and loosen the nut (B). NOTE: During installation, insert the new cotter pin into the ball joint pin from the forward to the rearward of the vehicle, and bend its end as shown. 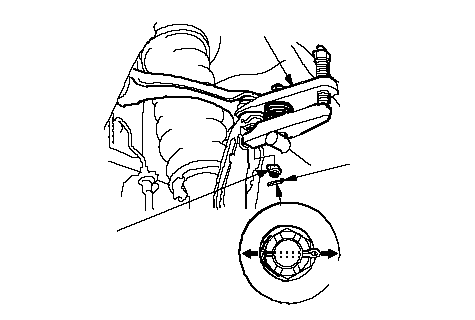 B B10 x 1.25 mm 39-47 N·m (4.0-4.8 kgf·m, 29-35 lbf·ft)AFORWARD07MAC-SL00200 |
| 15. | Disconnect the upper arm ball joint from the knuckle using the special tool. |
| 16. | Remove the driveshaft outboard joint (A) from the knuckle (B) by tapping the driveshaft end (C) with a plastic hammer while drawing the hub outward, then remove the knuckle. NOTE: Do not pull the driveshaft end outward. The inner driveshaft joint may come apart. 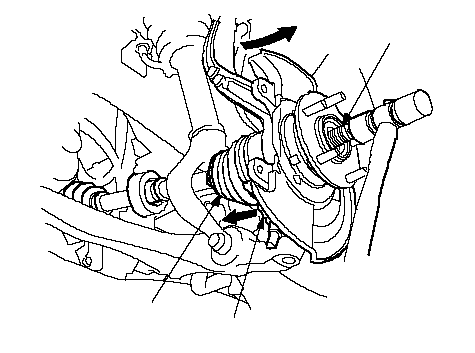 CBA CBA |
| 17. | Install the knuckle/hub in the reverse order of removal, and note these items:
|
Wheel Bearing Replacement
| 1. | Separate the hub (A) from the knuckle (B) using the special tool and a hydraulic press. Hold the knuckle with the attachment (C) of the hydraulic press or equivalent tool. Be careful not to deform the splash guard. Hold onto the hub to keep it from falling when pressed clear.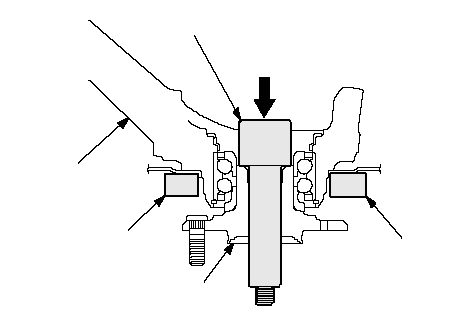 ACBC07GAF-SD40100Press ACBC07GAF-SD40100Press |
| 2. | Press the wheel bearing inner race (A) off of the hub (B) using the special tool, a commercially available bearing separator (C), and a press.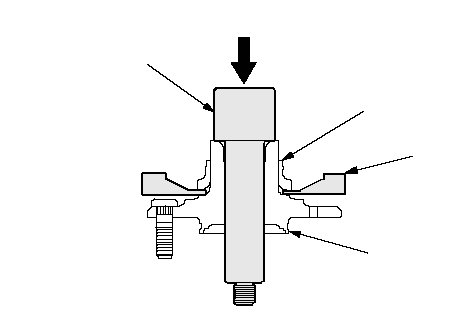 ABC07GAF-SD40100Press ABC07GAF-SD40100Press |
| 3. | Remove the snap ring (A) and the splash guard (B) from the knuckle (C).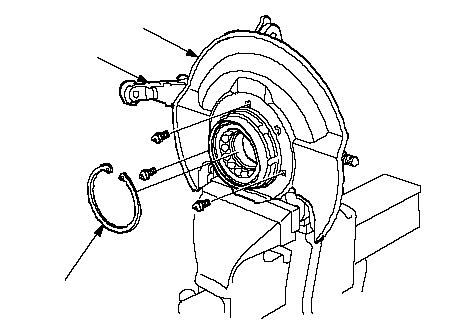 CBA CBA |
| 4. | Check the front knuckle ring (A) for damage or deformation, and replace it if necessary.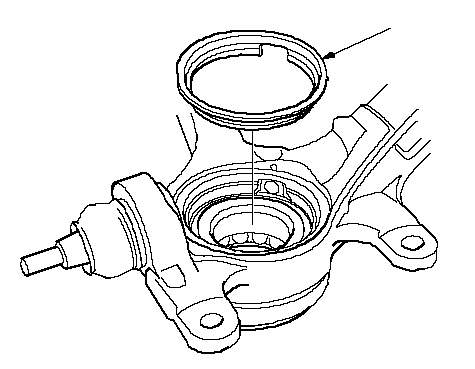 A A |
| 5. | Press the wheel bearing (A) out of the knuckle (B) using the special tool and a press.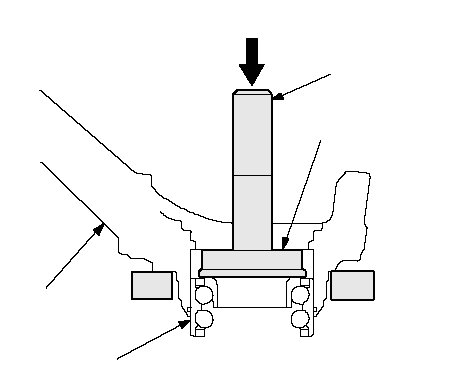 BAPress07749-001000007746-0010600 BAPress07749-001000007746-0010600 |
| 6. | Wash the knuckle and hub thoroughly in high flash point solvent before reassembly. |
| 7. | Press a new wheel bearing (A) into the knuckle (B) using the old bearing (C), a steel plate (D), the special tool, and a press. NOTE:
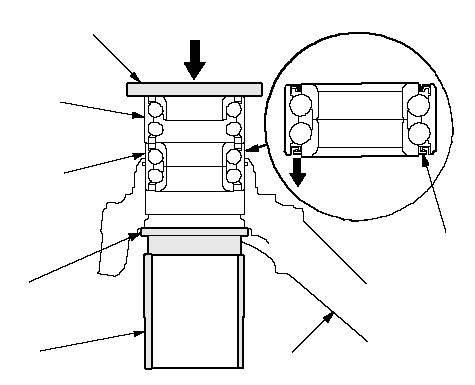 PressDCA07GAD-SD4010107965-SD90100BE PressDCA07GAD-SD4010107965-SD90100BE |
| 8. | Install the new front knuckle ring (A) on the inside of the knuckle by aligning the cutout portion (B) on the ring with the wheel sensor hole (C) in the knuckle. Be careful not to damage or deform the ring when installing it.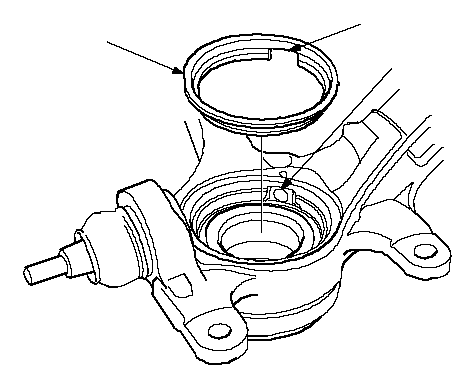 ABC ABC |
| 9. | Install the snap ring (A) securely in the knuckle (B).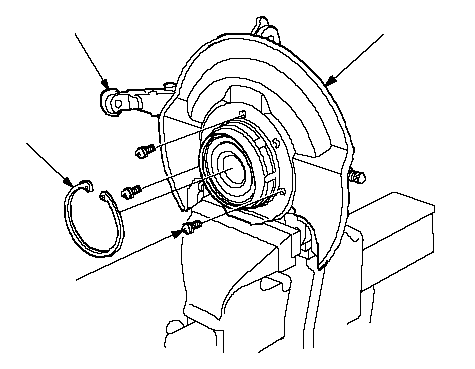 CBAD CBAD6 x 1.0 mm 9.8 N·m (1.0 kgf·m, 7.2 lbf·ft) |
| 10. | Install the splash guard (C), and tighten the screws (D) to the specified torque. |
| 11. | Press a wheel bearing (A) onto the hub (B) using the special tools and a press.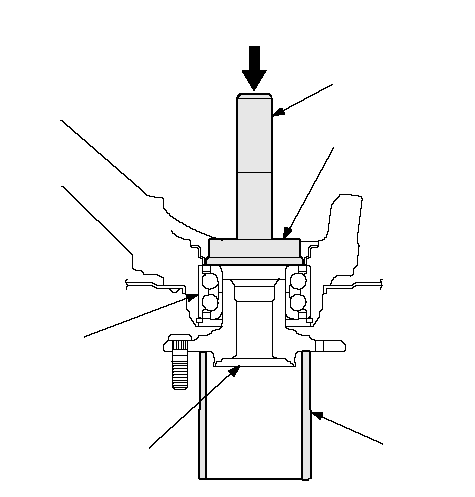 BPress07749-001000007746-001060007965-SD90100A BPress07749-001000007746-001060007965-SD90100A |