Crankshaft Installation
Special Tools Required
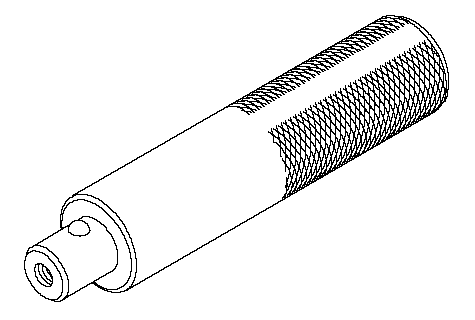
Handle driver ( 07749-0010000)
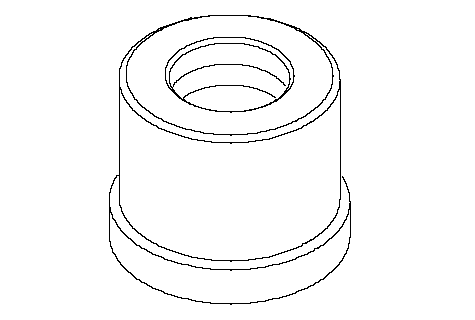
Driver attachment, 24 x 26 mm ( 07746-0010700)
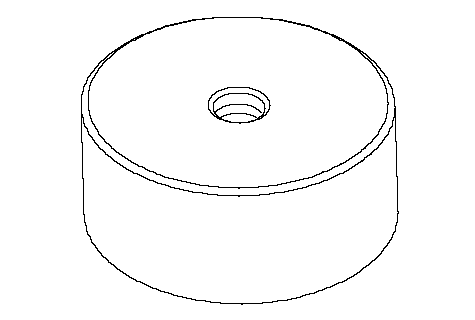
Oil seal driver attachment 96 ( 07ZAD-PNA0100)
| 1. | With a manual transmission, install the crankshaft end bushing when replacing the crankshaft.
Using the special tools, drive in the crankshaft end bushing until the special tools bottom against the crankshaft.
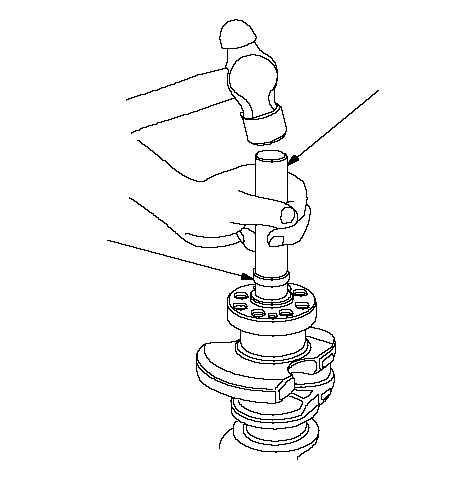 07746-001070007749-0010000 07746-001070007749-0010000 |
| 5. | Install the bearing halves in the cylinder block and connecting rods.
|
| 6. | Apply a coat of engine oil to the main bearings and rod bearings.
|
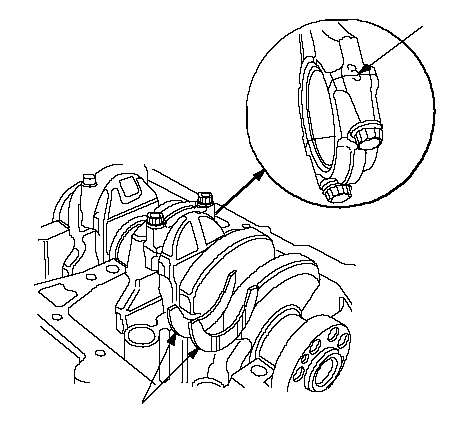
| 7. | Hold the crankshaft so rod journal No. 2 and rod journal No. 3 are straight up, and lower the crankshaft into the block.
|
| 8. | Install the thrust washers (A) in the No. 4 journal of the cylinder block.
 BA BA |
| 9. | Apply engine oil to the threads of the connecting rod bolts.
|
| 10. | Seat the rod journals into connecting rod No. 1 and connecting rod No. 4. Line up the mark (B) on the connecting rod and cap, then install the caps and bolts finger-tight.
|
| 11. | Rotate the crankshaft clockwise, and seat the journals into connecting rod No. 2 and connecting rod No. 3. Line up the mark on the connecting rod and cap, then install the caps and bolts finger-tight.
|
| 12. | Tighten the connecting rod bolts.
| Tightening torque: |
|---|
| K20A6 engine: | 20 N·m (2.0 kgf·m, 14 lbf·ft)+90° | | K24A3 engine: | 36 N·m (3.7 kgf·m, 27 lbf·ft)+120° |
|
| 13. | Remove old liquid gasket from the lower block mating surfaces, bolts, and bolt holes.
|
| 14. | Clean and dry the lower block mating surfaces.
|
| 15. | Apply liquid gasket, P/N 08C70-K0234M, 08C70-K0334M or 08C70-X0331S, evenly to the cylinder block mating surface of the lower block and to the inner threads of the bolt holes.
NOTE: Do not install the parts if 4 minutes or more have elapsed since applying liquid gasket. Instead, reapply liquid gasket after removing old residue.
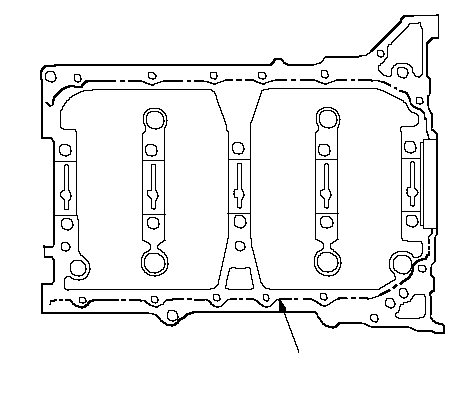 Apply liquid gaslet Apply liquid gaslet
along the broken line. |
| 16. | Put the lower block on the cylinder block.
|
| 17. | Tighten the bearing cap bolts in sequence to 29 N·m (3.0 kgf·m, 22 lbf·ft).
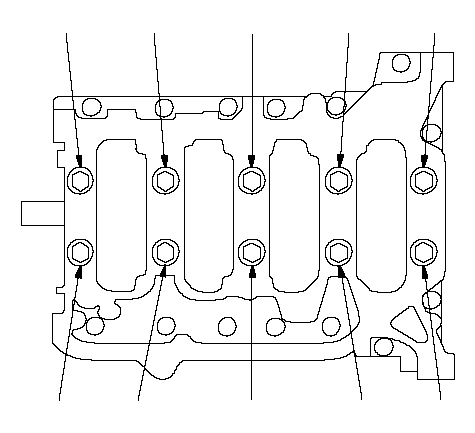 (10)(9)(8)(7)(5)(4)(3)(2)(6)(1) (10)(9)(8)(7)(5)(4)(3)(2)(6)(1) |
| 18. | Tighten the bearing cap bolts an additional 56°.
|
| 19. | Tighten the 8 mm bolts in sequence to 22 N·m (2.2 kgf·m, 16 lbf·ft).
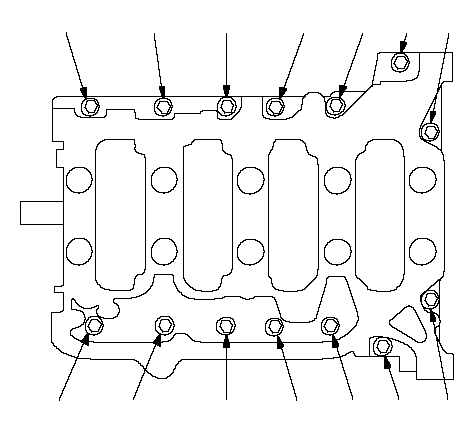 (14)(13)(12)(11)(10)(9)(8)(7)(6)(5)(4)(3)(2)(1) (14)(13)(12)(11)(10)(9)(8)(7)(6)(5)(4)(3)(2)(1) |
| 20. | Use the special tools to drive a new oil seal squarely into the block to the specified installed height.
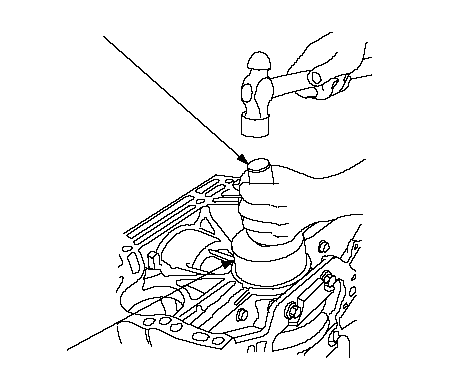 07ZAD-PNA010007749-0010000 07ZAD-PNA010007749-0010000 |
| 21. | Measure the distance between the cylinder block (A) and oil seal (B).
| Oil Seal Installed Height: | 0.2-1.2 mm (0.001-0.047 in.) |
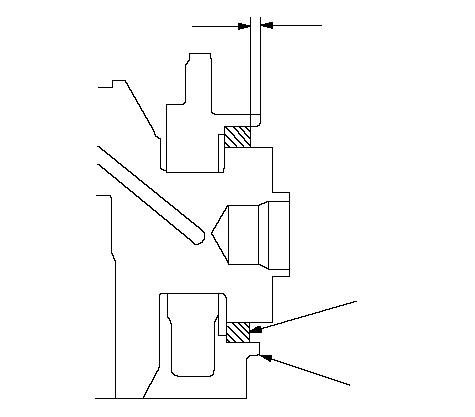 0.2-1.2 mm 0.2-1.2 mm
(0.001-0.047 in.)BA |
| 22. | Install the baffle plates.
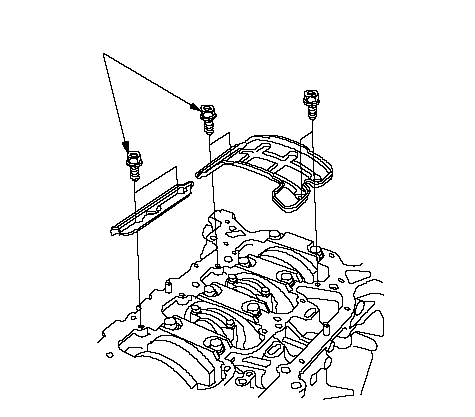 6 x 1.0 mm 6 x 1.0 mm
12 N·m (1.2 kgf·m, 8.7 lbf·ft) |
| 26. | Install the transmission:
|
| 27. | Install the engine assembly.
NOTE: Whenever any crankshaft or connecting rod bearing is replaced, it is necessary after reassembly to run the engine at idling speed until it reaches normal operating temperature, then continue to run it for about 15 minutes.
|