Clutch Slave Cylinder Replacement

NOTE:
  • Use fender covers to avoid damaging painted surfaces.
  • Do not spill brake fluid on the vehicle; it may damage the paint or plastic. If brake fluid does contact the paint or plastic, wash it off immediately with water.
  • The illustration show K24Z3 engine model.
  1. Disconnect the clutch line (A) from the slave cylinder (B). To prevent spills, cover the line joint with rags or shop towels.
    NOTE: Loosen the flare nut (C) while holding the clutch line connector (D) with a wrench.
  1. Remove the slave cylinder from the transmission housing.

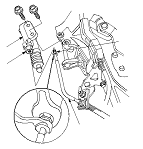
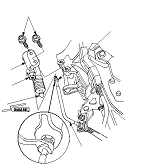
  1. Apply a light of molybdenum grease to the pushrod (A) of the slave cylinder.
  1. Connect the clutch line (B) to the slave cylinder (C), and loosely tighten the flare nut (D).
  1. Install the slave cylinder to the transmission housing, then tighten the clutch line flare nut to the specified torque.
    NOTE: Tighten the flare nut while holding the clutch line connector (E) with a wrench.
  1. Check the clutch operation, and check for leaks.
  1. Test-drive the vehicle.