How to Troubleshoot the Navigation System

General Operation
Refer to the navigation system manual for the navigation system operating procedures.

Anti-theft Feature
The navigation system and audio unit have a coded theft protection circuit. Make sure you have the anti-theft security code before:
  • Disconnecting the battery.
  • Disconnecting the navigation unit 8P connector.
  • Removing the No. 15 (10 A) fuse from the under-hood fuse/relay box.
After service, reconnect power to the navigation unit, and turn the ignition switch to ON (II). Enter the 4-digit anti-theft security code, then select Done.
When replacing the navigation unit, be sure to give the customer the new anti-theft security code.

Symptom Diagnosis
Certain circumstances and system limitations will result in occasional vehicle positioning errors. Some customer's may think this indicates a problem with the navigation system when, in fact, the system is normal. Keep the following items in mind when interviewing customer's about symptoms of the navigation system.

Self-Inertial Navigation Limitations
The limitations of the self-inertial portion of the navigation system (the yaw rate sensor and the vehicle speed signal) can cause discrepancies between the vehicle's actual position and the indicated vehicle's position (GPS vehicle position).
The following circumstances may cause vehicle positioning errors:
  • Moving the vehicle with the engine stopped and the vehicle stopped, such as by ferry or tow truck, or if the vehicle is spun on a turn table.
  • Tire slippage, changes in tire rolling diameters, and some driving situations may cause discrepancies in travel distances. Examples of this include:
  • -
    Continuous tire slippage on a slippery surface
    -
    Driving with snow chains mounted
    -
    Abnormal tire pressure
    -
    Incorrect tire size
    -
    Frequent lane changes across a wide highway
    -
    Continuous driving on a straight or gently curving highway
    -
    Very bumpy roads
  • Tolerances in the system and map inaccuracies sometimes limit how precisely the vehicle's position is indicated. Examples of this include:
  • -
    Driving on roads not shown on the map (map matching is not possible)
    -
    Driving on a road that winds in one direction, such as a loop bridge, an interchange, or a spiral parking garage
    -
    Driving on a road with a series of sharp hair-pin turns
    -
    Driving near a gradual highway exit or transition
    -
    Driving on one of two close parallel roads
    -
    Making many 90 degree turns

Global Positioning System (GPS) Limitations
The GPS cannot detect the vehicle's position or elevation during the following instances:
  • For the first 5 to 10 minutes after reconnecting the battery (this process can take as long as 45 minutes).
  • When the satellite signals are blocked by tall buildings, mountains, tunnels, large trees, inside parking structures or large trucks.
  • When the GPS antenna is blocked by metallic window tinting or by an object placed above it in the vehicle. The GPS antenna requires a clear unobstructed view of the sky.
  • When there is no satellite signal output (signal output is sometimes stopped for satellite servicing).
  • When the satellite signals are blocked by the operation of some electronic aftermarket accessories including, but not limited to non-OEM in-dash entertainment units (radio, CD players/changers, radar detectors and theft recovery systems) and cell phones placed near the navigation system.
The accuracy of GPS is reduced during these instances:
  • Metallic window tinting above the GPS antenna.
  • When only three or less satellite signals can be received (Four satellite signals are required for accurate positioning).
  • When driving near high tension power lines.
  • When the satellite control centers are experiencing problems.

Muting Logic
Whenever the navigation system is giving guidance, the front speakers are muted. When the voice control system is being used, all of the speakers are muted. If the Hands Free Telephone is in use, the voice control system is unavailable and a message appears onscreen.

LCD Display Unit Limitations
NOTE: The screen is not touch sensitive. Use the interface dial and buttons to select items on the screen.
  • In cold temperatures, the display may stay dark for the first 2 or 3 minutes until it warms up.
  • When the display is too hot because of direct summer sunlight, it will remain dark until the temperature drops (you may see an error message displayed stating this fact).
  • When the humidity is high and the interior temperature is low, the display may appear cloudy. The display will clear up after some use.
  • Fingerprints on the screen may be noticeable. Clean the screen with a soft, damp cloth. You may use a mild cleaner intended for eye glasses or computer screens. To avoid scratching the panel, do not rub too hard or use abrasive cleaners or shop towels.

Symptom Duplication
  • When the symptom can be duplicated, verify that it is not a characteristic of the system. Review the navigation system manual and compare it to a known-good vehicle (with the same software and database), under the same conditions. If the symptom is not the same as the known-good, follow the self-diagnostic procedures and the appropriate troubleshooting procedures.
  • When the symptom does not reappear or only reappears intermittently, ask the customer about the conditions when the symptom occurred.
  • -
    Always ask the customer to demonstrate the problem.
    -
    Try to establish possible user error or misunderstanding of the system.
    -
    Try to establish if outside interference may have been the cause.
    -
    Try to duplication the symptom under the same conditions the customer experienced.
    -
    Vibration, temperature extremes, and moisture (dew, humidity) are factors that are difficult to duplicate.
    -
    Inspect the vehicle for after-market electronic devices (vehicle locators, amps, radar detectors, etc.) that may be hidden.

Service Precautions
  • If the navigation unit needs to be replaced, you can back-up the navigation data and transfer it to a new navigation unit. See Save users memory (KQ model).
  • When the battery is disconnected, the internal GPS clock is reset to 0:00. The clock will reset to the correct time after the system finishes GPS initialization.
  • Before disconnecting the battery, make sure you have the anti-theft codes for the audio system and the navigation system, and write down the audio presets. Also obtain any PGM-FI or transmission DTCs and freeze frame date (which will be lost when the ECM/PCM loses power).
  • After reconnecting the battery, you have to wait to get the initial signal from the satellite. It will take from 10 to 45 minutes.
  • Adjust the setup clock settings (time zone and daylight savings) in the navigation system.
  • Before returning the vehicle to the customer, enter the anti-theft codes for the audio system and the navigation system.

System Initialization
If for any reason, you lose power to the navigation system (like the battery was disconnected). The navigation system will require initialization. Once completed, your system will be ready to use.
This initialization requires the following:
  • Entering the 4-digit anti-theft security code to unlock the system
  • GPS initialization (may not be needed depending of the length of time the system was without power)
  • Map matching to align the GPS to a location on the map

GPS Initialization
NOTE: You must park the vehicle outside with a clear view of the southern sky.
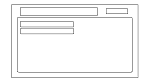
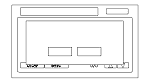
Depending on the length of time the battery was disconnected, your system may require GPS initialization. If it does, the following screen appears:

If this procedure is not necessary, the system proceeds directly to the Disclaimer screen. During initialization, the system searches for all available GPS satellites, and obtains their orbital information. During this procedure the vehicle should be out in the open with a clear view of the sky.
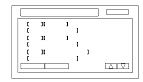
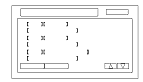
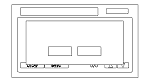
If the navigation system finds the satellites properly, this box clears, and changes to the Disclaimer screen. If within 10 minutes the system fails to locate a sufficient number of satellites to locate your position, the following screen appears.
It this appears, turn off the engine, then restart the vehicle and move it to a different location. If you now see the Disclaimer screen, the GPS initialization is complete.
NOTE:
  • The average acquiring time is less than 10 minutes, but it can take as long as 45 minutes.
  • If the system is still unable to acquire a signal, follow the instructions on the screen. If this screen appears again, go to troubleshooting for the GPS icon is white or not shown.
  • Skip to a CSF screen by pushing the MENU + INFO buttons at the same time and can move to an System Links screen.

Map Matching
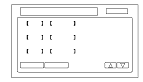
This part of the initialization matches the GPS coordinates with a road on the map screen. To perform this part of the procedure, ensure that the navigation system is displaying a map, and drive the vehicle on a mapped road shown on the map screen. Do not enter a destination at this time. When the name of the current road you are driving on, appears at the bottom of the screen, the entire procedure is complete. Your system is now ready to use.

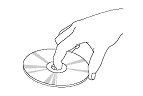
DVD Handing and Cleaning
To avoid damaging or leaving fingerprints on the DVD, always handle it by the edges and place it in a jewel case whenever it is outside the navigation unit. Deep scratches or fingerprints on the back of the DVD can cause intermittent rebooting or other system errors.

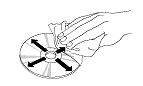
Smudges and fingerprints can be carefully removed using a mild cleaner and tissues designed to clean eyeglasses. To clean a DVD, use a clean soft cloth. Very gently wipe across the DVD from the center to the outside edge, never in a circular motion.
Do not place stabilizer rings or labels on the DVD.

How to Answer Customer Questions About Navigation Coverage
Some customers may ask questions regarding a city, address, or POI (point of interest) covered by the navigation system. It is better to verify a coverage question on an actual vehicle than to disappoint your customer by promising coverage that may be incomplete or missing in their area. The following suggestions can be used to answer coverage inquiries from your customer.
Is my address covered by the navigation system?
Using a current production vehicle (of the same model), try entering the customer's address (street first) to see if their area is covered. Always enter the street first, because sometimes their city may be included in a neighboring township, or under some larger metropolitan city name. If the address is shown in a later year vehicle, but not your customer's vehicle, you might recommend that your customer purchase an update.
Is my city covered by the navigation system?
For general questions about whether a city is covered, view the map coverage link on the DVD order site. On the site, select a year, and select a model, then click on the Coverage link. You then select a state or province, and the cities are listed. Of course, this does not guarantee that the customer's road or address is in the system. Verifying on an actual production vehicle is always the best guarantee that your information is accurate.
The gas station on my corner is now a restaurant. Why is it still incorrect in the navigation system?
For POI-related customer questions, explain that businesses are constantly moving, and there can be a considerable lag in updating the millions of POIs in the system. The database is updated annually, and the best way to the verify whether the POI is accurate is verify the inquiry on a current production vehicle.
Answers to these and other questions regarding coverage can be found in these locations:
  • In the Frequently Asked Questions section of the navigation system manual.
  • At the online DVD order site, by clicking on the FAQs link.

How do I find the local address of a business that is part of a national chain (for example, Starbucks)?
There are three ways to find the local address to businesses:
  • If you know the phone number of the business, select Phone Number and enter the 10 digit phone number (area code plus seven digit number).
  • Select Category, then Restaurant. Enter the keyword Star. The resulting list includes all restaurants that have the letters Star anywhere in the name.
  • Select Name and enter Starbucks. For more common business names, like McDonalds, you may have to search through a list that includes other businesses like McDonalds Welding, McDonalds Automotive, etc.

Precaution on Customer ‘‘Sneak Previews''
Your customer might request a look (or sneak preview) at features in the latest navigation software. You should never preview a navigation DVD in a customer's vehicle. Inserting a new DVD installs the latest software from the DVD into the memory of the customer's navigation system. When the original DVD is reinstalled, the newer software remains in memory and is often incompatible with the customer's original DVD Map and POI database.
If your customer wishes to see the latest navigation coverage or software features, demonstrate it on an in-stock vehicle that already has the latest DVD version.
If, by chance, a newer version is loaded accidentally, either by the dealer or the customer, the only remedy is to enter the navigation diagnostic mode's Version screen and do a forced download.

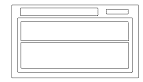
How to Check Error History
The Error History feature is to record intermittent navigation issues that occur while the customer is driving. Sometimes the customer complaint cannot be duplicated. The error history may record the information needed to diagnose the problem. To check the error history:
  1. Start the engine.
  1. When Select Diagnosis Items menu is displayed, select Detail Information & Setting.

  1. When the navigation unit has hard codes, the Error History icon appears yellow when the Self Diagnosis mode (System links) screen is displayed. When no hard errors are stored, the icon appears gray. To view the errors with their DTC codes, select the error history icon.

  1. Select Hard Error (Soft Error is for factory use only).


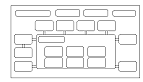
Hardware Error History

  1. The Hard Error screen displays the following for each error:
    • The DTC trouble code for the error
    • A brief description of the DCT code
    • The date and time when the error occurred.
    NOTE:
    • To see additional errors, use the interface dial to select UP or DOWN.
    • Select Clear to delete the error history. The Save feature is for factory use only.
  1. Use the DTC Symptom troubleshooting table to troubleshoot the error.


Software Error History

Software errors are not available. They are for factory use only.

How to Clear Error History
  1. Do the steps in How to check Error History.
  1. Select Clear in the error menu.
    NOTE:
    • By selecting Clear, all software and hardware errors stored in history will be erased at the same time.
    • Save is for factory use only.
Hard error history is displayed
Soft error history is displayed (Soft errors are for factory use only)

  1. After selecting Clear and selecting Yes, both Hard Error history and Soft Error history will be cleared at the same time.
Hard error history clear
Soft error history clear (Soft errors are for factory use only)