Rear Seat-back Cover Replacement
|
NOTE:
-
Put on gloves to protect your hands.
-
Take care not to tear the seams or damage the seat covers.
-
The left rear seat-back is shown; the right rear seat-back is similar.
-
-
Remove these items:
-
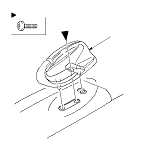
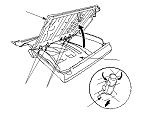
Left seat-back: Remove the screws, then remove the center belt guide (A).
|
|
-
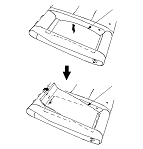
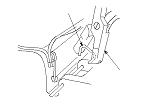
Left seat-back: Pull out the center portion of the armrest back panel (A) to release upper edge of the armrest back panel.
|
|
-
Left seat-back: Pull out the armrest back panel (A) to release the hook (B) of the seat-back frame and hook (C) of the seat-back cover.
|
|
-
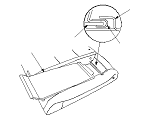
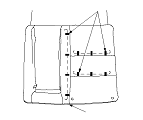
Release the lower hook strip (A), and unzip the seat-back cover (B).
|
|
-
Pull out the seat-back frame (A) from the pad (B), then pull out the head restraint guides (C) and the center head restraint guides (D) while pinching the end of the guides, and remove them.
-
Remove the seat-back cover and pad from the seat-back frame.
|
|
-
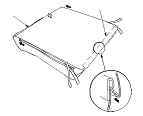
Pull back the edge of the seat-back cover (A) all the way around, and release the upholstery rings (B), then remove the seat-back cover.
|
|
-
Install the cover in the reverse order of removal, and note these items:
-
To prevent wrinkles when installing a seat-back cover, make sure the material is stretched evenly over the pad before securing the upholstery rings and the hook strips.
-
Replace any upholstery rings (A) you removed with new ones. Install them with commercially available upholstery ring pliers (B).
|
|