Center Console Armrest Removal/Installation

NOTE:
  • Take care not to scratch the console.
  • When removing components, use the trim tools or equivalent.
  1. Remove these items:
  1. Remove the screws, and pull the center trim (A) up to detach the clips and to release the hook (B), then remove the trim.

  1. Remove the screws securing the driver's side panel (A) and the passenger's side panel (B) from the console box (C), and slide the driver's side panel and the passenger's side panel forward to release the ribs (D) of the panels from the hooks (E) of the box, then remove the panels.

  1. Remove the screws, then remove the left box rail (A) and the right box rail (B) by pulling them up from the console box (C) while releasing the hooks (D).
  1. Close the armrest, and slide it fully forward.

  1. Remove the screw securing the opening spring (A).

  1. Remove the E-clips (A), and remove the hinge pin (B), the hinge bushings (C), and the opening spring (D) from the console armrest (E) and the console box (F).

  1. Open the console armrest (A), and while releasing the gear portions (B) of both sides from the dampers (C) of the console box (D), remove the armrest.

  1. With rear ventilation: If necessary, remove the screws, then remove the left side duct (A) and the right side duct (B) from the console box (C).

  1. With rear ventilation: If necessary, remove the screws, then remove the console bracket (A) from behind the console box (B).

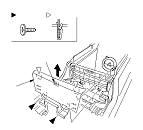
  1. With rear ventilation: If necessary, remove the screws, then remove the rear duct (A) from behind the console box (B).
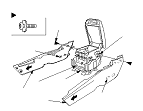
  1. Install the armrest in the reverse order of removal, and note these items:
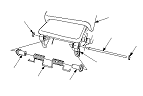
    • Replace the E-clips with new ones.
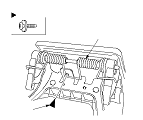
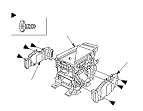
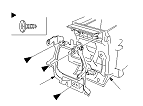
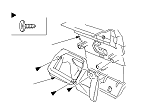
    • Apply low strength liquid thread lock to the 5 mm screws fastening the opening spring and both the side panels before reinstallation.
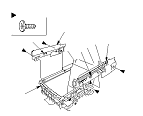
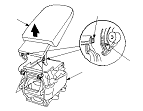
    • Make sure the ribs of the driver's side panel and the passenger's side panel are engaged to the hooks of the console box securely.