Headliner Removal/Installation

SRS components are located in this area. Review the SRS component locations and the precautions and procedures before doing repairs or service.
NOTE:
  • Put on gloves to protect your hands.
  • Take care not to bend and scratch the headliner.
  • Be careful not to damage the dashboard and other interior trim.
  • When removing components, use the trim tools or equivalent.
  1. Slide both the front seats all the way back, and recline the seat-back fully.
  1. Do the battery terminal disconnection procedure, then wait at least 3 minutes before beginning work.
  1. Remove these items:
  1. Remove these items:
  1. Remove the roof console (A).
    -1.
    Remove the lenses (B).
    -2.
    Remove the screws (C), then pull out the front individual map light (D).
    -3.
    Disconnect the front individual map light connector (E). If equipped, disconnect the sunroof switch connector (F) or the ambient light connector.
    -4.
    Remove the screws (G). Pull out the front side of the console, and release the rear hooks (H).
    -5.
    If equipped, disconnect the navigation microphone connector (I) or the HFT microphone connector, and/or the ultrasonic sensor connector.
  1. With automatic dimming rearview mirror: Remove the rearview mirror harness cover or the rain sensor cover. Disconnect the connector from the rearview mirror, and release the wire harness from the rearview mirror harness cover base or the rain sensor cover base.

  1. If necessary, remove the roof console screw grommet (A) by pinching out the hooks (B).
  1. If necessary, detach the hooks (C) by prying out the map light clip (D), then remove the clip.

  1. Remove the roof wire harness (A) by detaching the harness clips (B, C) from the driver's side front pillar (D). If the sunroof is equipped, release the lowest clip with a tube holder from the front sunroof drain tube (E). LHD model is shown; RHD model is symmetrical.

  1. Remove the antenna lead (A) by detaching the harness clips (B) from the passenger's side front pillar (C), and disconnect the antenna lead connector (D). LHD model is shown; RHD model is symmetrical.

  1. From under the driver's dash, remove the bolt, and detach the hook (A), then move the driver's under-dash fuse/relay box (B). LHD model is shown; RHD model is symmetrical.

  1. From under the driver's dash, disconnect the interior wire harness connector(s) (A), and detach the harness clip (B). LHD model is shown; RHD model is symmetrical.

  1. From outside of the driver's dash, using a long-handled clip remover, carefully pry up the roof wire harness holder (A) from the stud-bolt, then pull out the roof wire harness (B) from inside the dashboard. LHD model is shown; RHD model is symmetrical.

  1. From the right rear pillar area, disconnect the antenna lead connector (A) from the AM/FM antenna amplifier (B), and detach the harness clips (C).

  1. From the left rear pillar area, disconnect the antenna lead connector (A) from the AM/FM antenna subamplifier (B), and detach the harness clips (C).

  1. For some models: From roof console opening, disconnect the sunroof subharness connector (A), and detach the harness clip (B). LHD model is shown; RHD moel is symmetrical.

  1. Lower the headliner (A).
    -1.
    Remove the front door opening seals (B) and rear door opening seals (C) from each roof portion.
    -2.
    With the help of an assistant, detach the rear clips (D) by pulling the rear portion of the headliner down.
    -3.
    With sunroof: Detach the front clips (E) and the Velcro fasteners (F) by lowering the sunroof opening edge of the headliner.
Without sunroof
With sunroof

  1. Remove the headliner (A) from the vehicle. LHD model is shown; RHD model is symmetrical.
    -1.
    Lower the headliner.
    -2.
    Move the headliner rearward.
    -3.
    Lower the front of the headliner below the steering wheel.
    -4.
    Rotate the headliner so as to point the front end to the outside of the passenger's front door and the rear end to the outside of the driver's front door.
    -5.
    Pull the headliner along with the interior wire harness (B) and the antenna lead (C) out through the passenger's front door.
    NOTE: Do not bend the headliner. Bending the headliner will crease and damage it.

  1. If necessary, remove the cushion tape fastening the roof wire harness (A) and the antenna lead (B) to the headliner (C), then remove them from the headliner.
Without sunroof - LHD model
Without sunroof - RHD model
With sunroof - LHD model
With sunroof - RHD model

  1. If necessary, remove the front grab handle bracket (A) and the rear grab handle bracket (B).
    NOTE:
    • The grab handle bracket was joined up the tab plates of the side curtain airbag. Prying the tab plates by force makes it possible to remove the bracket.
    • Take care not to damage the side curtain airbag.
    -1.
    Remove the bolts (C, D, E).
    -2.
    With a flat-tip screwdriver, carefully pry up a gap between the front tab plate (F) and the grab handle bracket to detach the joint (G).
    -3.
    Repeat preceding step at the rear tab plate (H) portion to detach the plate from the bracket.
    -4.
    Detach the clips (I).
Front
Rear

  1. Install the headliner in the reverse order of removal, and note these items:
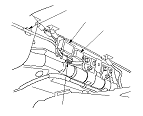
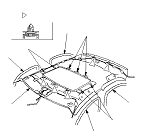
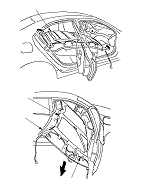
    • To prevent the side curtain airbags from deploying improperly and possibly causing injury, inspect removed pieces and replace them if they have any of these types of damage:
    • -
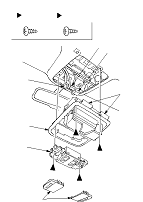
      Any crease or tears in the headliner (A)
      -
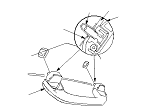
      Any cracks or breakages in the grab handle (B)
      -
      Any damages around the grab handle holes (C) or sunvisor holes in the headliner
      -
      Any cracks in the sunvisor stay base (D)
      -
      Any cracks in the sunvisor bracket cover (E)
      -
      Any bends or cracks in the sunvisor stay shaft (F)
      -
      Any cracks in the sunvisor base (G)
      -
      Any cracks or breakages in the vanity mirror base (H)
      -
      Any fastener bases (I), stiffeners (J), and clip bases (K) which have come off the headliner
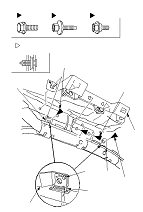
    • Replace the grab handle bracket mounting 6 mm bolt with a new one if it was removed.
    • When installing a new grab handle bracket, tighten it and tab plates together with their mounting bolts securely.
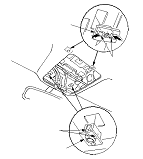
    • When installing the grab handle, push on the handle against the bracket (L) until the clips (M) snap into place securely.
    • If the clips are damaged or stress-whitened, replace them with new ones.
    • Replace the removed cushion tape with new ones.
    • Check that both sides of the headliner are securely attached to the trim.
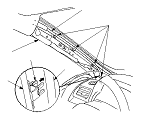
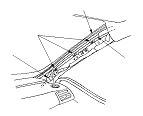
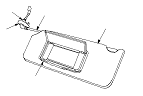
    • When reinstalling the headliner through the front passenger's door opening, be careful not to fold or bend it. Also, be careful not to scratch the body.
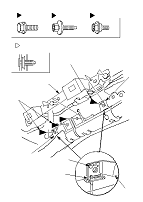
    • If the map light clips are removed, replace them with new ones.
    • If the roof console screw grommets are removed or if they are damaged or stress-whitened, replace them with new ones.
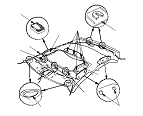
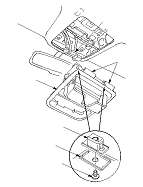
    • Reinstall the roof console (N) as following procedures:
    • -
      Install the roof console screw grommets (O) to the console with the screws (P).
      -
      If equipped, connect the navigation microphone connector (Q) or the HFT microphone connector, and/or the ultrasonic sensor connector.
      -
      Set the rear hooks (R), and fit the grommets into the holes in the body, then push on the console until the grommets snap into place securely.
    • Check for any DTCs that may have been set during repairs, and clear them.
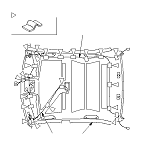
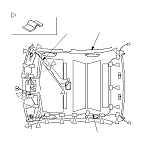
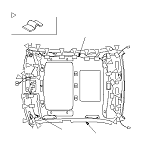
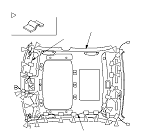
Headliner
Grab handle
Sunvisor
Roof console