Cigarette Lighter Test/Replacement

NOTE: If both cigarette lighter and accessory power socket do not work, check the No. 18 (7.5 A) fuse in the driver's under-dash fuse/relay box and body ground (G503) first.
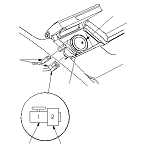
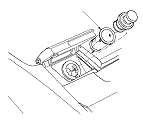
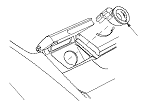
  1. Disconnect the 2P connectors (A) from the cigarette lighter (B) and illumination ring (C).
  1. Inspect the connector terminals to be sure they are all making good contact.
    • If the terminals are bent, loose, or corroded, repair them as necessary and recheck the system.
    • If the terminals look OK, go to Step 4 .
  1. Turn the ignition switch to ACC (I).
  1. Measure the voltage between the cigarette lighter 2P connector No. 1 terminal and body ground. There should be battery voltage.
    • If there is battery voltage, go to Step 6 .
    • If there is no battery voltage, check for:
    • -
      Blown No. 23 (20 A) fuse in the driver's under-dash fuse/relay box.
      -
      -
      Poor ground (G601).
      -
      An open in the wire.
  1. Check for continuity between the cigarette lighter 2P connector No. 2 terminal and body ground. There should be continuity.
    • If there is continuity, go to Step 7 .
    • If there is no continuity, check for:
    • -
      Poor ground (G503).
      -
      An open in the wire.

  1. Remove the socket (A).

  1. Remove the ring (A) from the panel.
  1. Install the cigarette lighter in the reverse order of removal.