|
Poor AM or FM radio reception or interference (without premium audio system)
NOTE:
-
Check the vehicle battery condition first.
-
Check the connectors for poor connections or loose terminals.
-
Check the radio reception in an open area. Poor reception/interference can be caused by any of these conditions:
-
The radio station is far away.
-
Atmospheric conditions are unfavorable.
-
Aftermarket window tint.
-
A tall building, mountains, or high-voltage power lines are nearby.
-
Turn the ignition switch to ON (II).
-
Check the reception/interference is the same in several locations.
|
Is the reception/interference the same?
|
|
YES
|
-
|
|
|
NO
|
-
|
Multipath interference or weak station. Operation is normal.■
|
-
Check the reception/interference while the engine is running.
|
Is there noise (static or whine) only with the engine running?
|
|
YES
|
-
|
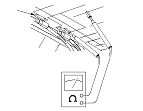
Check the antenna and radio grounds. If OK, check the charging system and the ignition system.■
|
|
NO
|
-
|
|
-
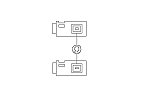
Turn the ignition switch to LOCK (0).
-
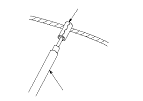
Wrap aluminum foil (A) around the tip of a tester probe (B) as shown.
|